Book Now

Category: Blog

  • Migraine IV Cocktail

    Migraine IV Cocktail

    Thanks to the numerous technological advancements in today’s age, IV therapy has become an easily accessible treatment for many patients. While some use it to help them battle a nasty case of the flu, others turn to it to try and relieve hangover symptoms. With its various possible uses and benefits, more people than ever are interested in trying it out. That’s why this article will focus on explaining the effects and ingredients of a migraine IV cocktail.

    By elaborating on each ingredient separately, you’ll have a better understanding of how this treatment works and how it may affect you. Furthermore, you’ll gain insights into the medications commonly used in this treatment and their mechanism of action. Continue reading to discover the migraine cocktail IV ingredients and their benefits!

    Source: shutterstock.com / Photo Contributor: Andrey_Popov

    What is a Migraine IV Cocktail?

    Before elaborating on the cocktail ingredients, you should first understand what migraine IV cocktails are. In simple terms, this type of treatment involves the use of a combination of medicines and vitamins designed to relieve migraine pain through an intravenous route.

    The common IV cocktail can contain different types of ingredients. Usually, this includes a saline solution, nutrients, and medications. Even though the IV components may vary depending on the patient’s condition, the professional medical team applying this treatment is the one to determine the right options for you.

    The way migraine IV cocktails differ from other types of migraine medication is because they include a combination of ingredients that directly enter your bloodstream. Thus, the main differences between IV fluids and other types of medication are:


    • Better absorption– taking oral medication may lead to loss of the ingredients during the digestion process. While it’s thought that only 50% of orally taken medicine is absorbed, the rates of IV fluids are up to 90%.

    • Accelerated effects– since IVs skip the digestive system, they’re praised for their fast-acting effectiveness and symptom relief.

    • Hydration– besides boosting the body with the needed medication, IV fluids also rehydrate your body, giving it the needed fluids and electrolytes.

    Components of the Migraine IV cocktail

    After discovering what migraine IV cocktails are, you should also inform yourself about their ingredients. This way, you’ll understand how this treatment affects your body and have a better insight into what benefits you may experience. That being said, here are the common ingredients found in migraine IV cocktails and used by the best mobile IV therapy nurses in AZ:


    • Saline solution

    • Antiemetics

    • NSAIDs

    Saline solution

    Every IV therapy uses a saline solution as a base to which other ingredients are later added. This combination of water and sodium (salt) is commonly used to provide the patient with much-needed hydration. Since many migraine attacks often include symptoms of vomiting, your body can easily become dehydrated.

    Thus, one of the first things that doctors do when a patient enters the ER with a migraine attack is to give them IV fluids to replenish their fluid levels. Even though further studies are required to define the effect saline has in migraine treatment, many doctors believe that fluid replacement is essential for treating acute migraines.

    Antiemetics

    The second essential ingredient found in migraine IV cocktails is antiemetics or antihistamines. This type of medication is used to combat the symptoms of vomiting that are often present during a migraine headache.

    Since migraine attacks may also lead to hypersensitivity to dopamine, antiemetics are useful for their dopamine antagonist properties. Some researchers go as far as to suggest that the application of these medications through IV should be considered as first-line migraine therapy.

    When choosing the right migraine cocktail, it’s important to ensure it contains at least some of this medication. For example, the Drip IV Infusion has different kinds of cocktail options with these ingredients, while also offering specific add-ons. The most efficient medicines they feature are Zofran, Pepcid, and Benadryl.

    NSAIDs 

    NSAIDS, also known as non-steroidal anti-inflammatory drugs, are the last common medicines found in migraine IV cocktails. They’re designed to aid in pain relief, inflammation, and temperature management. Thus, they’re commonly used to treat period pain and headaches.

    Since this type of medicine is known to block cyclooxygenase, it also decreases the synthesis of prostaglandins, thought to be involved in the pathophysiology of migraines. Due to their cost-efficiency and availability as over-the-counter medicine, NSAIDs are thought to be the most commonly used therapy to treat this dreadful condition.

    When including this medicine in migraine IV cocktails, it may come in different brands or doses. However, one of the most used NSAIDs in IV fluids is the renowned Toradol. Since it has the ability to reduce the hormones causing inflammation and pain, it’s thought to be highly effective in migraine pain relief. 

    Source: shutterstock.com / Photo Contributor: azazello photo studio

    Supplementary components 

    Besides the commonly used medicine, many IV fluids also contain supplementary components. The ones thought to be beneficial for treating migraine headaches are the following:


    • Magnesium

    • Vitamin C

    • Vitamin B

    • Zinc

    • Glutathione

    Magnesium

    The first commonly used nutrient in migraine IV cocktails is magnesium. Many researchers believe that this ingredient can be efficiently used as migraine treatment in patients who have experienced contraindications from other migraine medicines. Even though no research indicates magnesium deficiency as a cause of this condition, studies suggest that high doses applied through IV fluids can aid in migraine relief.

    The reason why this ingredient is used in migraine cocktails is because it affects nerve conduction in the peripheral and central nervous systems. By reducing the excessive stimulation of the brain receptors, this ingredient is thought to not only reduce the severity of the attacks but also minimize their frequency.

    Vitamin C

    The next important IV compound for migraine treatment is vitamin C. This ingredient is popular due to its antioxidant properties, which protect the body’s cells from free-radical damage. When it comes to a migraine attack, this vitamin may be used to treat the neurogenic inflammation caused by it.

    Even though further studies are needed, scientists highlight the importance of taking at least 1000 mg of vitamin C daily to minimize the severity of the attacks. This belief comes from a nonrandomized study where antioxidants like vitamin C were used in combination with vitamin E to improve the migraine outcome. Thus, injecting the needed dose of this ingredient through IV fluids may give your body the relief it’s been looking for.

    Vitamin B

    Vitamin B is another important element in migraine IV treatment. One study shows that those suffering from frequent migraine attacks usually have lower levels of vitamin B12, linking its deficiency to headaches. 

    Another study shows that vitamins B6 and B12 may be potentially used to lower homocysteine levels, which reduces the disability caused by the migraine attack. Alongside vitamin B9, it may reduce the severity of migraine and the frequency of the attacks.

    Zinc

    Another important ingredient found in this treatment is zinc. Like vitamin B, some researchers believe that a deficiency from this mineral can cause more frequent migraines. Thus, a study was conducted to observe the effects this ingredient had on the control group.

    This study revealed that those who took zinc supplements experienced a decrease in the frequency of migraine attacks. Even though further studies are needed, including zinc in migraine IV cocktails may give your body a refreshing boost.

    Glutathione

    The last important migraine ingredient in the IV cocktail you should know about is glutathione. Since it’s believed that migraines are linked to oxidative stress, it’s important to try and reduce this factor. Thus, scientists researched the effects glutathione had on the frequency and severity of migraine attacks.

    This study resulted in a decline in oxidative stress, which directly influenced the migraine. The patients experienced a 50% improvement in both the frequency and severity of the attacks.

    Considerations and Limitations

    If you’re interested in trying migraine IV cocktails, there are several factors you should consider. First, the application of intravenous fluids should always be done by a professional medical team. Since it involves needle insertion, the area must be cleaned, and the needle needs to be carefully applied with medical-grade gloves.

    Furthermore, having a professional medical team by your side will help alleviate any anxiety you may be feeling during the treatment. The designated nurses will guide you through the process and answer any questions you may have. 

    However, as with any medical treatment, there are several limitations you should also be aware of. Even though this type of IV therapy may help alleviate the pain associated with migraine headaches, it’s not considered a long-term solution. Thus, if you’re experiencing frequent headaches, it’s recommended to consult with your primary healthcare doctor to discuss the right treatment options. 

    Remember that migraines can last up to 72 hours, so experiencing prolonged symptoms may be a sign of another underlying condition. That’s why it’s best to first consult with a medical physician before you start taking IV fluids to decide if they’re the right course of action. 

    Source: shutterstock.com / Photo Contributor: fizkes

    Conclusion

    After discovering the use and ingredients found in a migraine IV cocktail, it’s up to you to decide if this is the right treatment option for you. Just remember that an experienced medical team should always apply this type of treatment to prevent any unwanted complications.

    As mentioned, the main ingredients found in migraine IV cocktails are saline, NSAIDs, antiemetics, and supplementary components. While the medicine is used to relieve the pain, the supplementary components may help reduce the frequency of the attacks and give the body an additional boost.

    Lastly, besides including the necessary IV compounds to help alleviate migraine pain, this cocktail is not considered a long-term solution. So, contacting your healthcare physician before trying this treatment is always recommended.

  • IV bolus vs push: Difference Between IV Bolus and IV Push

    IV bolus vs push: Difference Between IV Bolus and IV Push

    An IV bolus is a rapid, large-volume fluid delivery method, while an IV push is a small, concentrated medication injection administered directly into a vein. Both use intravenous access to bypass the digestive system, but they differ in volume, speed, purpose, and risk profile.

    This guide covers how each method works, what distinguishes them clinically, the specific medications and fluids used for each, their associated risks, and how controlled IV drip infusion compares to both approaches.

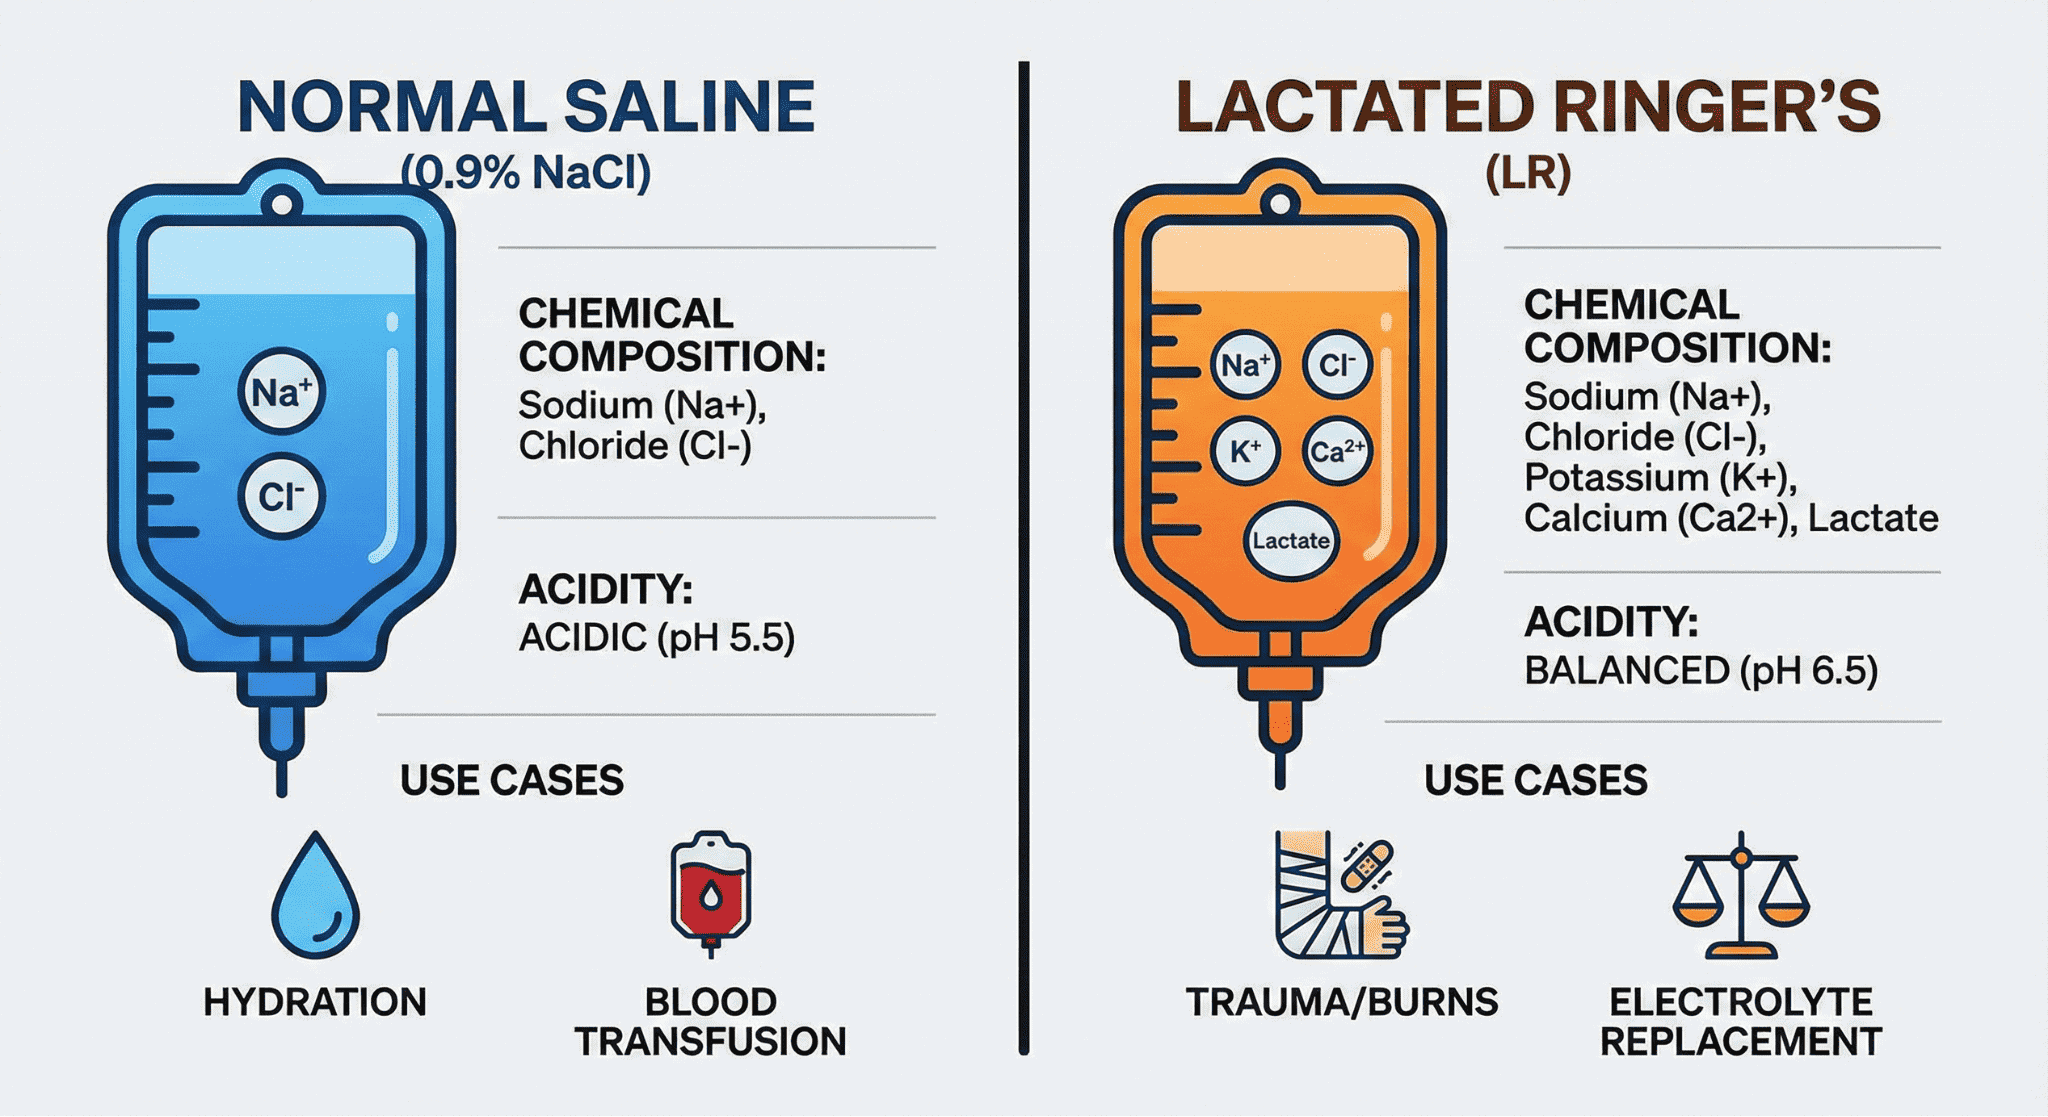
    IV bolus administration typically involves 250 mL to 1,000 mL of fluid delivered over several minutes to roughly 30 minutes. Clinicians use it for rapid rehydration, sepsis resuscitation, electrolyte correction, and nutrient replenishment. Common bolus fluids include normal saline, lactated Ringer’s solution, and dextrose solutions, each selected based on the patient’s condition and fluid balance needs.

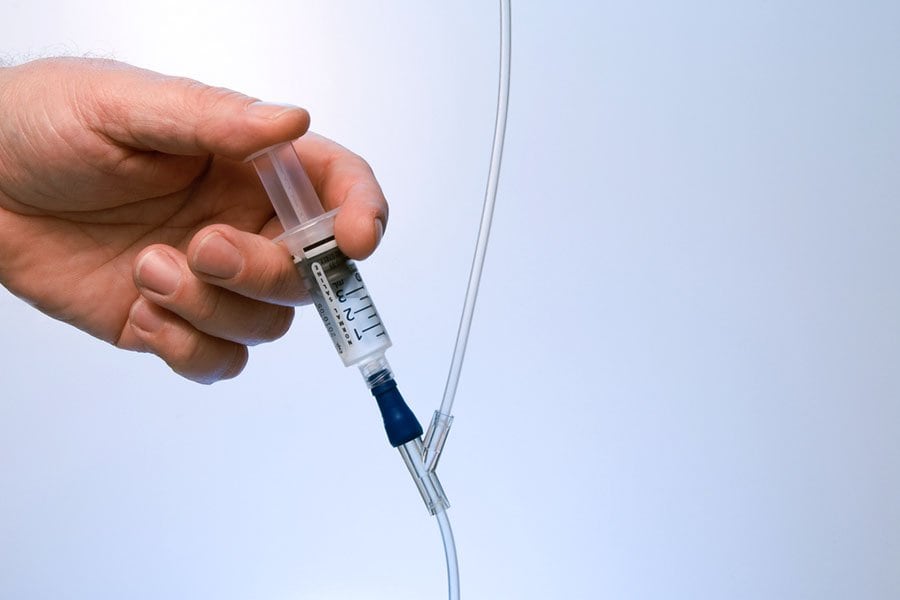
    IV push delivery, by contrast, involves 1 mL to 10 mL of concentrated medication injected in seconds to under one minute. Opioid analgesics, antiemetics, emergency cardiac drugs, benzodiazepines, and certain antibiotics all rely on push administration when immediate systemic drug action is required. Each drug carries specific rate guidelines; delivering too fast risks speed shock or muscle rigidity, while delivering too slow can reduce efficacy or cause paradoxical reactions.

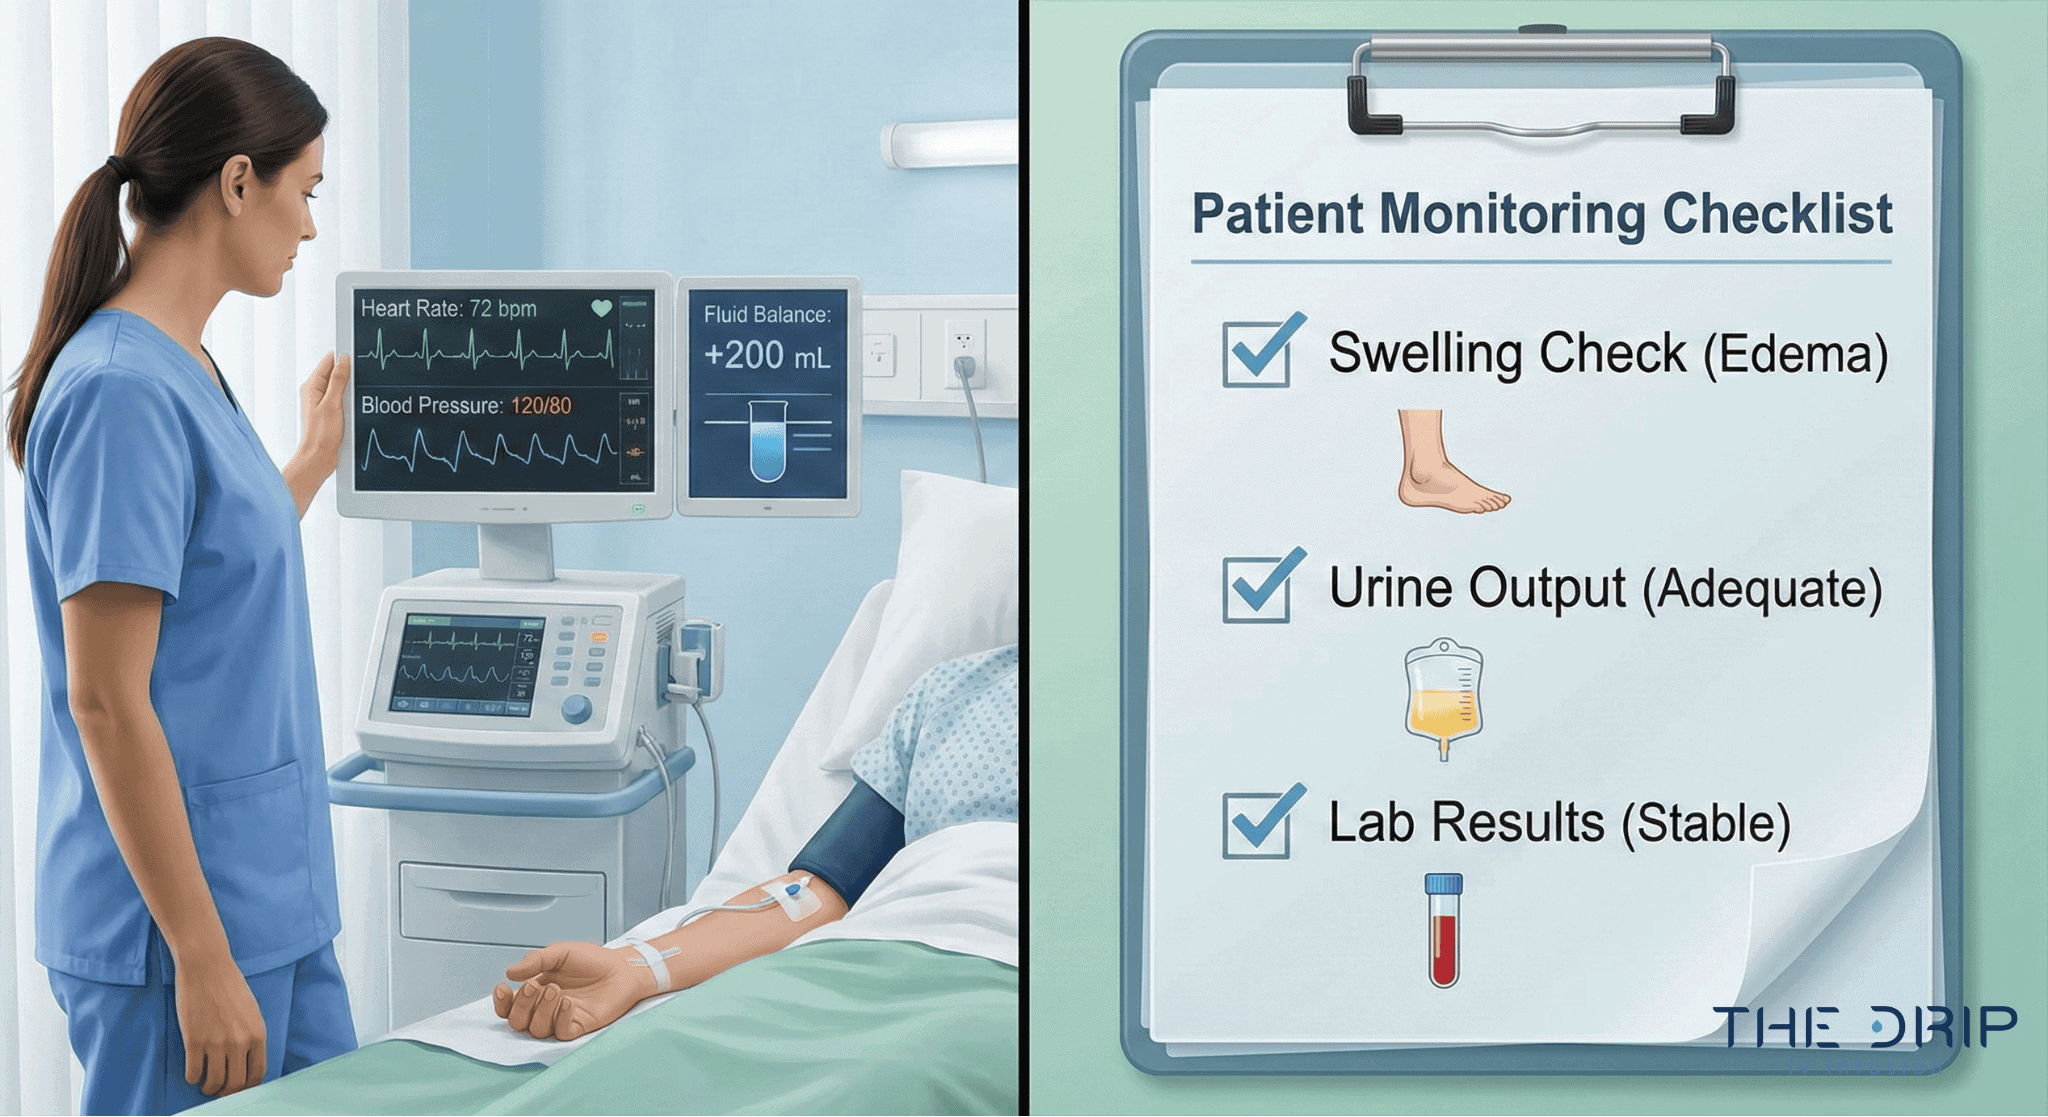
    The risk profiles reflect these differences. Bolus administration carries concerns about circulatory overload, pulmonary edema, and cardiac strain, particularly in patients with heart failure or kidney disease. Push administration poses risks of vein irritation, phlebitis, and systemic speed reactions tied to injection rate.
    Healthcare providers choose between the two based on drug formulation, patient hemodynamic status, onset timing needs, and clinical setting. Controlled IV drip infusions offer a third option that prioritizes gradual, sustained absorption for wellness applications like hydration and vitamin therapy.

    What Does IV Bolus Mean in Medical Terms?

    An IV bolus is a rapid, large-volume injection of fluid or medication delivered directly into a vein. The subsections below cover how it is administered, what volumes qualify, and how fast delivery typically occurs.

    How Is an IV Bolus Typically Administered?

    An IV bolus is typically administered by connecting a bag of fluid to a peripheral or central venous catheter and allowing it to flow at a controlled, rapid rate. A healthcare provider sets the flow based on the patient’s clinical needs, often using gravity or an infusion pump. According to StatPearls (NCBI Bookshelf), for patients with mild-to-moderate hypovolemia, fluids should be administered at a rate of 50 to 100 mL/h above estimated losses to achieve a positive fluid balance. The provider monitors vital signs throughout, adjusting the rate if the patient shows signs of intolerance. For most clinical scenarios, this method strikes a practical balance between speed and safety.

    IV bolus administration steps infographic showing connecting IV bag, setting flow rate, and monitoring the patient during infusion

    What Volume of Fluid Qualifies as an IV Bolus?

    The volume of fluid that qualifies as an IV bolus depends on the clinical indication and patient weight. Sepsis resuscitation protocols, for example, often call for a standard volume of 30 mL/kg, as noted by ScienceDirect. This is substantially larger than an IV push, which involves injecting a small, concentrated amount of medication over a few seconds. However, volume must be carefully matched to the patient. In critically ill patients, fluid overload from rapid bolus administration is linked to increased mortality and complications, including pulmonary edema and cardiac failure. Clinicians must monitor closely for volume overload, especially in patients with congestive heart failure or renal failure.

    How Fast Is an IV Bolus Infusion Delivered?

    An IV bolus infusion is delivered within seconds to several minutes in acute clinical settings, though wellness applications may extend to 20 to 35 minutes. According to Springer Nature, an IV bolus is a rapid injection of a solution into a vein, typically completed within seconds or a few minutes, whereas continuous infusion administers medication slowly over extended periods. In acute heart failure cases, continuous infusion of loop diuretics is sometimes proposed as an alternative to bolus injection to reduce complications and achieve greater diuresis. The speed distinction matters: bolus delivery prioritizes rapid therapeutic effect, making it the preferred method when immediate fluid or medication response is critical.

    With the IV bolus defined, understanding IV push administration reveals how these two methods differ in practice.

    What Does IV Push Mean in Medical Terms?

    IV push is a method of delivering medication directly into the bloodstream through a vein, typically in under one minute. The following subsections cover how it is administered, what volume qualifies, and how fast the injection is delivered.

    How Is an IV Push Typically Administered?

    An IV push is typically administered by a healthcare provider who injects a small, concentrated dose of medication directly into a vein or an existing IV line over a short period, often less than one minute. According to the National Center for Biotechnology Information (NCBI), intravenous push is the process of introducing a medication or fluid substance directly into the bloodstream via the venous system.

    Administration speed varies by drug. Morphine, for instance, should be delivered over 4 to 5 minutes and diluted to reduce respiratory depression risk. Atropine, by contrast, requires rapid delivery because slow administration may cause paradoxical bradycardia. This drug-specific variability makes IV push one of the most technique-sensitive methods in intravenous therapy.

    IV push administration guide showing medication preparation, controlled injection, and patient response monitoring steps

    What Volume of Medication Qualifies as an IV Push?

    The volume of medication that qualifies as an IV push is typically a small, concentrated amount, usually ranging from 1 to 10 mL per dose. Because volumes are small, precise concentration standardization becomes critical for patient safety. ASHP’s Standardize 4 Safety initiative addresses this directly as a national effort to standardize medication concentrations and reduce errors across different administration routes, including IV push.

    Given how little fluid is involved, even minor dosing miscalculations can significantly affect patient outcomes. Practitioners should always verify drug-specific concentration guidelines before delivering any IV push medication.

    How Fast Is an IV Push Injection Delivered?

    An IV push injection is delivered over a range of a few seconds to five minutes, depending on the specific medication. Most IV push drugs are administered in under one minute, though certain agents require slower delivery to prevent adverse reactions.

    Even with appropriate technique, some risk of local irritation exists. A study published in PMC found that rapid IV push administration of 500 mg thiamine was associated with injection site reactions in 0.86% of doses. While this incidence is low, it reinforces the importance of following drug-specific rate guidelines for every IV push medication.

    Understanding push delivery mechanics sets the stage for comparing how IV bolus and IV push differ in speed.

    How Do IV Bolus and IV Push Differ in Speed?

    IV bolus and IV push differ in speed primarily by timeframe: an IV push delivers medication in seconds to under one minute, while an IV bolus completes delivery over several minutes to roughly 30 minutes. The distinction matters because administration rate directly affects how the body absorbs and responds to intravenous substances.

    An IV push is the faster method. According to the National Center for Biotechnology Information, intravenous push introduces a medication or fluid substance directly into the bloodstream via the venous system, typically in less than one minute. This near-instantaneous delivery makes IV push ideal for emergency cardiac drugs and acute pain management, where even brief delays can compromise patient outcomes.

    An IV bolus, while still considered rapid compared to continuous infusion, operates on a longer timeline. Delivery can be completed in approximately 20 to 35 minutes depending on the volume and clinical context. That broader window allows larger fluid volumes to enter the circulatory system without overwhelming venous pressure.

    The speed difference carries clinical significance beyond convenience:

    • IV push speed (seconds to under 1 minute) enables immediate drug action for time-sensitive interventions.
    • IV bolus speed (minutes to roughly 30 minutes) allows controlled delivery of larger volumes for hydration or nutrient replenishment.
    • Continuous infusion speed (hours) maintains steady-state drug levels over extended periods.

    Faster is not always better. Administering certain substances too rapidly through an IV push can trigger speed shock, a systemic reaction involving chest pressure, irregular pulse, and potential cardiac arrest. For most wellness and hydration scenarios, the slightly slower bolus pace provides a safer, more comfortable experience while still delivering results far faster than oral alternatives.

    IV delivery speed comparison chart showing IV push administered in seconds to one minute versus IV bolus over 20 to 35 minutes

    How Do IV Bolus and IV Push Differ in Volume?

    IV bolus and IV push differ in volume primarily by scale: bolus delivery involves larger fluid volumes, while push delivery uses small, concentrated medication doses. The distinctions below clarify typical ranges and why volume matters clinically.

    IV bolus volumes typically range from 250 mL to 1,000 mL of fluid, though resuscitation protocols may call for even larger amounts. Sepsis guidelines, for example, often specify 30 mL/kg as a standard fluid bolus volume. These larger volumes serve purposes such as rapid rehydration, electrolyte correction, and circulatory support. Because the fluid load is substantial, clinicians must monitor patients closely for signs of volume overload, particularly in those with compromised cardiac or renal function.

    IV push volumes, by contrast, rarely exceed 10 mL per injection. Most IV push medications are delivered in concentrated doses of 1 mL to 5 mL, injected directly into the vein or through an existing IV line. According to the AHRQ Patient Safety Network, the compact volume of IV push medications demands precise syringe technique, since even small miscalculations in concentration can produce outsized pharmacological effects. This is why standardization efforts like ASHP’s Standardize 4 Safety initiative focus on consistent medication concentrations across care settings.

    The volume difference between these two methods carries direct clinical consequences:

    • Fluid balance impact: Bolus volumes shift overall fluid status, making them unsuitable for patients prone to pulmonary edema or heart failure.
    • Concentration risk: Push volumes are small but highly potent, so delivery speed and dilution accuracy become the primary safety concerns.
    • Equipment requirements: Bolus delivery often uses IV bags with gravity drip or infusion pumps, while push delivery requires only a syringe and a patent IV access point.
    • Monitoring priorities: Bolus administration demands hemodynamic monitoring for fluid tolerance; push administration demands observation for immediate drug reactions.

    For clinicians and patients alike, recognizing that volume dictates both the delivery method and the risk profile is essential when choosing between these two approaches. Understanding these volume distinctions helps clarify why each method suits different therapeutic goals.

    How Do IV Bolus and IV Push Differ in Purpose?

    IV bolus and IV push differ in purpose based on whether the clinical goal requires volume replacement or rapid medication delivery. The subsections below cover when each method is preferred.

    When Is an IV Bolus Preferred Over an IV Push?

    An IV bolus is preferred over an IV push when the clinical goal requires large-volume fluid delivery for hydration, resuscitation, or nutrient replenishment. Situations involving dehydration, blood pressure stabilization, or electrolyte correction call for the sustained volume that bolus infusions provide.

    Bolus administration also reduces the risk of speed shock, a systemic reaction characterized by chest pressure, irregular pulse, and cardiac arrest that can occur when a substance enters the bloodstream too rapidly via IV push, according to Pressbooks’ Nursing Advanced Skills resource. Because bolus infusions distribute larger fluid volumes over a longer window, they allow the body to absorb nutrients and fluids gradually without the concentrated vascular impact of a direct push.

    When Is an IV Push Preferred Over an IV Bolus?

    An IV push is preferred over an IV bolus when a patient needs immediate systemic medication effects in a small, concentrated dose. Emergency scenarios requiring rapid drug onset, such as cardiac arrest intervention or acute pain management, rely on push delivery because it places the full medication concentration into the bloodstream within seconds.

    IV push is also preferred for drugs that lose efficacy when diluted in larger fluid volumes. Medications requiring precise, time-sensitive dosing benefit from the controlled syringe technique that push administration provides. For patients who cannot tolerate high fluid volumes due to heart failure or renal impairment, push delivery achieves the therapeutic goal without adding circulatory fluid burden. Understanding these purpose-driven distinctions helps clarify which medication types are best suited for each method.

    What Types of Medications Are Given by IV Push?

    The types of medications given by IV push include opioid analgesics, antiemetics, emergency cardiac drugs, benzodiazepines, and rapid-acting antibiotics. Each drug class has specific rate requirements to balance therapeutic speed with patient safety.

    Common IV push medications infographic showing opioid analgesics, antiemetics, cardiac drugs, benzodiazepines, and antibiotics

    Opioid Analgesics

    Opioid analgesics such as morphine and fentanyl are commonly delivered by IV push for rapid pain control. According to the New Jersey Health Care Coalition’s adult and pediatric IV push medication reference, morphine administered via IV push should be delivered over 4 to 5 minutes and may be diluted to a final concentration of 0.5 to 5 mg/mL to reduce the risk of respiratory depression. Fentanyl requires administration over 1 to 2 minutes because rapid delivery can cause skeletal muscle and chest wall rigidity. Precise rate control makes IV push the preferred route when immediate analgesia is critical, particularly in emergency and post-surgical settings.

    Antiemetics

    Antiemetics are medications that suppress nausea and vomiting, and several are routinely given by IV push. Ondansetron (Zofran) is one of the most widely used options in this class. According to a UNC Health adult quick IV push reference, ondansetron for post-operative nausea and vomiting should be administered via IV push over at least 30 seconds, though 2 to 5 minutes is preferred. This controlled injection rate helps prevent headache and QT prolongation. For patients who cannot tolerate oral dosing, IV push antiemetics provide reliable absorption that bypasses the gastrointestinal tract entirely.

    Emergency Cardiac Drugs

    Emergency cardiac drugs such as atropine, adenosine, and epinephrine rely on IV push for life-saving speed during cardiac events. Atropine is a particularly instructive example: it should be administered as a rapid IV push because slow administration may cause paradoxical bradycardia rather than the intended heart rate increase, as noted in Vizient’s IV medication administration guidelines. This paradoxical response underscores why rate specifications vary by drug class. In cardiac arrest and unstable arrhythmias, even seconds of delay can affect outcomes, making IV push the standard delivery route for frontline resuscitation medications.

    Benzodiazepines

    Benzodiazepines are sedative medications frequently given by IV push to manage seizures, acute anxiety, and procedural sedation. Diazepam, lorazepam, and midazolam each have specific push rates, typically ranging from 1 to 2 minutes depending on the agent. Slow, controlled delivery is essential because overly rapid injection increases the risk of respiratory depression and hypotension. Lorazepam, often the first-line choice for status epilepticus, requires careful rate monitoring despite the urgency of seizure termination. This balance between speed and safety makes benzodiazepines one of the drug classes where IV push technique directly influences clinical outcomes.

    Rapid-Acting Antibiotics

    Rapid-acting antibiotics are given by IV push when infections require immediate therapeutic drug levels in the bloodstream. Agents such as ceftriaxone, cefazolin, and certain penicillin derivatives can be administered over 2 to 5 minutes via direct injection. This approach is common in emergency departments where bacterial infections present with acute symptoms like sepsis or meningitis. Not all antibiotics qualify for push delivery; many require slower infusion to avoid adverse reactions like red man syndrome or phlebitis. Clinicians select IV push antibiotics based on the drug’s stability profile and the patient’s clinical urgency, reserving this method for agents proven safe at rapid injection rates.

    With specific push medications in context, the fluids used for IV bolus administration serve a different clinical purpose.

    What Types of Fluids Are Given as an IV Bolus?

    The types of fluids given as an IV bolus include normal saline, lactated Ringer’s solution, and dextrose solutions. Each serves a distinct clinical purpose based on the patient’s condition.

    Normal Saline

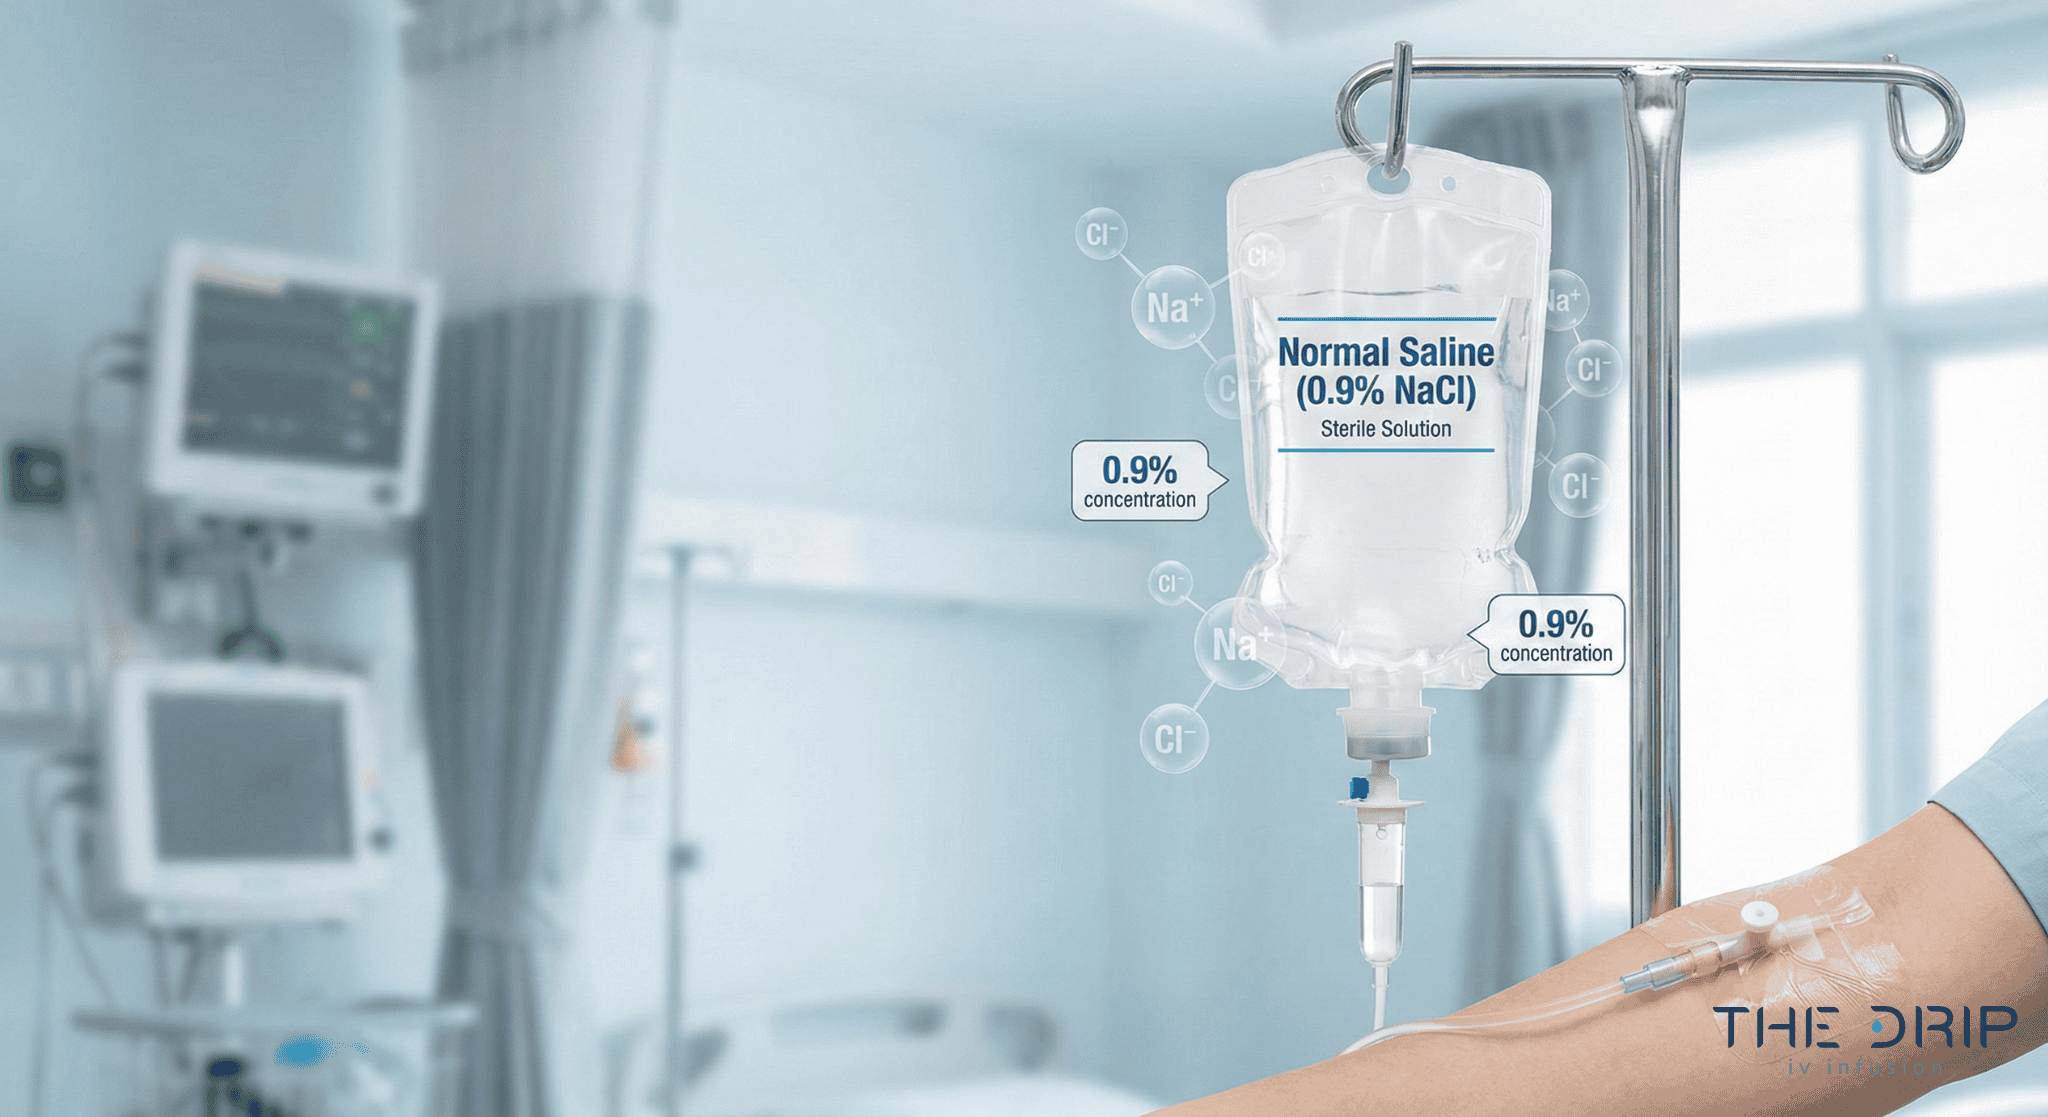
    Normal saline is a 0.9% sodium chloride solution and the most widely used crystalloid for IV bolus administration. Clinicians rely on it for rapid volume resuscitation, dehydration correction, and as a compatible carrier for many IV medications. According to a 2016 study published in BMC Nephrology, intravenous fluid administration in the ICU requires differentiating between maintenance, replacement, and resuscitative therapies to select appropriate crystalloids like normal saline or lactated Ringer’s. Its balanced sodium content closely mirrors blood plasma concentration, making it a versatile first-line choice in emergency and routine settings alike.

    Lactated Ringer’s Solution

    Lactated Ringer’s solution is a balanced crystalloid containing sodium, potassium, calcium, and lactate. It more closely resembles the body’s extracellular fluid composition than normal saline. Clinicians often prefer it for surgical patients, trauma resuscitation, and burn recovery because its buffered formulation helps reduce the risk of hyperchloremic metabolic acidosis. When large-volume boluses are needed, this balanced electrolyte profile makes lactated Ringer’s a particularly practical option over prolonged fluid replacement.

    Dextrose Solutions

    Dextrose solutions are glucose-based IV fluids used as a bolus to address hypoglycemia or provide caloric support. The most common formulations include 5% dextrose in water (D5W) and 10% dextrose (D10W). D5W delivers a modest glucose supply while contributing free water for hydration, whereas D10W provides a more concentrated caloric source for patients with critically low blood sugar. Because dextrose is metabolized quickly, these solutions are often combined with saline or electrolyte bases when sustained volume expansion is also needed.

    With fluid types established, understanding the risks of each IV administration method helps guide safer clinical decisions.

    What Are the Risks of IV Push Administration?

    The risks of IV push administration include speed shock, vein irritation, and local injection site reactions. These complications relate directly to how fast the medication enters the bloodstream and the chemical properties of the drug itself.

    What Happens if an IV Push Is Delivered Too Quickly?

    If an IV push is delivered too quickly, the patient risks a dangerous systemic reaction known as speed shock. Speed shock is characterized by chest pressure, irregular pulse, and potential cardiac arrest when a foreign substance enters the bloodstream too rapidly, according to Nursing Advanced Skills (Pressbooks). Certain medications carry unique fast-injection risks; fentanyl, for example, can trigger skeletal muscle and chest wall rigidity if not administered over the recommended one to two minutes. This is why drug-specific rate guidelines exist for nearly every IV push medication. Clinicians who rush the process trade seconds of convenience for potentially life-threatening consequences.

    Can IV Push Medications Cause Vein Irritation?

    Yes, IV push medications can cause vein irritation, most commonly presenting as phlebitis. A study reported by The Cardiology Advisor found that phlebitis is the most common complication of peripheral intravenous access, occurring in 44% of cases, followed by infiltration at 16.3% and occlusion at 7.6%. Concentrated medications delivered through small peripheral veins are particularly prone to triggering this inflammatory response. Even nutrients considered generally safe carry measurable risk when pushed intravenously; IV push thiamine at 500 mg doses was associated with injection site reactions in 0.86% of administrations. Proper vein selection, adequate dilution, and controlled push rates all help reduce local irritation significantly.

    Understanding push-specific risks clarifies why bolus administration carries its own distinct concerns.

    What Are the Risks of IV Bolus Administration?

    The risks of IV bolus administration include circulatory overload, pulmonary edema, and cardiac strain from rapid fluid delivery. The following subsections cover system overload consequences and populations who should avoid large-volume boluses.

    What Happens if an IV Bolus Overloads the Circulatory System?

    An IV bolus overloads the circulatory system when fluid volume exceeds the heart’s ability to pump effectively, causing a dangerous rise in venous pressure. This excess fluid forces plasma into surrounding tissues and lung spaces. According to a study published in PMC (National Institutes of Health), fluid overload from rapid bolus administration in critically ill patients is linked to increased mortality and complications such as pulmonary edema and cardiac failure.

    Common signs of circulatory overload include:

    • Sudden shortness of breath and oxygen desaturation
    • Elevated jugular venous pressure
    • Peripheral edema in the extremities
    • Rapid, bounding pulse with rising blood pressure

    Even in non-critical settings, clinicians must monitor fluid input closely. Smaller, measured boluses with reassessment between doses reduce the chance of pushing the cardiovascular system past its compensatory limits.

    Who Should Avoid Receiving a Large-Volume IV Bolus?

    Patients with pre-existing cardiovascular or renal conditions should avoid receiving a large-volume IV bolus without careful clinical oversight. Fluid boluses for sepsis patients often involve a standard volume of 30 mL/kg; however, according to a ScienceDirect study on sepsis fluid resuscitation, clinicians must carefully monitor for volume overload in patients with congestive heart failure or renal failure.

    High-risk populations include:

    • Patients with congestive heart failure, where excess volume worsens cardiac output
    • Individuals with chronic kidney disease who cannot excrete fluid efficiently
    • Elderly patients with reduced cardiac reserve and lower tolerance for rapid volume shifts
    • Neonates and pediatric patients with smaller total blood volumes

    For anyone considering IV therapy outside a hospital, this is precisely why provider screening matters before any fluids are administered.

    How Do Healthcare Providers Decide Between IV Bolus and IV Push?

    Healthcare providers decide between IV bolus and IV push by evaluating the medication’s pharmacological profile, the required volume, the patient’s clinical stability, and the urgency of the situation. The key decision factors include drug-specific protocols, patient risk assessment, and the clinical setting where treatment occurs.

    Choosing the wrong method carries real consequences. Medication errors for drugs given intravenously have some of the highest error rates in healthcare, estimated between 48% and 53% in hospital and long-term care settings, according to SingleCare’s medication error analysis. This makes proper method selection a critical patient safety concern, not merely a procedural preference.

    Healthcare providers typically weigh several factors before selecting a delivery method:

    • Drug formulation requirements: Some medications require rapid systemic delivery via IV push, while others need the larger fluid volumes that IV bolus provides.
    • Patient hemodynamic status: Patients with compromised cardiac or renal function may not tolerate the rapid volume shifts associated with bolus administration.
    • Onset timing needs: Emergency situations often demand IV push for near-instant drug action, whereas fluid resuscitation calls for bolus delivery.
    • Vein condition and access quality: Concentrated IV push medications can increase irritation risk in fragile or small-gauge peripheral lines.
    • Clinical setting and scope of practice: The expansion of IV treatments in medical spa and mobile settings requires protocols that ensure healthcare providers work within their appropriate clinical scope to maintain safety, as noted in the American Journal of Nursing.

    For most clinical decisions, the medication itself dictates the method. Drugs with narrow therapeutic windows or known speed-related complications almost always have manufacturer-specified administration rates that remove guesswork from the equation. When providers follow these drug-specific guidelines alongside individualized patient assessment, the risk of administration errors drops significantly.

    Understanding these clinical decision points helps clarify why IV therapy protocols exist and how each delivery method serves a distinct therapeutic purpose within the broader spectrum of intravenous treatment.

    How Does IV Drip Infusion Compare to Both IV Bolus and IV Push?

    IV drip infusion compares to both IV bolus and IV push primarily through its controlled, slower delivery rate. The Infusion Nurses Society provides evidence-based standards guiding clinical decisions across all three methods. The subsections below clarify how a controlled drip differs from a bolus and from a push.

    What Makes a Controlled IV Drip Different from a Bolus?

    A controlled IV drip differs from a bolus in delivery speed and volume regulation. An IV bolus delivers a large fluid volume rapidly, sometimes within minutes, to restore hydration or correct deficits quickly. A controlled IV drip, by contrast, uses gravity or a programmable pump to administer fluids steadily over 30 to 60 minutes or longer.

    This slower rate reduces the risk of circulatory overload, making drip infusions safer for patients who cannot tolerate sudden fluid shifts. Bolus delivery prioritizes speed; drip infusion prioritizes sustained, gradual absorption. For most wellness applications, the controlled drip strikes a better balance between efficiency and comfort.

    What Makes a Controlled IV Drip Different from a Push?

    A controlled IV drip differs from a push in volume, duration, and clinical intent. IV push delivers a small, concentrated medication dose directly into the vein, often in under one minute. A controlled drip administers a larger solution containing fluids, vitamins, or minerals over a prolonged period.

    Because push injections enter the bloodstream almost instantly, they carry a higher risk of speed-related reactions. Drip infusions dilute active ingredients across a steady flow, reducing vein irritation and systemic shock risk. For nutrient-based therapies like hydration or vitamin delivery, controlled drips offer gentler, more sustained absorption than either bolus or push methods.

    Understanding these distinctions helps when choosing the right IV therapy approach for your goals.

    How Should You Approach IV Therapy with Mobile IV Infusion Services?

    You should approach IV therapy with mobile IV infusion services by verifying provider credentials, understanding which delivery method suits your needs, and confirming that safety protocols align with clinical standards. The following sections cover how customized IV cocktails compare to clinical methods and the key takeaways from this guide.

    Can The Drip IV Infusion’s Customized IV Cocktails Deliver the Same Benefits as Clinical IV Methods?

    Yes, The Drip IV Infusion’s customized IV cocktails can deliver the same core benefits as clinical IV methods because they use the same intravenous delivery mechanism that bypasses the GI tract for maximum absorption. Mobile IV therapy provides medical-grade hydration and nutrient therapy directly to patients’ locations, with services often including health screenings via telehealth before administration.

    The Drip IV Infusion employs nurses with decades of experience in emergency medicine, home health, and IV medical techniques. Each session uses proven blends of vitamins, minerals, and hydration fluids administered through controlled infusion protocols.

    What separates a quality mobile provider from a clinical setting is not the delivery science; it is the customization. The Drip IV Infusion builds each IV cocktail around individual health goals, offering add-ons such as glutathione, Vitamin C, zinc, and NAC to tailor every treatment.

    What Are the Key Takeaways About IV Bolus vs Push?

    The key takeaways about IV bolus vs push center on three distinctions: volume, speed, and clinical purpose.

    • IV bolus delivers larger fluid volumes over minutes, making it ideal for rapid hydration, fluid resuscitation, and nutrient replenishment.
    • IV push injects small, concentrated medication doses directly into the vein within seconds, suited for time-sensitive drug delivery.
    • Speed and volume determine risk profiles; bolus carries fluid overload concerns while push carries speed shock risks.
    • Healthcare providers select between bolus and push based on patient condition, medication properties, and desired onset time.
    • Safety protocols from organizations like the Infusion Nurses Society guide clinical decision-making for both administration methods.

    According to ISMP, programmable infusion pumps with dose error-reduction systems should be used for all medication and hydration infusions to minimize administration errors. Understanding these differences helps you ask better questions before any IV treatment, whether in a hospital or through a mobile service like The Drip IV Infusion.

  • When Do You Need an IV for Dehydration?

    When Do You Need an IV for Dehydration?

    IV treatment might be one of the best ways to get your body’s necessary vitamins, minerals and nutrients. But when do you need an IV for dehydration?

    Continue reading to find out all the benefits IV therapy may bring. Also, learn what the advantages are when it comes to dehydration and similar conditions.

    Source: shutterstock.com/ Photo Contributor: EugeneEdge

    When Do You Need an IV for Dehydration?

    IV therapy is usually used in severe dehydration. However, most of the population may face mild dehydration characterized by headache, dark yellow urine, thirst and muscle pain.

    Such symptoms usually disappear if you drink large amounts of fluids, preventing dehydration from becoming moderate or severe. The severe form of dehydration occurs if early symptoms are not treated.

    Wondering how to know if you need IV fluids for dehydration? Staying hydrated is crucial, and for those seeking a convenient solution, consider the IV drip for hydration Phoenix. We provide the potential benefits of IV drip for hydration right at your doorstep. So, the use of IV drip for hydration in patients is required in the following types of dehydration:


    • Extreme thirst

    • Excessive tiredness

    • Dark-colored urine

    • Less urge to urinate

    • Confusion

    • Dizziness

    • Rapid heartbeat

    • Low blood pressure

    In addition to the above symptoms, these are five signs of dehydration that may occur in newborns and children:


    • Sunken eyes

    • Dry mouth 

    • Sunken cheeks

    • Irritability

    • Lack of tears

    • Diaper not wet after three or more hours

    • Sunken soft spot 

    Who Is IV Dehydration Therapy Intended For?

    This type of therapy is available to everyone, but certain individuals may benefit and require it the most. Primarily, it is the older population because they experience dehydration more often than other age groups. This might be attributed to the effect of drugs, reduced kidney function, and other conditions.

    In addition to the elderly, the chronically ill may also benefit the most from IV therapy. Certain health conditions make it difficult for these individuals to consume liquids and obtain essential nutrients orally. Therefore, IV therapy may be an excellent way to replace lost fluids.

    IV Hydration Therapy: Benefits and Side Effects

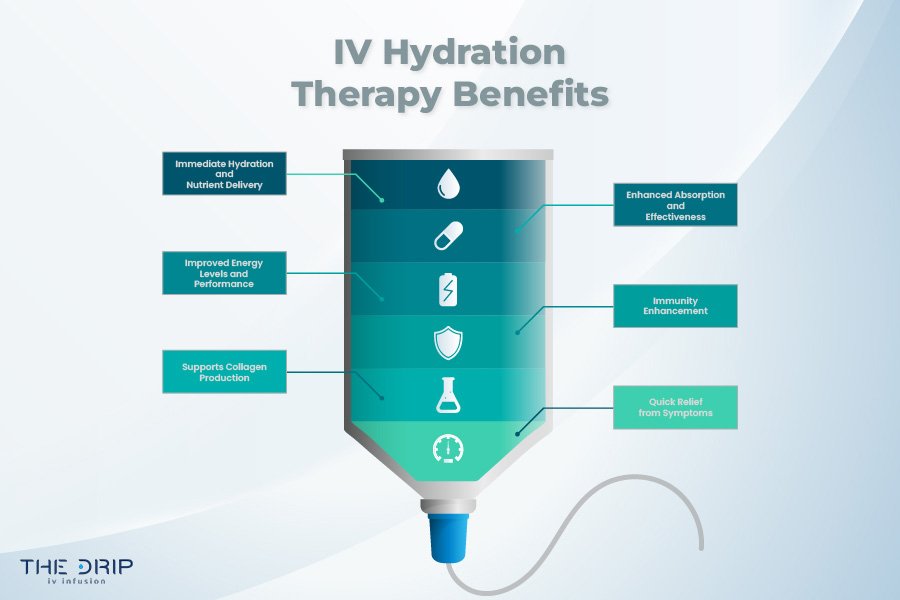
    The main possible benefit of this therapy is the rapid delivery of nutrients through the bloodstream. This way, the body can use the necessary minerals, vitamins, and nutrients.

    Although this type of therapy is used in patients with nutrient deficiencies, healthy people may often use IV hydration therapy. So, IV hydration therapy might:

    Side effects

    Although rare, side effects may occur if IV therapy is not performed correctly and if performed by a person without a proper medical license. In such cases, side effects such as bleeding, swelling at the insertion site, and bruising may happen.

    So, this procedure is best performed in healthcare facilities. If performed in a home setting, it should involve a registered nurse.

    Source: shutterstock.com/ Photo Contributor: Studio GM

    How Are IV Fluids Administered?

    The nurse injects IV fluid into the vein using a small needle. This needle is attached to a tube that leads to the IV solution. A valve on the tube controls the amount of liquid that should be administered into the body.

    In addition to health facilities, this therapy can also be administered at home. This is especially true for people unable to reach health facilities and older people. In this case, registered nurses come with the equipment to administer IV therapy, determine the type of IV fluid you should receive, and perform the procedure.

    After administering the solution, the nurses monitor the patient’s condition for a certain time in case of side effects. After the procedure is over, the medical staff leaves the patient’s home.

    If IV therapy is performed at home, it is best to call in licensed medical personnel such as The Drip IV Infusion. Performing this type of therapy by people who are not medically certified may lead to more side effects that may worsen the patient’s health.

    Conclusion

    When do you need an IV for dehydration? To recap, if you have severe dehydration, you need IV therapy.

    However, if you suspect that you have a mild or severe form of dehydration, it is best to consult your doctor, who will tell you if you have indications to receive IV therapy.

  • How Do You Start an IV?

    How Do You Start an IV?

    Starting an IV is the process of inserting a peripheral catheter into a vein to deliver fluids, medications, or nutrients directly into the bloodstream. This clinical skill requires specific equipment, proper technique, and trained hands to perform safely.

    This guide covers IV equipment and catheter selection, patient preparation and vein assessment, the step-by-step insertion process, anatomical site options, difficult-access strategies, common mistakes and complications, professional qualifications, and ongoing line maintenance.

    Successful IV access begins with assembling the right supplies. A standard start kit includes an antiseptic applicator, transparent dressing, tourniquet, gauze, and tape; catheter gauge ranges from 14 (for trauma resuscitation) down to 24 (for neonates), with the smallest effective size recommended to minimize vein irritation.

    Before insertion, clinicians verify the provider order, assess vein quality through palpation, and position the patient’s arm below heart level to encourage venous filling. The insertion sequence itself follows a precise order: tourniquet application, vein selection, site cleaning with chlorhexidine that must dry for at least 30 seconds, catheter entry at 10 to 30 degrees bevel-up, flashback confirmation, catheter advancement, securement, and drip rate calculation.

    Vein choice depends on therapy duration and patient anatomy. The median cubital vein offers reliable short-term access, while forearm veins provide stability for extended infusions. For patients with difficult access due to dehydration, obesity, or fragile vasculature, warm compresses promote dilation and ultrasound guidance achieves success rates above 80% after failed traditional attempts.

    Complications including phlebitis, infiltration, infection, and air embolism each require specific recognition and response protocols. Only licensed professionals, primarily registered nurses, paramedics, and certain LPNs, are authorized to perform IV insertion, with scope of practice varying by state.

    What Equipment Do You Need to Start an IV?

    The equipment needed to start an IV includes a peripheral IV start kit, the correct catheter gauge, and the appropriate IV fluid. Each component plays a specific role in safe, effective venous access.

    IV start kit components image showing catheter, tourniquet, antiseptic swab, and dressing used for IV insertion

    What Are the Essential Supplies in an IV Start Kit?

    The essential supplies in an IV start kit are the pre-assembled components required for safe peripheral venous access. According to Medline Industries, the standard peripheral IV start kit typically includes a 2% chlorhexidine gluconate (CHG) and 70% isopropyl alcohol antiseptic applicator, a transparent semipermeable dressing, a tourniquet, 2×2 inch gauze pads, medical tape, and a patient identification label.

    Having these items pre-packaged in a single kit reduces preparation time and minimizes the risk of missing a critical supply during insertion. For practitioners who perform IV starts regularly, confirming kit completeness before approaching the patient is a simple habit that prevents unnecessary delays.

    How Do You Choose the Right IV Catheter Gauge?

    You choose the right IV catheter gauge by matching the catheter size to the prescribed therapy, the patient’s vein condition, and the required flow rate. Clinical guidelines recommend selecting the smallest gauge peripheral catheter that will accommodate the prescribed therapy and patient needs to minimize vein irritation, according to Pedagogy Education. Larger gauges deliver higher flow rates but carry greater risk of vein damage, while smaller gauges are gentler on fragile vasculature.

    14-Gauge Catheter

    A 14-gauge catheter is the largest peripheral catheter commonly used in clinical settings. Capable of delivering approximately 240 mL/min, it is primarily indicated for trauma resuscitation and massive fluid replacement where rapid volume delivery is critical. This gauge is rarely needed outside emergency scenarios.

    16-Gauge Catheter

    A 16-gauge catheter provides high-volume flow suitable for surgical patients and blood transfusions. While slightly smaller than a 14-gauge, it still supports rapid infusion rates. Clinicians typically reserve this size for operating rooms and acute care settings where moderate to large fluid volumes are anticipated.

    18-Gauge Catheter

    An 18-gauge catheter is the most versatile size for general adult IV therapy. It accommodates blood products, CT contrast media, and standard fluid administration effectively. Most adult patients with adequate vein size tolerate this gauge well, making it a reliable default choice for routine infusions.

    20-Gauge Catheter

    A 20-gauge catheter balances adequate flow with patient comfort. It suits most standard infusions, medications, and hydration therapy in adult patients. When vein size is moderate or the prescribed therapy does not require high flow rates, a 20-gauge is often the most practical selection.

    22-Gauge Catheter

    A 22-gauge catheter is clinically preferred for elderly and pediatric patients requiring slower infusions. Designed for a flow rate of 35 mL/min, this smaller gauge reduces vein irritation in patients with fragile vasculature. Its gentler profile makes it well suited for extended therapy in populations where vein preservation is a priority.

    24-Gauge Catheter

    A 24-gauge catheter is the smallest standard peripheral catheter used in clinical practice. It is reserved for neonates, very small pediatric patients, and adults with extremely fragile or limited venous access. Flow rates are restricted, so this gauge works best for slow medication delivery rather than rapid fluid resuscitation.

    What Type of IV Fluids Are Used for Infusion?

    The types of IV fluids used for infusion are crystalloid solutions and colloid solutions, with crystalloids being the most commonly administered. According to StatPearls (National Center for Biotechnology Information), crystalloid solutions are categorized by their relative tonicity to plasma as isotonic, hypotonic, or hypertonic, and are the most commonly used fluids for replacement due to availability and low cost.

    The three primary crystalloid categories include:

    • Isotonic solutions (250–375 mOsm/L), such as 0.9% Normal Saline and Lactated Ringer’s, remain in the extracellular compartment and treat fluid volume deficits.
    • Hypotonic solutions (less than 250 mOsm/L) shift fluid into cells and are indicated for intracellular dehydration and hypernatremia.
    • Hypertonic solutions (greater than 375 mOsm/L) pull fluid from cells into the intravascular space and treat severe hyponatremia and cerebral edema.

    Provider order verification must confirm the type of solution, rate of infusion, and duration of therapy before any fluid is connected. Matching the correct fluid to the clinical indication is just as important as selecting the right catheter; an inappropriate solution can worsen the very imbalance it was meant to correct.

    With the right equipment assembled, proper patient preparation becomes the next critical step before insertion.

    How Do You Prepare a Patient Before Starting an IV?

    You prepare a patient before starting an IV by assessing vein quality, verifying the provider order, and positioning the patient correctly. These three steps reduce complications and improve first-attempt success.

    How Do You Assess a Patient’s Veins Before Insertion?

    You assess a patient’s veins before insertion by visually inspecting and palpating the upper extremities for size, resilience, and accessibility. Start at the dorsal hand veins and work proximally toward the forearm and antecubital fossa. A suitable vein feels bouncy and refills quickly after compression.

    Factors that complicate vein assessment include dehydration, obesity, and prior IV therapy. Applying a tourniquet three to four inches above the intended site engorges the veins, making them easier to evaluate. If veins remain difficult to locate, warming the area with a compress promotes venous dilation.

    For patients with a history of multiple failed attempts, this initial assessment determines whether standard palpation will suffice or advanced tools are necessary.

    What Steps Should You Take to Verify the Provider Order?

    The steps you should take to verify the provider order include confirming the patient’s identity, the prescribed solution type, the infusion rate, and the therapy duration. According to the Merck Manuals, provider order verification is a critical pre-insertion requirement that must include the type of solution, rate of infusion, and duration of therapy.

    Cross-check the order against the patient’s allergy history and current medications before gathering supplies. Any discrepancy between the written order and the patient’s clinical status requires clarification with the prescribing provider before proceeding. Skipping this step is one of the most preventable causes of IV-related adverse events.

    How Do You Position the Patient for IV Access?

    You position the patient for IV access by placing them in a comfortable, supported position with the selected arm extended and slightly below heart level. This encourages venous filling by gravity and stabilizes the limb during catheter insertion.

    For patients with difficult intravenous access, ultrasound-guided techniques have demonstrated an 80.95% success rate after multiple failed traditional attempts, according to a study published in BMJ Open Quality. Proper positioning also matters during emergencies; if an air embolism occurs, Durant’s maneuver requires placing the patient in the left lateral decubitus and Trendelenburg position to trap air in the right atrium and ventricle, minimizing entry into the pulmonary circulation.

    With the patient properly prepared, the next step involves selecting the best vein and performing the actual insertion.

    What Are the Steps to Start an IV Successfully?

    The steps to start an IV successfully follow a precise sequence: tourniquet application, vein selection, site cleaning, catheter insertion, flashback confirmation, catheter advancement, securement, and drip rate setting.

    How Do You Apply the Tourniquet Correctly?

    You apply the tourniquet correctly by placing it 3 to 4 inches above the intended insertion site and tightening it enough to restrict venous flow without cutting off arterial circulation. The tourniquet should feel snug, and you should still be able to palpate a distal pulse. Flat latex or disposable tourniquets work best for most adults. Leave it in place no longer than one to two minutes to avoid discomfort and hemoconcentration. If veins do not distend within that window, release the tourniquet briefly, reposition, and reapply. Proper tourniquet technique is the single most controllable factor in making veins accessible for cannulation.

    How Do You Select the Best Vein for IV Insertion?

    You select the best vein for IV insertion by palpating for a vessel that feels bouncy, resilient, and well-anchored beneath the skin. Ideal veins are straight, visible or easily palpable, and located on the dorsal hand or forearm. Avoid veins near joints, previously punctured sites, or areas with bruising and scarring.

    Key vein selection criteria include:

    • The vein rebounds when gently pressed and released.
    • The vessel runs in a straight segment long enough to accommodate the catheter length.
    • The surrounding tissue is free from edema, infection, or prior infiltration.
    • The nondominant arm is used when possible to preserve patient comfort.

    How Do You Clean and Prep the Insertion Site?

    You clean and prep the insertion site by applying an antiseptic agent in a circular motion, starting at the puncture point and working outward. According to CPR123, site preparation requires 2% chlorhexidine in 70% alcohol, which must dry completely for at least 30 seconds before needle insertion. This drying time is essential because inserting through a wet antiseptic can introduce chemical irritation into the vein and compromise the antimicrobial effect. Avoid fanning or blowing on the site; let it air dry naturally. Once prepped, do not re-palpate the vein unless you repeat the entire cleaning process.

    How Do You Insert the IV Catheter at the Right Angle?

    You insert the IV catheter at the right angle by stabilizing the vein with traction from your nondominant hand and approaching with the bevel facing up. According to the Merck Manuals, the recommended catheter insertion angle for peripheral IV access is between 10 and 30 degrees to ensure proper entry into the vein lumen. A shallow angle, closer to 10 degrees, suits superficial veins on the dorsal hand, while deeper forearm veins may require angles closer to 30 degrees. Once you penetrate the skin, reduce the angle slightly and advance until you see a flashback of blood in the catheter chamber.

    How Do You Confirm a Successful Flashback of Blood?

    You confirm a successful flashback of blood by observing a visible return of blood in the catheter’s flash chamber immediately after the needle enters the vein lumen. This small chamber sits at the catheter hub and fills with blood when venous access is achieved. A brisk, steady flashback indicates correct intravascular placement. If the flashback is slow or absent, the needle may be partially outside the vein or pressed against the vessel wall. In that case, make a minor angle adjustment before advancing further. Never push the catheter forward without confirming flashback, as doing so risks infiltration or vessel damage.

    How Do You Advance the Catheter and Remove the Needle?

    You advance the catheter and remove the needle by first lowering the insertion angle after confirming flashback, then sliding the plastic catheter forward over the needle and into the vein. Use a smooth, controlled motion with your dominant hand while maintaining skin traction with the other. Once the catheter hub sits flush against the skin, apply gentle pressure over the vein just beyond the catheter tip, then withdraw the needle completely. Immediately activate the needle’s safety mechanism and dispose of it in a sharps container. Keeping pressure over the catheter tip during needle removal prevents blood from flowing back through the hub.

    How Do You Secure the IV Catheter and Connect the Tubing?

    You secure the IV catheter and connect the tubing by first placing a transparent semipermeable dressing over the insertion site, ensuring the catheter hub remains visible for monitoring. Attach the primed IV tubing or a saline lock to the catheter hub using a Luer-lock connection, then twist firmly until snug. Secure the tubing loop with medical tape to prevent accidental dislodgment. Document the insertion date, catheter gauge, and site location on the dressing or patient chart. A well-secured line reduces the risk of accidental removal and catheter migration during movement.

    How Do You Set the Correct Drip Rate After Starting an IV?

    You set the correct drip rate after starting an IV by referencing the provider’s prescribed infusion rate and calculating drops per minute based on the IV tubing’s drop factor. Gravity-fed tubing typically delivers 10, 15, or 20 drops per milliliter, while micro-drip sets deliver 60 drops per milliliter. The formula is: (volume in mL × drop factor) ÷ time in minutes. Adjust the roller clamp while counting drops in the drip chamber for 15 seconds, then multiply by four to verify accuracy. Recheck the rate periodically, as patient repositioning and tubing kinks can alter flow unexpectedly.

    With an established line and verified drip rate, identifying the best anatomical vein sites strengthens future insertion success.

    Where Are the Best Veins to Start an IV?

    The best veins to start an IV include the median cubital, cephalic, basilic, dorsal hand, and forearm veins. Each site offers distinct advantages depending on therapy duration, patient anatomy, and clinical goals.

    Arm vein diagram for IV insertion showing cephalic vein, basilic vein, and median cubital vein access points

    What Makes the Median Cubital Vein a Preferred IV Site?

    The median cubital vein is a preferred IV site because of its large diameter, superficial position, and stability in the antecubital fossa. Most clinicians can palpate it easily, which makes it a reliable first choice for venipuncture and short-term infusions.

    However, this vein sits directly over the elbow joint. According to NYSORA, the median cubital vein is a common site for venipuncture but is less ideal for long-term IV therapy because catheter patency is often compromised by joint movement. For extended infusions, sites below the antecubital fossa typically maintain better flow. Despite this limitation, the median cubital remains the go-to vein when quick, reliable access is the priority.

    When Should You Use the Cephalic Vein for IV Access?

    You should use the cephalic vein for IV access when longer infusion duration is expected or when the antecubital fossa is unavailable. The cephalic vein runs along the lateral (thumb) side of the forearm and upper arm, offering a long, accessible path that accommodates catheter placement away from joint flexion points.

    This vein is particularly useful for patients receiving multi-hour IV therapy, since catheter movement is minimal compared to antecubital sites. Its superficial course along the radial aspect makes it visible and palpable in most adults. For patients needing repeated access, the cephalic vein’s length provides multiple potential insertion points along its path.

    When Is the Basilic Vein Appropriate for IV Insertion?

    The basilic vein is appropriate for IV insertion when other peripheral sites are inaccessible or when larger-bore catheter placement is needed. It runs along the ulnar (pinky) side of the forearm and courses toward the antecubital fossa, where it connects with branches from the cephalic vein.

    Although the basilic vein offers a generous diameter, it sits deeper than the cephalic vein and tends to roll during cannulation. Anchoring the surrounding skin firmly before insertion helps stabilize it. Clinicians often reserve this vein for situations where more superficial options have been exhausted, making it a valuable backup rather than a first-line choice.

    How Do You Start an IV in a Hand Vein?

    You start an IV in a hand vein by targeting the dorsal metacarpal veins, which form a visible network across the back of the hand. These veins are superficial, easy to anchor, and well suited for short-term infusions or low-flow therapies.

    Peripheral catheters ranging from 0.5 to 2.0 inches are commonly available, with shorter lengths preferred for these superficial hand veins. A 20- or 22-gauge catheter typically works best here. Because hand veins are smaller and more fragile than forearm veins, gentle technique and a shallow insertion angle are essential. Hand sites work well for brief treatments but may limit patient mobility and comfort during longer sessions.

    When Should You Consider the Forearm for IV Placement?

    You should consider the forearm for IV placement when therapy requires extended catheter dwell time, patient comfort during movement, and reliable flow rates. Forearm veins, including the accessory cephalic and median antebrachial veins, sit in a flat, stable area free from joint interference.

    This stability makes forearm sites ideal for continuous infusions lasting several hours. Patients can bend their elbows and use their hands freely, which reduces frustration and accidental dislodgement. For practitioners prioritizing both catheter longevity and patient satisfaction, the forearm consistently delivers the best balance of accessibility and function.

    Knowing where to place an IV sets the stage for handling situations where vein access proves challenging.

    What Are the Best Tips for Starting a Difficult IV?

    The best tips for starting a difficult IV include using warm compresses, anchoring rolling veins, relying on palpation over sight, and leveraging technology like vein finders or ultrasound. Each technique addresses a specific challenge.

    How Do You Start an IV on a Dehydrated Patient?

    You start an IV on a dehydrated patient by applying a tourniquet longer than usual, using gravity to engorge veins, and palpating rather than relying solely on visual cues. Lowering the arm below heart level encourages venous pooling when veins appear flat. A warm compress applied for three to five minutes promotes vasodilation in patients whose fluid deficit has collapsed superficial vessels. Smaller gauge catheters, such as a 22-gauge, often succeed where larger sizes fail because dehydrated veins are more fragile. Once access is established, isotonic crystalloid solutions restore intravascular volume effectively. Patience during site selection matters more than rushing multiple attempts, which can further damage compromised vasculature.

    How Do You Find Veins on Patients With Dark Skin?

    You find veins on patients with dark skin by prioritizing palpation over visual inspection. Veins that are difficult to see may still be easily felt as a bouncy, spongy cord beneath the surface when a tourniquet is applied. Running a fingertip along the forearm and dorsal hand identifies vein pathways even when skin pigmentation obscures the characteristic blue-green color. Adequate lighting angled across the skin can cast subtle shadows over vein contours. Near-infrared vein finders project a real-time vein map onto the skin surface, removing the dependence on visual contrast entirely. For clinicians who rely heavily on sight, shifting to a palpation-first approach is one of the most impactful technique adjustments available.

    How Do You Start an IV on an Obese Patient?

    You start an IV on an obese patient by targeting anatomical landmarks where subcutaneous fat is thinnest, such as the dorsal hand, the radial aspect of the wrist, and the forearm. A blood pressure cuff inflated slightly above venous pressure can serve as a more effective tourniquet than a standard elastic band on larger arms. Palpation is essential because veins may sit deeper than expected beneath adipose tissue. Using a longer catheter, typically 1.75 to 2.0 inches, ensures the cannula reaches the vein lumen through additional tissue depth. Ultrasound guidance becomes especially valuable in this population when surface landmarks are not palpable after standard techniques.

    How Do You Access Rolling Veins During IV Insertion?

    You access rolling veins during IV insertion by anchoring the vein with firm traction using your non-dominant thumb placed one to two inches below the intended puncture site. Pulling the skin taut in a distal direction stabilizes the vein against the underlying tissue, preventing lateral movement during needle entry. Approaching from the side of the vein rather than directly on top can also reduce rolling. A swift, confident insertion at a 10 to 15 degree angle minimizes the push force that displaces mobile veins. In my experience, hesitant or slow needle advancement is the primary reason rolling veins are missed; decisive technique solves the problem more reliably than any single piece of equipment.

    How Can Warm Compresses Help Improve Vein Visibility?

    Warm compresses help improve vein visibility by causing vasodilation, which increases the diameter of superficial veins and makes them easier to palpate and visualize. According to a study published in PubMed Central, heat application via a hot pack or warm compress is recommended for venous dilation prior to catheterization to enlarge venous diameter and improve success rates. Applying a warm, moist towel or a commercial heat pack to the target area for three to five minutes before tourniquet application produces noticeable engorgement. This technique is particularly useful for elderly patients, dehydrated individuals, and anyone with chronically small or deep veins where standard tourniquet application alone is insufficient.

    When Should You Use a Vein Finder or Ultrasound?

    You should use a vein finder or ultrasound after two failed attempts using traditional palpation and visualization techniques. Near-infrared vein finders project subcutaneous vein patterns onto the skin surface, helping clinicians identify viable targets without invasive exploration. Ultrasound-guided peripheral IV access provides real-time imaging of deeper veins that cannot be felt or seen. This technology is especially valuable for patients with obesity, edema, IV drug use history, or chronic illness that has scarred superficial vessels. Escalating to technology early, rather than repeatedly sticking a patient, reduces tissue trauma and preserves trust.

    With difficult-access strategies established, understanding common insertion mistakes helps prevent complications altogether.

    What Are Common Mistakes When Starting an IV?

    Common mistakes when starting an IV include going through the vein, blowing the vein, forming a hematoma, and causing infiltration after insertion. Each error has distinct causes and prevention strategies.

    Common IV complications infographic showing infiltration, phlebitis, infection, and air embolism during intravenous therapy

    What Happens If You Go Through the Vein?

    Going through the vein occurs when the needle punctures both the anterior and posterior walls of the vessel, exiting the opposite side. This typically results from inserting the catheter at too steep an angle or advancing with too much force. Because the recommended catheter insertion angle is between 10 and 30 degrees with the bevel facing up, exceeding this range significantly increases the risk of through-and-through puncture.

    When the posterior wall is breached, blood leaks into surrounding tissue, and the IV fluid cannot infuse properly. Practitioners should reduce their insertion angle once a flashback appears, then gently advance the catheter rather than the needle. In my experience, this single adjustment prevents most through-the-vein errors.

    Why Does an IV Blow and How Can You Prevent It?

    An IV blows when the vein wall ruptures during or shortly after catheter insertion, causing fluid to leak into surrounding tissue. Common causes include:

    • Using a catheter gauge too large for the selected vein.
    • Applying excessive pressure during insertion or flushing.
    • Inserting into fragile veins weakened by age, medications, or repeated access.
    • Failing to stabilize the vein with adequate traction before puncture.

    According to clinical guidelines from Pedagogy Education, selecting the smallest gauge peripheral catheter that accommodates the prescribed therapy minimizes vein irritation and reduces blowout risk. Anchoring the vein with gentle distal traction before advancing the needle also helps prevent the vessel from shifting or collapsing under pressure.

    How Do You Avoid Causing a Hematoma During IV Insertion?

    You avoid causing a hematoma during IV insertion by applying proper technique at every stage. A hematoma forms when blood pools beneath the skin after a vein is punctured inadequately or a tourniquet is removed at the wrong time.

    Key prevention steps include:

    • Releasing the tourniquet before withdrawing the needle from the vein.
    • Applying firm, direct pressure immediately after catheter removal.
    • Avoiding repeated probing or redirection once the needle is under the skin.
    • Selecting a vein that is well-anchored and visible rather than deep and mobile.

    Patients on anticoagulant therapy or those with fragile vasculature require extra caution, as even minor technique lapses can produce significant bruising.

    What Errors Lead to IV Infiltration After Insertion?

    The errors that lead to IV infiltration after insertion involve catheter displacement, poor securement, and improper site selection. Infiltration occurs when IV fluid leaks from the vein into surrounding interstitial tissue.

    According to a study cited by The Cardiology Advisor, infiltration accounts for approximately 16.3% of peripheral IV complications, making it one of the most frequent post-insertion issues. Contributing errors include:

    • Inadequate dressing or tape allowing catheter movement.
    • Placing the catheter near a joint where flexion dislodges it.
    • Infusing at a rate that exceeds what the vein can tolerate.
    • Failing to monitor the site regularly for swelling, coolness, or pain.

    Routine site assessment and proper catheter securement are the most reliable safeguards against infiltration. Understanding these common insertion errors helps explain why professional IV administration matters.

    What Complications Can Occur After Starting an IV?

    Complications that can occur after starting an IV include infiltration, phlebitis, infection, and air embolism. Each complication presents distinct warning signs and requires specific clinical interventions.

    How Do You Recognize and Manage IV Infiltration?

    You recognize IV infiltration by observing swelling, coolness, pallor, and tightness at the catheter site, which indicate that IV fluid has leaked into surrounding tissue. Pain or a burning sensation often accompanies these signs, particularly with vesicant medications. To manage infiltration, stop the infusion immediately, disconnect the tubing, and elevate the affected limb. Applying a warm or cold compress depends on the solution infused. Document the infiltration grade and notify the provider. For most patients, early detection prevents tissue damage, making frequent site assessments one of the simplest yet most overlooked safeguards in IV therapy.

    What Are the Signs of Phlebitis From an IV?

    The signs of phlebitis from an IV include pain, redness, warmth, and swelling along the vein path near the catheter site. A palpable venous cord may also develop as inflammation progresses. Clinicians use the Visual Infusion Phlebitis (VIP) scale, which scores severity from 0 to 5, with each grade identifying a progressively advanced state of inflammation (Delta Med). A VIP score of 2, indicating early-stage phlebitis with erythema and edema, requires resiting the cannula. Risk factors include large-gauge catheters, prolonged dwell time, and irritating infusates. Routine site assessment using the VIP scale catches phlebitis early before it escalates to thrombophlebitis.

    How Do You Identify an IV-Related Infection?

    You identify an IV-related infection by monitoring for localized signs such as erythema, purulent drainage, tenderness, and induration at the catheter insertion site. Systemic indicators include fever, chills, and elevated white blood cell counts without another identifiable source. Catheter-related bloodstream infections develop when bacteria migrate along the catheter into the bloodstream, making aseptic technique during insertion and maintenance critical. If infection is suspected, remove the catheter, culture the tip, and obtain blood cultures before initiating antimicrobial therapy. Strict hand hygiene and timely catheter replacement remain the most effective preventive measures against IV-related infections.

    What Should You Do If a Patient Has an Air Embolism?

    You should immediately clamp the IV line, place the patient in the left lateral decubitus position, and call for emergency assistance. This positioning, known as Durant’s maneuver, traps air in the right atrium and ventricle to minimize entry into the pulmonary circulation (Medscape). Applying Trendelenburg positioning further prevents air migration into the right ventricular outflow tract. Administer high-flow oxygen to accelerate nitrogen reabsorption. Symptoms of air embolism include sudden dyspnea, chest pain, hypotension, and a churning “mill wheel” heart murmur. Although rare with peripheral IVs, air embolism remains life-threatening; priming all IV tubing and removing air from syringes prevents this complication entirely.

    With complications identified early, proper IV maintenance keeps therapy safe and effective.

    Who Is Qualified to Start an IV?

    Several categories of healthcare professionals are qualified to start an IV, though authorization varies by role, training, and state law. The sections below cover registered nurses, licensed practical nurses, paramedics and EMTs, and phlebotomists.

    Can Registered Nurses Start an IV Independently?

    Yes, registered nurses can start an IV independently in most clinical and mobile settings. IV insertion falls within the standard RN scope of practice across all 50 states, making registered nurses the most common professionals who perform peripheral venipuncture. RNs complete IV cannulation training during nursing school and refine the skill through clinical rotations. Competency requirements vary by employer, but most hospitals and infusion services require demonstrated proficiency before allowing independent IV starts. For practitioners just entering the field, building confidence takes time; first-attempt success rates for newly qualified nurses range from 44% to 76.9%, compared to 91% to 98% among experienced practitioners, according to a study published by the European Society of Medicine.

    Are Licensed Practical Nurses Allowed to Start IVs?

    Yes, licensed practical nurses are allowed to start IVs in many states, though authorization depends on specific state nurse practice acts. Some states permit LPNs to initiate peripheral IV lines after completing additional IV certification coursework. Other states restrict LPNs to monitoring existing IV infusions without starting new lines. In states where LPNs may initiate IVs, they typically must work under the direct supervision of a registered nurse, physician, or nurse practitioner. Because these regulations differ significantly from one jurisdiction to the next, any LPN seeking to perform IV insertion should verify current scope-of-practice rules through their state board of nursing before proceeding.

    What IV Training Do Paramedics and EMTs Receive?

    Paramedics and EMTs receive IV training that varies significantly based on certification level and state regulations. Paramedics complete extensive programs covering peripheral and intraosseous access, fluid resuscitation, and medication administration through IV lines. EMTs at the basic level typically do not receive IV initiation training, as their scope focuses on basic life support interventions. According to the National Highway Traffic Safety Administration, state governments in the United States hold the primary authority to issue EMS licenses and define the scope of practice for paramedics and EMTs regarding IV initiation. Advanced EMTs (AEMTs) occupy a middle tier, often authorized to start IVs and administer a limited set of fluids. This layered credentialing system means field providers should always confirm their state-specific authorization.

    Can Phlebotomists Legally Start an IV Line?

    No, phlebotomists cannot legally start an IV line in most jurisdictions. Phlebotomy certification trains professionals to perform venipuncture for blood draws, not for establishing intravenous access. IV catheter insertion requires maintaining a patent line, connecting fluid administration sets, and monitoring for complications, all of which fall outside standard phlebotomy training. Some states allow phlebotomists to perform venipuncture under supervision, but this authorization covers blood collection only. Facilities occasionally cross-train phlebotomists for IV starts through specialized competency programs, yet the legal authority to insert and maintain IV catheters still requires additional licensure or delegation from a supervising provider. For anyone considering IV therapy, confirming that a licensed professional performs the insertion remains essential.

    How Do You Maintain and Monitor an IV After Insertion?

    You maintain and monitor an IV after insertion by flushing the line regularly, replacing the catheter on schedule, and watching for signs that require restarting. These practices prevent complications and keep the infusion flowing safely.

    How Often Should You Flush an IV Line?

    You should flush an IV line every 8 to 12 hours when it is not in active use, and before and after each medication administration or fluid infusion. Flushing with a prefilled normal saline syringe clears residual medication, prevents clot formation inside the catheter lumen, and confirms line patency.

    A standard flush involves pushing 3 to 5 mL of 0.9% sodium chloride through the line using a pulsatile (push-pause) technique. This turbulent flow is more effective at clearing the catheter interior than a single continuous push. If resistance is felt during flushing, the line should never be forced; resistance may indicate a partial occlusion or catheter malposition that needs clinical evaluation.

    When Should an IV Catheter Be Replaced?

    An IV catheter should be replaced every 72 to 96 hours for peripheral lines, according to standard clinical protocols, to reduce infection and phlebitis risk. Catheter dwell time directly correlates with complication rates. According to a study published by the American Academy of Pediatrics, statewide CLABSI rates declined by 40%, from 3.5 to 2.1 per 1,000 central-line days, following targeted prevention initiatives that included timely catheter replacement.

    Immediate replacement is also warranted whenever signs of complications appear before the scheduled change, such as redness, swelling, or pain at the insertion site. Facilities that enforce strict replacement schedules consistently report fewer catheter-related bloodstream infections.

    What Signs Indicate an IV Needs to Be Restarted?

    The signs that indicate an IV needs to be restarted include:

    • Infiltration: Swelling, coolness, or blanching around the insertion site, suggesting fluid is leaking into surrounding tissue.
    • Phlebitis: Pain, redness, warmth, or a palpable cord along the vein, scored using the Visual Infusion Phlebitis (VIP) scale from 0 to 5 in ascending severity.
    • Occlusion: Inability to flush the line or an infusion pump alarm signaling flow resistance.
    • Dislodgement: A catheter that has migrated partially or fully out of the vein.
    • Signs of infection: Purulent drainage, fever, or increasing tenderness at the site.

    A VIP score of 2 or higher, indicating early-stage phlebitis with pain and erythema, requires immediate resiting of the catheter. Prompt recognition of these warning signs protects patient safety and ensures uninterrupted therapy. With proper monitoring established, professional IV services can streamline the entire process.

    How Does Professional IV Therapy Simplify the Process?

    Professional IV therapy simplifies the process by placing every clinical step in the hands of licensed, experienced nurses. The sections below cover why mobile nurse-administered infusions outperform DIY attempts and the key takeaways about how to start an IV.

    Can Mobile Nurse-Administered IV Infusions Replace DIY Attempts?

    Yes, mobile nurse-administered IV infusions can replace DIY attempts for most wellness and recovery needs. California law mandates that only licensed medical professionals, such as an RN under the supervision of a physician, PA, or NP, are authorized to administer IV therapy, according to a review by Nextech. Similar regulations exist across states, reinforcing that IV insertion requires clinical training, sterile technique, and proper vein assessment.

    Attempting IV access without this expertise introduces risks:

    • Incorrect catheter gauge selection can cause vein irritation or infiltration.
    • Poor site preparation increases infection risk.
    • Improper insertion angle leads to blown veins or hematomas.
    • Unmonitored drip rates may cause fluid overload.

    The Drip IV Infusion sends registered nurses directly to homes and workplaces, handling equipment selection, vein assessment, catheter insertion, and post-infusion monitoring. This eliminates every technical barrier that makes self-administered IVs dangerous for untrained individuals.

    What Are the Key Takeaways About How to Start an IV?

    The key takeaways about how to start an IV center on preparation, technique, and knowing when to seek professional help.

    • Proper equipment, including the correct catheter gauge, antiseptic, tourniquet, and transparent dressing, forms the foundation of a safe IV start.
    • Vein selection matters; the median cubital, cephalic, and basilic veins each serve different clinical scenarios.
    • Insertion technique requires a 10 to 30 degree angle with bevel up, followed by flashback confirmation and smooth catheter advancement.
    • Complications such as phlebitis, infiltration, and infection demand immediate recognition and response.
    • Only qualified professionals, including RNs, paramedics, and certain LPNs, should perform IV insertion.

    For anyone seeking IV hydration, vitamin infusions, or recovery support without the complexity, The Drip IV Infusion provides nurse-administered mobile IV therapy across Arizona, bringing clinical expertise directly to each client.

  • Peripheral IV Sites

    Peripheral IV Sites

    If you’re here looking up peripheral IV sites, you’re probably facing a medical procedure or helping someone who needs an IV. We get it – this stuff can feel scary. But you’ve come to the right place to learn exactly what these IV sites are and where doctors put them to take the best care of you.

    A peripheral IV site is just a spot on your body where doctors stick a tiny, bendy plastic tube into one of your veins. This lets them send fluids, medicines, or blood right into your bloodstream. Think of it like plugging a hose into your garden spigot. Unlike the big central lines that go deep near your heart, peripheral IVs use the veins in your arms, hands, or sometimes feet. They’re way less scary and the most common type – doctors use over 1 billion of them around the world each year.

    TL;DR Summary:

    • Peripheral IV sites are different from central lines because they use veins in your arms and hands instead of big vessels near your chest, making them less risky but good for shorter treatments
    • Doctors group IV spots by where they are (hand, forearm, elbow area, upper arm, lower leg, scalp), with forearm spots being the best choice for most adults since they cause problems about 20% less often
    • Good veins feel soft and bouncy, not hard or throbbing, and doctors like using your non-dominant arm so you can still use your main hand
    • Where they put your IV depends on your age, how good your veins are, how long you need treatment, and what’s wrong with you – older folks get about 7 out of 10 minor problems and 9 out of 10 major problems
    • Common spots include hand veins on the back of your hand, arm veins in your forearm, and elbow veins (but only for emergencies)
    • Forearm spots stay put better and don’t get messed up as easily as hand spots, though new research shows both work about the same overall
    • Success rates are very different – doctors get it right 65-86% of the time in adults but only 53% in kids – using ultrasound helps them succeed over 90% of the time
    • New technology that lets doctors see your veins better helps them get it right the first try and hurts less
    • The Visual Infusion Phlebitis score helps doctors watch for problems on a scale from 0 to 5
    • Professional IV services like The Drip IV Infusion use the best methods including vein-finding gadgets and different tricks to make veins bigger for easier placement

    Quick Tip: When you get an IV, ask them to put it in your non-dominant forearm if they can. This spot usually feels the most comfortable, stays put better, and causes fewer problems while letting you keep using your main hand for everyday stuff.

    As we dig into the details of where IVs go, you’ll understand why doctors pick certain spots, what happens when they put one in, and how the right spot makes you more comfortable and helps your treatment work better.

    What defines a peripheral IV site and how is it different from other IV access points?

    A peripheral IV site is a vein in your arms or legs where doctors put a single plastic tube to give you fluids, medicines, and blood. Over 1 billion of these plastic tubes help patients every year worldwide. About 8 out of 10 hospital patients get one.

    Peripheral IVs are different from central lines because of where they go and how deep. Peripheral IVs go into veins in your arms, hands, or legs. Central lines go into big veins in your neck, chest, or groin and reach almost to your heart. Midline catheters are somewhere in between – they’re longer than regular IVs and go into your upper arm veins but stop before they get to your heart. PICCs work better for longer treatments but need special doctors to put them in.

    These differences matter because peripheral IVs work great for short-term needs while central access helps with longer treatments.

    How are peripheral IV sites categorized?

    Peripheral IV sites are sorted by where they are on your body: hand, forearm, elbow area, upper arm, lower leg, and scalp veins for babies. Doctors like to use your non-dominant arm because it’s more comfortable for you, doesn’t get bumped around as much, and causes fewer problems.

    What types of veins are typically chosen for peripheral IV placement?

    Doctors look for straight veins that don’t branch off in your arms and legs. Good veins feel soft and squishy when they press on them, not hard or pulsing. Hard veins that feel like cords mean there’s a clot. Veins that pulse are actually arteries and doctors stay away from those.

    Hand veins on the back of your hand are the farthest out, so doctors can try spots higher up your arm if the first one doesn’t work. Arm veins in your forearm are what most adults get. Elbow veins are saved for emergencies because bending your elbow can kink the tube.

    What factors influence the choice of peripheral IV site?

    The factors that influence the choice of a peripheral IV site include patient age, vein quality, treatment duration, and medical history. Doctors consider several important factors when selecting a peripheral IV site. These factors affect success rates, patient comfort, and complication risks. Here are the main elements that guide the selection:

    • Patient age and complication likelihood
    • First-attempt success rates (varies by age group)
    • Catheter size required for therapy
    • Duration of therapy
    • Vein accessibility challenges (e.g., obesity, drug use history)
    • Phlebitis scoring from 0–5 to monitor inflammation
    Infographic showing key factors influencing IV site selection including age, vein quality, and treatment duration.

    What are the main sites used for IV insertion on the body?

    The main spots for IVs are your hand, forearm, elbow area, upper arm, lower leg, and scalp. Hand spots use veins on the back of your hand and are the farthest out, so doctors can try higher spots if needed. Forearm spots use bigger arm veins and are what most adults get because they cause fewer problems. 

    Elbow spots have big veins but doctors only use them in emergencies. Upper arm spots use the same veins that continue up your arm when other places won’t work. Lower leg spots include foot veins but doctors avoid these in adults unless they absolutely have to. Scalp veins work for babies and young kids when other spots can’t be used. These body areas are the foundation for where doctors decide to put IVs.

    Visual comparison of IV insertion sites for infants (scalp) and adults (forearm), showing age-specific differences.

    Why are certain anatomical sites preferred for IV insertion?

    Certain anatomical sites are preferred because they offer safer access and better patient comfort. These preferences come from both evidence and clinical guidelines:

    • Forearm veins have fewer complications
    • Upper arm and hand veins have lower clot and swelling risk than leg veins
    • The non-dominant arm minimizes disruption to daily activities
    • CDC guidance prioritizes upper arm placement in adults
    • Starting distally preserves more options if multiple attempts are needed

    What are the advantages and disadvantages of the most common IV insertion sites?

    Each spot has good and bad points with different problem rates. Forearm spots cause about 20% fewer problems like swelling, redness, and pain compared to hand spots. Hand spots cause over half of both minor and major IV problems even though doctors use them a lot. Elbow spots can get kinked when you bend your arm, which stops the flow and causes problems. 

    Leg spots have higher chances of infection and blood clots in adults, so doctors don’t like using them. A 2023 study found that overall, forearm and hand spots have about the same problem rates, which means how well the doctor does it and takes care of it matters just as much as where it goes.

    What complications are associated with different IV insertion locations?

    Complication risks and dwell-time performance vary by IV location and device type. The table shows the major measurable values:

    ElementMeasurementValue
    Swelling rateForearm vs HandSimilar
    Infiltration rateForearm vs HandSimilar
    Problem distributionHand/Wrist>50% of issues
    Average dwell timeStandard IVs73 hours
    Dwell timeClosed-system137 hours
    Dwell timeRegular system96 hours

    What should be considered when choosing IV sites on the forearm?

    Picking forearm IV spots means looking at your blood vessels, your specific situation, and how to put it in. The two main arm veins serve as the primary vessels for forearm IVs. Medical guidelines say the forearm is the best spot for most adults. A 2023 study found problems happen about 20% less often in forearm IVs compared to hand placement. Medical standards limit doctors to two attempts per person to minimize trauma.

    Doctors check vein quality by feeling and looking before picking spots. Good forearm veins feel soft, bouncy, and stretchy rather than hard or like cords. Your non-dominant arm works better for comfort and less chance of it getting knocked out. These body and practical considerations guide doctors toward the best forearm IV placement.

    How do forearm veins compare to hand veins for IV insertion?

    Forearm and hand veins differ in complication profiles and practical performance. The table below summarizes the most important measurable differences between these two IV sites:

    SiteComplication RateKey Study FindingsStability During Movement
    Forearm~20% fewer issues2023 study: no significant difference overallMore stable
    Hand>50% of minor & major issuesSame 2023 study: comparable outcomesLess stable
    Side-by-side image comparing hand IV and forearm IV placements, showing activity impact and complication rates.

    What are the benefits and risks of forearm IV sites?

    Forearm IV spots are easy to secure and less likely to get knocked out when you move around. Forearm placement lets you keep using your hand for daily activities like eating, writing, and using your phone. A 2023 analysis found no real difference in swelling rates between forearm and hand spots. The same study showed no real difference in fluid leaking rates between forearm and hand spots either.

    Risk factors stay minimal when doctors use proper technique. Your specific situation like vein quality, skin condition, and how much you move around influences where they put it. These balanced benefits and risks make forearm spots optimal choices for most adult patients who need IVs.

    What techniques help ensure successful IV placement in the forearm?

    Several techniques help doctors achieve successful forearm IV placement. These methods improve vein visibility and accessibility, increasing first-attempt success:

    1. Applying a tourniquet
    2. Palpating for soft, bouncy veins
    3. Positioning the arm so gravity fills the veins
    4. Warming the site
    5. Gently tapping to stimulate dilation
    6. Using ultrasound or vein-finding technology as needed

    Near-infrared vein finders like AccuVein help doctors succeed on the first try while reducing pain and stress. Vein visualization devices project real-time maps of your blood vessels onto your skin so they can identify the best veins. These technologies work alongside traditional assessment methods to optimize forearm IV placement. The combination of hands-on techniques and advanced visualization tools enhances forearm IV placement outcomes across all kinds of patients.

    Doctor using near-infrared vein finder to locate veins in a patient’s forearm before IV insertion.

    How should you approach peripheral IV site selection and care with The Drip IV Infusion?

    The Drip IV Infusion picks IV spots using evidence-based ways to check your veins. The service focuses on your non-dominant arm for comfort and less chance of it getting knocked out. Trained professionals check vein quality by feeling for soft, bouncy, and stretchy vessels that show healthy blood flow. The Drip IV Infusion uses advanced vein finder technology to project real-time maps of your blood vessels onto your skin surface. These near-infrared devices help them succeed on the first attempt while reducing discomfort. The upcoming sections detail their specific selection criteria and management techniques.

    Can The Drip IV Infusion help with choosing and managing peripheral IV sites?

    Yes. The Drip IV Infusion can help with choosing and managing peripheral IV sites by following Infusion Nurses Society standards for vein assessment. Their practitioners pick non-dominant upper arm sites to keep you mobile during infusion sessions. The service uses multiple vein enhancement techniques including tourniquet application, gravity positioning, local warming, and gentle tapping to make veins more visible. 

    Vein finder technology provides visual confirmation of suitable vessels before they try to insert anything. The Drip IV Infusion limits insertion attempts to two per practitioner, following INS guidelines. Their systematic approach combines hands-on assessment with technological visualization for optimal site selection.

    What are the key takeaways about peripheral IV sites, IV insertion locations, and forearm IV sites we covered?

    The key takeaways about peripheral IV sites include their status as the most frequently performed invasive procedure with over 1 billion used annually worldwide. Forearm spots cause about 20% fewer complications compared to hand placement locations. First-attempt success rates range from 65-86% in adults versus 53% in kids. 

    The Visual Infusion Phlebitis score provides standardized assessment from 0-5 for monitoring insertion sites. Ultrasound guidance achieves success rates exceeding 90% for difficult access cases. Average time in place reaches 73 hours for standard IVs, extending to 137 hours with closed-system devices. CDC and medical standards recommend upper arm placement using the smallest appropriate size for the prescribed therapy.

  • What Is Cannula?

    What Is Cannula?

    In the world of modern medicine, certain tools are essential for ensuring precision and safety in patient care. Among them is the cannula, which has become integral to various medical interventions and techniques. So, what is cannula?

    This post will delve into the definition, purpose, and importance of this medical instrument.

    Source: shutterstock.com / Photo Contributor: Noiel

    What Is Cannula? 

    In a medical context, the term cannula refers to a thin, flexible plastic tube, a crucial medical device used in various healthcare settings. The hollow tube is inserted into a body cavity, duct, or vessel using a needle to allow the passage of fluids. Healthcare providers utilize such instruments to administer medications, provide oxygen, and draw blood. It provides direct access to the patient’s bloodstream.

    Medical professionals, like certified nurses for mobile IV therapy in Arizona, play a central role in mobile IV therapy, expertly utilizing cannulas to provide efficient and safe intravenous treatments.

    Types of Cannula

    Peripheral cannula

    Among the different types, the peripheral cannula finds widespread use in medical care. This small, thin tube is inserted into the peripheral vein, commonly in the arm and hand. While it has a spectrum of functions, it is often used to administer medications and fluids and facilitate blood draws. Since it is minimally invasive, the cannula is a fundamental tool in hospitals and on-site patient care settings. 

    Central venous cannula

    The central venous cannula is intended for situations demanding more extensive vascular access. It is designed for insertion into large central veins and is suitable for patients requiring prolonged intravenous delivery.

    This cannula plays a vital part in monitoring central venous pressure. It is commonly used for the administration of certain fluids and medications that are harsh on the peripheral veins.

    Arterial cannula

    In situations when direct access to arterial blood is needed, the arterial cannula comes into play. This type of cannula is designed for insertion into arteries. It allows continuous monitoring of blood pressure and sampling.

    In some cases, the medical providers use it to deliver medications directly to the arterial system. It is often employed in critical care settings, such as intensive care units and certain surgical procedures. 

    Nasal cannula

    Venturing beyond venous access, the nasal cannula has a respiratory focus. It is designed to fit in the nostrils, delivering oxygen directly to the patient’s nasal passages. 

    Compared to the standard cannulas, the high-flow nasal cannulas offer an increased oxygen flow rate to ensure the patient breathes well. Its non-invasive nature makes it an accessible choice for patients requiring an extensive oxygen support period. 

    Uses of Cannula

    Administration of medications

    One of the primary functions of the cannula is the ability to provide precise administration of medications and therapeutic agents. It enables the delivery directly into the person’s bloodstream. 

    Such an approach enables efficient absorption and a fast onset of action. As a result, the cannula has become an indispensable tool for healthcare providers managing a spectrum of medical conditions. 

    Fluid infusion

    Effective fluid management is a cornerstone of patient care. Whether it is rehydrating a patient, maintaining an electrolyte balance, or delivering special solutions, cannulas significantly contribute to facilitating fluid infusion. 

    They provide a direct route for fluids to enter the circulatory system. This is crucial for surgical settings, emergency care, and situations when precise control of the patient’s fluid status is required. 

    Blood sampling

    Cannulas are invaluable tools for obtaining blood samples in diagnostic procedures. Rather than subjecting their patients to repeated needle sticking, medical providers can utilize these devices to draw blood for laboratory analysis. This minimizes discomfort and allows for a collection of multiple samples over time, supporting the monitoring and assessment of various health parameters. 

    Oxygen therapy

    Besides vascular access, healthcare providers utilize specific types of cannula for oxygen therapy. As mentioned above, the nasal cannulas deliver a controlled oxygen flow directly to the patient’s respiratory system. 

    Hence, such cannulas are employed for managing respiratory conditions and providing essential oxygen support for patients with compromised respiratory function. The non-invasive nature of such applications ensures patient comfort during the extended periods of oxygen delivery. 

    Source: shutterstock.com / Photo Contributor: angellodeco

    Insertion Techniques

    Site preparation

    Before the medical providers insert the cannula, they need to carefully prepare the site. The process starts with selecting the right spot to insert the cannula based on the cannula type they’ll use and the medical procedure.

    Sterility is paramount in such interventions, so healthcare professionals adhere to strict aseptic techniques to minimize the risk of infections. They cleanse the site using antiseptic solutions, creating a safe cannula insertion environment

    Cannula insertion

    Inserting an instrument such as the cannula requires a skilled hand and an understanding of the human’s anatomical structures. For instance, for a peripheral cannula, the healthcare providers use a fine needle to puncture their selected vessel. When the needle is in place, the cannula advances into the vessel, and the needle is withdrawn, leaving the flexible tube in a position. 

    Regarding central venous and arterial cannulas, the insertion is even more intricate and may involve ultrasound guidance for accuracy. The medical providers must be precise to ensure proper placement and minimize patient discomfort. They need to monitor patients’ responses to make real-time adjustments to ensure success. 

    Securement

    Following the cannula insertion, the next step is proper securement. This involves affixing the cannula in place to prevent dislodgement. Depending on the cannula’s type and location, healthcare professionals use different securement devices, transparent dressings, or specialized adhesive anchors. Proper securement ensures stability and reduces the risk of complications. 

    Complications Associated With Cannula Use

    While they play an indispensable role in medical interventions, the use of the cannula is not without potential complications. Hence, medical providers need to understand these challenges to optimize effectiveness and ensure patient safety. 

    Infection

    Infections like redness and swelling are the primary concern associated with cannula use. Inserting a foreign object into the body increases the risk of bacterial contamination, even if it is only temporary. However, proper aseptic techniques during insertion and diligent maintenance of hygiene protocols can mitigate this risk. 

    Phlebitis

    Phlebitis, characterized by inflammation of the vein, is another complication connected to the use of cannulas. It may result from mechanical irritation, chemical factors, or infections. Monitoring for early signs and promptly addressing contributing factors, like choosing an appropriate vein and minimizing the duration of cannula placement, are essential strategies for preventing phlebitis.

    Extravasation

    Extravasation may occur when the fluids intended for IV administration leak into the surrounding tissues. This can be concerning when there is an administration of medications with potential tissue-damaging effects. Careful monitoring of cannula placement, securement, and immediate recognition of signs, such as swelling or discomfort at the infusion site, is crucial for preventing adverse outcomes.

    Cannula Care and Maintenance

    The safe and effective use of cannulas involves meticulous care and maintenance protocols for minimizing the risk of complications and ensuring the patient’s well-being. 

    Dressing changes

    Regular dressing changes are a fundamental aspect of cannula care. These dressings serve as a protective barrier against infection and provide stability. Healthcare professionals must adhere to stringent protocols to prevent microbial contamination. Sterile gauze, transparent dressings, or securement devices maintain cleanliness and promote optimal healing around the entry point.

    Site care

    Ongoing site care is integral for preserving the integrity of the cannula site. Hence, a regular inspection for signs of issues or problems is imperative. Therefore, healthcare providers must clean the surrounding area with antiseptic solutions to minimize the risk of infection. Additionally, proper securement of the cannula to prevent unintended dislodgement is important in maintaining the stability of the device.

    Gentle removal

    Just as the insertion, removing the cannula requires a careful approach. Hence, medical providers must follow established protocols to minimize discomfort and risk of infection. After ensuring that removal aligns with the patient’s medical progress, they must execute it precisely. 

    Source: shutterstock.com / Photo Contributor: ANGHI

    Conclusion

    If you’re curious about what is cannula, this informative post explains everything regarding this vital medical tool. This device is significant in modern medicine, employed for various purposes, including administering fluids or withdrawing blood. It facilitates medical professionals’ intricate processes to diagnose and treat various conditions.

  • 50+ Tips & Techniques on IV Insertion

    50+ Tips & Techniques on IV Insertion

    IV insertion is the process of placing a peripheral intravenous catheter into a vein to deliver fluids, medications, or nutrients directly into the bloodstream. Successful cannulation depends on preparation, vein selection, precise technique, and ongoing site management.

    This guide covers pre-insertion preparation, vein selection and difficult-access strategies, step-by-step catheter insertion technique, first-stick success optimization, special patient populations, common mistakes and complication management, pain reduction and infection prevention, and long-term skill development.

    Preparation begins with gathering the right supplies, matching catheter gauge to therapy type, assessing the patient’s medical history, and verifying the physician’s order. Selecting the correct gauge alone prevents one of the most common causes of insertion-related phlebitis.

    Vein selection requires both visual and tactile assessment across hand, forearm, and antecubital sites while avoiding areas of flexion, prior damage, or valve obstruction. When standard methods fail, layered strategies like tourniquet adjustment, warm compresses, gravity positioning, and ultrasound guidance help locate deeper or non-palpable vessels.

    The insertion sequence itself follows a strict order: tourniquet application, site disinfection, vein anchoring, controlled needle entry at 10 to 30 degrees, flashback confirmation, catheter advancement, securement, and saline flush verification. Each step builds on the previous one, and skipping any of them introduces avoidable risk.

    Adapting technique for pediatric, elderly, obese, dehydrated, dark-skinned, and pregnant patients requires shifting from visual-first to palpation-first strategies and adjusting catheter size, angle, and positioning for each group’s anatomy.

    Recognizing complications like infiltration, phlebitis, and extravasation early, combined with proper securement and aseptic maintenance, protects patients after the catheter is placed. Simulation training and first-stick tracking then close the loop between knowledge and consistent clinical performance.

    Why Is Proper IV Insertion Technique So Important?

    Proper IV insertion technique is important because it directly prevents mechanical complications that can harm patients. According to StatPearls (NCBI), proper IV site selection and insertion technique are critical to preventing mechanical complications such as air embolism and thrombosis. Even a small procedural error, whether in angle, depth, or site choice, can trigger complications that escalate quickly from minor discomfort to serious vascular events. For clinicians and mobile IV therapy professionals alike, mastering correct technique is not optional; it is the foundation that every other tip and strategy in this guide builds upon. The sections that follow cover preparation, vein selection, step-by-step insertion methods, and complication management to help sharpen that foundation.

    How Should You Prepare Before Starting an IV Insertion?

    You should prepare before starting an IV insertion by gathering supplies, selecting the correct catheter gauge, assessing the patient, and verifying the physician’s order. Each step below covers one essential preparation task.

    What Supplies and Equipment Do You Need for IV Insertion?

    The supplies and equipment you need for IV insertion include:

    • Appropriately sized IV catheter (gauge selected based on therapy type)
    • Tourniquet
    • Antiseptic solution (chlorhexidine or alcohol swabs)
    • Sterile transparent dressing or tape
    • Pre-filled normal saline flush syringe
    • Extension set or T-connector
    • Clean gloves (non-sterile for peripheral access)
    • Sharps disposal container
    • Labels and documentation materials

    Having everything within arm’s reach before gloving prevents interruptions that compromise aseptic technique. This single habit separates consistently clean insertions from avoidable contamination events.

    How Do You Select the Right IV Catheter Gauge?

    You select the right IV catheter gauge by matching catheter size to the prescribed therapy and the patient’s vein condition. According to the Merck Manuals, 18- or 20-gauge IV catheters are typically used for routine infusions in adults, while 14- or 16-gauge catheters are selected for high-volume infusions such as rapid fluid resuscitation or blood transfusions.

    Smaller gauges, like 22 or 24, suit pediatric patients and adults with small, fragile veins. Choosing the smallest gauge that delivers the required flow rate protects vein integrity and reduces phlebitis risk. Oversizing the catheter relative to the vein is one of the most preventable causes of insertion-related complications.

    What Patient Assessment Should You Complete Before IV Insertion?

    The patient assessment you should complete before IV insertion covers medical history, allergy status, coagulation risk, and skin integrity at potential insertion sites. Review the patient’s current medications, particularly anticoagulants, which increase bleeding risk during cannulation.

    Inspect both arms for bruising, scarring, infection, or prior infiltration. Patients with mastectomy history, arteriovenous fistulas, or lymphedema on one side require access on the opposite extremity. The CDC recommends chlorhexidine-impregnated dressings for patients aged 18 years and older to protect short-term central venous catheter sites, highlighting how site protection decisions begin during this assessment phase.

    How Should You Verify the Order and Confirm Patient Identity?

    You should verify the order and confirm patient identity by performing a two-patient-identifier check before any IV insertion. Match the patient’s name and date of birth against the physician’s order, the medication administration record, and the patient’s wristband.

    Confirm the prescribed solution, infusion rate, and route. This verification step catches transcription errors and wrong-patient scenarios before a needle ever touches skin. Skipping this step remains one of the most common sources of IV administration errors. With identity and order confirmed, the next priority is selecting the best available vein.

    How Do You Choose the Best Vein for IV Insertion?

    You choose the best vein for IV insertion by assessing visibility, palpability, and location while avoiding sites prone to complications. Common failures such as off-shot insertion, shallow puncture, and double puncture of the vein wall often trace back to poor vein selection.

    Best vein locations for IV insertion diagram showing dorsal hand veins, forearm veins, and antecubital veins

    What Makes a Vein Ideal for Peripheral IV Access?

    A vein ideal for peripheral IV access is one that feels bouncy and resilient on palpation, appears straight for an adequate length, and sits in a location away from joints or areas of flexion. Ideal veins refill quickly after compression and are large enough to accommodate the selected catheter gauge.

    Keeping the arm in a dependent position maximizes pooling of venous blood, making suitable veins easier to identify. According to standards introduced by the Australian Commission on Safety and Quality in Health Care, proper vein assessment and catheter management reduce complications and improve vascular access outcomes. A vein that looks prominent but feels hard or cord-like often indicates sclerosis, making it a poor candidate despite its visual appeal.

    Which Veins in the Hand Are Best for IV Insertion?

    The veins in the hand best for IV insertion are the dorsal metacarpal veins and the dorsal venous network. These superficial vessels sit on the back of the hand, where they are typically visible and easy to palpate.

    Dorsal metacarpal veins run between the knuckles and offer short, straight segments suitable for smaller-gauge catheters. The dorsal venous arch connects these tributaries and provides a slightly larger target. Hand veins work well for short-duration infusions, though they can be more painful due to thinner overlying tissue. Starting distally preserves proximal sites for future access if needed.

    Which Veins in the Forearm Are Best for IV Insertion?

    The veins in the forearm best for IV insertion are the cephalic vein and the accessory cephalic vein. Both run along the lateral (thumb-side) aspect of the forearm and provide long, straight segments with adequate caliber.

    • The cephalic vein travels from the wrist toward the elbow along the radial side, offering consistent depth and stability.
    • The accessory cephalic vein branches off the cephalic vein and provides an alternative when the primary vessel is unavailable.
    • The basilic vein on the medial forearm is another option, though its proximity to nerves and deeper position require more cautious palpation.

    Forearm sites are generally preferred for most infusions because the area allows secure catheter stabilization and comfortable patient movement.

    Which Veins in the Antecubital Fossa Are Best for IV Insertion?

    The veins in the antecubital fossa best for IV insertion are the median cubital vein, the cephalic vein, and the basilic vein where they converge at the inner elbow. The median cubital vein is the most commonly targeted because it is large, superficial, and well-anchored by surrounding tissue.

    These veins accommodate larger-gauge catheters and support rapid fluid delivery or blood draws. However, antecubital sites sit at a point of flexion, which increases the risk of catheter kinking and dislodgement during patient movement. For this reason, experienced clinicians typically reserve antecubital veins for short-term access, blood sampling, or emergency situations rather than extended infusions.

    What Veins Should You Avoid During IV Insertion?

    The veins you should avoid during IV insertion include those in areas of flexion, near previous puncture sites, and over joints. Clinicians should also avoid veins in an extremity affected by injury, surgery, or lymphedema.

    Specific veins and sites to avoid include:

    • Veins of the lower extremities, which carry a higher risk of thrombophlebitis.
    • The inner wrist, where nerves and tendons sit dangerously close to the vein.
    • Previously infiltrated or phlebitic sites that may be damaged.
    • Veins that feel hard, tortuous, or sclerosed on palpation.
    • Areas near arteriovenous fistulas used for dialysis.

    According to Pressbooks Nursing Advanced Skills guidelines, clinicians should avoid areas of flexion and must secure all catheters with a stabilization device to prevent accidental dislodgement. Selecting the right vein from the start sets the foundation for the techniques used to locate and access it.

    What Techniques Help You Find Difficult Veins?

    Techniques that help you find difficult veins range from simple physical methods to advanced imaging technology. The following sub-sections cover tourniquets, gravity positioning, warm compresses, tactile stimulation, vein finders, and ultrasound guidance.

    How Does Applying a Tourniquet Improve Vein Visibility?

    Applying a tourniquet improves vein visibility by restricting venous return, which causes blood to pool in the veins below the constriction point. This pooling engorges the vessels, making them more palpable and easier to see beneath the skin. Place the tourniquet 3 to 4 inches above the intended insertion site, tight enough to impede venous flow without occluding arterial supply. The patient should still have a palpable radial pulse. If veins remain flat after application, ask the patient to open and close their fist several times to promote additional engorgement.

    How Does Gravity Help Engorge Veins Before IV Insertion?

    Gravity helps engorge veins before IV insertion by encouraging venous blood to pool in the dependent extremity. Lowering the patient’s arm below heart level allows blood to fill peripheral veins more fully, increasing vessel diameter and improving palpability. This technique works especially well when combined with tourniquet application. For patients with chronically difficult access, having them dangle the arm over the side of the bed for 30 to 60 seconds before assessment can make a meaningful difference. In my experience, gravity is one of the most underused strategies; it costs nothing and consistently improves vein presentation when other methods fall short.

    Can Warm Compresses Help Dilate Hard-to-Find Veins?

    Yes, warm compresses can help dilate hard-to-find veins. Heat causes vasodilation, increasing blood flow to the area and expanding vein diameter. Apply a warm, moist towel or commercial heat pack to the target site for two to four minutes before attempting access. This approach is particularly effective for patients whose veins constrict due to cold environments, anxiety, or dehydration. Avoid excessive heat that could burn fragile skin, especially in elderly or neuropathic patients. Combining warmth with a tourniquet and gravity creates a layered strategy that maximizes vein presentation before the first stick.

    How Does Tapping or Stroking the Vein Aid Visualization?

    Tapping or stroking the vein aids visualization by triggering local vasodilation through mechanical stimulation. Gentle, rapid taps over the target vessel release histamine from surrounding tissue, which relaxes the vein wall and promotes engorgement. This makes the vein more prominent under the skin. Use light, controlled flicking rather than forceful slapping, which can cause the vein to spasm and retract. Stroking the vein distally to proximally while the tourniquet is applied can also push pooled blood into the target segment. This low-tech method pairs well with warm compresses for patients who have small or deeply seated veins.

    When Should You Use a Vein Finder or Transilluminator?

    You should use a vein finder or transilluminator when standard visual and tactile assessment fails to identify a suitable vessel. Near-infrared (NIR) vein finders project a map of subcutaneous veins onto the skin surface, revealing vessels invisible to the naked eye. These devices are especially valuable for pediatric patients, individuals with dark skin tones, and those with obesity or chronic IV access history. According to a ScienceDirect review, NIR light devices reduce peripheral IV cannulation time by 29.43 seconds and decrease attempts by 0.47 compared to traditional methods. For any clinician who routinely encounters difficult access, a vein finder is a worthwhile investment.

    How Can Ultrasound-Guided IV Insertion Help with Difficult Access?

    Ultrasound-guided IV insertion helps with difficult access by providing real-time visualization of deep or non-palpable veins beneath the skin surface. The clinician uses a linear probe to identify the vessel, confirm its patency, and guide the needle directly into the lumen under live imaging. A 2025 trial published in the National Institutes of Health reported a first-attempt success rate of 85.7% for ultrasound-guided peripheral IV catheter insertion. Guidewire-assisted PIVCs are also emerging in emergency departments to further improve success in patients with difficult venous access. Despite its effectiveness, confidence in this technique varies widely; only 26.1% of general staff nurses report confidence compared to 85.4% of specialized vascular access nurses. Dedicated training closes this gap and makes ultrasound guidance a reliable option across clinical settings.

    With difficult veins located, the next step is mastering the insertion technique itself.

    What Are the Step-by-Step Techniques for IV Catheter Insertion?

    The step-by-step techniques for IV catheter insertion follow a consistent sequence: tourniquet application, site disinfection, vein anchoring, needle insertion, flashback confirmation, catheter advancement, securement, and flush verification.

    Peripheral IV catheter insertion steps diagram showing tourniquet placement, needle angle entry, flashback check, and catheter threading

    How Do You Properly Apply the Tourniquet?

    You properly apply the tourniquet by placing it 3 to 4 inches above the intended insertion site and tightening it enough to occlude venous flow without cutting off arterial circulation. The patient should still have a palpable radial pulse below the tourniquet. Tie it using a quick-release knot so removal is immediate once venous access is established. According to a 2023 study published by the National Institutes of Health, tourniquet use for less than 2 hours is proven safe, while longer durations increase the risk of nerve injury or tissue ischemia. For most routine IV starts, the tourniquet should remain in place no longer than one to two minutes before reassessing.

    What Is the Correct Way to Disinfect the Insertion Site?

    The correct way to disinfect the insertion site is to apply a chlorhexidine-based antiseptic in a back-and-forth friction scrub for at least 30 seconds, then allow the area to air dry completely. Isopropyl alcohol (70%) serves as an acceptable alternative when chlorhexidine is unavailable. Never blow on, fan, or touch the prepped area after disinfection. Allowing full drying time is essential because inserting through a wet antiseptic layer can introduce chemicals into the vein and compromise the bactericidal effect. This single preparatory step remains one of the most effective measures against catheter-related bloodstream infections.

    How Do You Anchor the Vein Before Needle Entry?

    You anchor the vein before needle entry by placing your non-dominant thumb approximately 1 to 2 inches below the intended puncture site and applying gentle downward traction to stretch the skin taut. This stabilization prevents the vein from rolling laterally during needle advancement. For particularly mobile veins, applying counter-traction with a second finger above the site creates a more stable target. Anchoring is especially critical in elderly patients whose veins tend to shift under loose skin. Maintaining consistent traction throughout the entire insertion, not just at the moment of puncture, significantly reduces the likelihood of a missed attempt.

    What Is the Ideal Needle Insertion Angle?

    The ideal needle insertion angle is 10 to 30 degrees relative to the skin surface, with the bevel facing up. Shallower angles, closer to 10 to 15 degrees, work best for superficial veins in the hand or dorsal forearm. Slightly steeper angles, approaching 25 to 30 degrees, are more appropriate for deeper veins or patients with more subcutaneous tissue. Inserting at too steep an angle risks puncturing through the posterior wall of the vein. Once you see flashback in the chamber, reduce the angle slightly before advancing to keep the catheter tip aligned within the vessel lumen.

    How Do You Confirm You Have Achieved a Flashback?

    You confirm you have achieved a flashback by observing a small return of blood in the catheter’s flash chamber immediately after the needle tip enters the vein lumen. This blood return appears as a visible stream or pooling of dark venous blood in the transparent hub. A true flashback indicates successful venipuncture. If no flashback appears, the needle may be positioned outside the vein or against a valve. Avoid advancing blindly without confirmation. Once flashback is visible, pause briefly, lower the insertion angle, and prepare to advance the catheter forward off the needle stylet.

    How Do You Advance the Catheter and Retract the Needle?

    You advance the catheter and retract the needle by first lowering the insertion angle after flashback, then sliding the catheter hub forward over the needle and into the vein using a smooth, steady motion. Never push the needle deeper to advance the catheter. Once the catheter is fully seated, apply gentle pressure over the vein just above the catheter tip to minimize blood loss, then retract and safely dispose of the needle stylet into a sharps container. Two-thirds of the catheter length should sit inside the vein to ensure stability and reduce dislodgement risk.

    How Do You Secure the Catheter After Successful Insertion?

    You secure the catheter after successful insertion by applying a transparent, semi-permeable dressing over the insertion site and using a manufactured stabilization device to anchor the catheter hub. Proper securement prevents migration, accidental dislodgement, and phlebitis. First-attempt success in pediatric patients ranges from only 33% to 50%, according to Wiley Online Library, making reliable securement even more critical when access is hard-won. Label the dressing with the insertion date, catheter gauge, and clinician initials. Avoid excessive taping that could obscure the site, since ongoing visual assessment of the insertion point is necessary to detect early signs of complications.

    How Do You Flush and Confirm IV Patency?

    You flush and confirm IV patency by connecting a prefilled normal saline syringe to the catheter hub and slowly injecting 3 to 5 mL while observing for resistance, swelling, or patient discomfort. Smooth, unimpeded flow without visible tissue swelling confirms that the catheter rests properly within the vein lumen. If resistance is felt or the patient reports burning, the catheter may be kinked, against a valve, or extravascular. Use a pulsatile (push-pause) flushing technique to create turbulence that clears the catheter interior and reduces clot formation risk. With patency confirmed, the line is ready for IV fluid or medication administration.

    What Tips Improve First-Stick Success Rates?

    First-stick success rates improve through proper lighting, tactile vein assessment, strategic patient positioning, careful site selection, skin stabilization, and clinician mental preparation. Each technique below addresses a specific factor.

    How Does Proper Lighting Affect IV Insertion Success?

    Proper lighting affects IV insertion success by allowing clinicians to visualize superficial veins, skin contours, and subtle color changes that indicate vein location. Dim or overhead-only lighting casts shadows across the arm, obscuring vein paths and increasing the likelihood of missed attempts. Positioning a direct, adjustable light source at an angle across the skin highlights vein shadows and surface topology. When visibility remains limited despite good lighting, technology-assisted approaches dramatically outperform visual inspection alone. A randomized clinical trial published on ResearchGate found that ultrasound-guided PIVC insertion achieved a 90.2% first-attempt success rate compared to 35.7% with conventional technique. Combining strong ambient light with visualization tools gives clinicians the best chance at a clean first stick.

    Why Should You Palpate Rather Than Only Look for Veins?

    You should palpate rather than only look for veins because tactile assessment reveals vein characteristics that visual inspection alone cannot detect. Palpation identifies vein depth, resilience, and direction beneath the skin surface. A healthy, cannulatable vein feels bouncy and springs back when pressed, while a thrombosed or sclerosed vein feels hard and cordlike. In patients with darker skin tones, deeper subcutaneous tissue, or edema, veins may be entirely invisible yet easily palpable. Running the index finger along the forearm with the tourniquet applied helps map the vein’s path and locate the straightest segment. Clinicians who rely solely on visible veins miss viable access sites, particularly in difficult-access populations where palpation becomes the primary assessment tool.

    How Does Patient Positioning Impact Vein Accessibility?

    Patient positioning impacts vein accessibility by using gravity to pool venous blood in the extremities. Lowering the arm below heart level engorges peripheral veins, making them more prominent and easier to palpate. Asking the patient to open and close their fist several times further increases venous distension. For patients with morbid obesity, positioning becomes even more critical; according to a 2024 study published by Termedia, ensuring that two-thirds of the catheter sits inside the vein is a significant clinical challenge due to increased subcutaneous tissue depth. Elevating the patient’s wrist slightly on a rolled towel can straighten the forearm veins and improve both visibility and angle of approach. Proper positioning is one of the simplest yet most overlooked techniques for improving first-attempt outcomes.

    Why Should You Avoid Inserting Near Valves or Bifurcations?

    You should avoid inserting near valves or bifurcations because these anatomical features increase the risk of catheter obstruction, vessel damage, and failed advancement. Venous valves create small, firm lumps within the vein that block catheter threading, while bifurcation points introduce irregular vessel geometry that makes smooth cannulation difficult. According to NYSORA, clinicians should target areas just above a venous bifurcation where the vessel is straighter and more stable. Valves can be identified during palpation as small, resistant bumps along the vein’s path. Selecting a straight, valve-free segment reduces the chance of catheter kinking and improves overall insertion success.

    How Does Stabilizing the Skin Reduce Rolling Veins?

    Stabilizing the skin reduces rolling veins by anchoring the vessel in place during needle entry. Veins embedded in loose subcutaneous tissue tend to shift laterally when the needle makes contact, causing missed punctures. Applying firm downward traction with the non-dominant thumb, approximately two to three centimeters below the intended insertion site, stretches the skin taut and locks the vein into position. This counter-tension prevents the vein from deflecting away from the needle bevel. For patients with particularly mobile veins, applying traction from both sides using the thumb and forefinger creates a stable channel. Consistent skin stabilization is one of the most reliable ways to prevent rolling, especially in elderly patients or those with lax skin.

    What Mental Preparation Techniques Help Calm Nervous Clinicians?

    Mental preparation techniques that help calm nervous clinicians include controlled breathing, visualization, and pre-procedure routines. Taking three slow, deep breaths before gloving activates the parasympathetic nervous system and steadies hand tremor. Visualizing the complete insertion sequence, from tourniquet application through flashback confirmation, builds procedural confidence before touching the patient. Developing a consistent setup ritual, such as arranging supplies in the same order every time, reduces cognitive load and creates a sense of control. Acknowledging nervousness rather than suppressing it also helps; experienced clinicians recognize that mild anxiety sharpens focus. For newer practitioners, these techniques bridge the gap between classroom knowledge and clinical performance, translating into more confident, successful first sticks.

    How Do You Handle Special Patient Populations During IV Insertion?

    You handle special patient populations during IV insertion by adapting technique, equipment, and assessment strategies to each group’s unique anatomical and physiological challenges. The sub-sections below cover pediatric, elderly, obese, dehydrated, dark-skinned, and pregnant patients.

    How Do You Insert an IV in Pediatric Patients?

    You insert an IV in pediatric patients by using smaller-gauge catheters, age-appropriate distraction, and topical anesthetics to reduce pain and improve cooperation. First-attempt success in this population ranges from only 33% to 50%, making preparation critical.

    Applying topical numbing cream before venipuncture is standard practice, though product selection matters. A ScienceDirect study found that EMLA (lidocaine-prilocaine) cream produced significantly greater vasoconstriction at -26.28% versus -3.27% and skin blanching in 72.73% versus 25% of cases compared to 4% lidocaine. This vasoconstriction can make vein identification harder, so clinicians should map the target vein before the cream takes full effect. Securing a cooperative caregiver at bedside and using child life specialists, when available, meaningfully reduces insertion attempts.

    What Techniques Work Best for Elderly Patients with Fragile Veins?

    The techniques that work best for elderly patients with fragile veins include using the smallest effective catheter gauge, minimizing tourniquet pressure, and avoiding excessive skin traction. Aging reduces subcutaneous tissue and vein elasticity, making vessels prone to rolling and rupturing during cannulation.

    According to a 2024 study published in the National Institutes of Health (PMC), PIVC failure occurs in 5.9% of patients overall, with phlebitis accounting for 5.8% of complications. Elderly patients face disproportionately higher rates due to vessel fragility. To reduce risk:

    • Apply the tourniquet gently, just enough to distend the vein without collapsing fragile walls.
    • Insert at a shallow angle, typically 10 to 15 degrees.
    • Use a floating technique, advancing the catheter with a slow saline flush rather than mechanical force.
    • Consider ultrasound guidance when veins are not palpable.

    Patience during site selection often matters more than technique refinements in this population.

    How Do You Approach IV Insertion in Obese Patients?

    You approach IV insertion in obese patients by relying heavily on palpation over visualization, selecting longer catheters, and using ultrasound when surface landmarks are obscured. Increased subcutaneous tissue depth makes traditional visual assessment unreliable.

    Ensuring that two-thirds of the catheter sits inside the vein is a well-established stability benchmark, yet achieving this in patients with morbid obesity presents a significant clinical challenge due to deeper tissue layers. Key strategies include:

    • Prioritize the forearm over the hand, where tissue depth is often more manageable.
    • Use a blood pressure cuff as a tourniquet for more even venous distension across a larger arm circumference.
    • Extend the arm on a flat surface with the wrist slightly hyperextended to bring veins closer to the surface.

    Ultrasound-guided insertion is particularly valuable here, as it reveals vessel depth and trajectory that neither sight nor touch can reliably detect.

    What Should You Consider for IV Insertion in Dehydrated Patients?

    You should consider that dehydrated patients present with flattened, poorly distended veins that resist standard cannulation techniques. Reduced circulating volume causes veins to collapse more easily under tourniquet pressure.

    Pre-insertion interventions can significantly improve success:

    • Apply warm compresses for two to three minutes to promote vasodilation.
    • Lower the arm below heart level to encourage gravitational venous pooling.
    • Use a tourniquet higher on the arm, allowing more time for slow venous filling before attempting access.
    • Encourage oral fluid intake when clinically appropriate, even small amounts, before the attempt.

    If peripheral access remains elusive after two attempts, escalating to ultrasound guidance or consulting a vascular access specialist prevents unnecessary patient trauma. For clinicians working in mobile or home settings, recognizing dehydration severity early guides whether peripheral access is realistic or a different approach is warranted.

    How Do You Manage IV Insertion for Patients with Dark Skin Tones?

    You manage IV insertion for patients with dark skin tones by shifting from visual-first to palpation-first assessment strategies. Veins that would be visible on lighter skin may not produce visible surface landmarks on darker pigmentation.

    According to NURSING.com Academy, clinicians should prioritize palpation to identify suitable veins and may use alcohol swabs to enhance visualization by creating a temporary reflective surface on the skin. Additional effective techniques include:

    • Palpate systematically from distal to proximal sites, feeling for the characteristic spongy bounce of a viable vein.
    • Apply an alcohol swab and observe how light reflects off the moist surface to reveal subtle vein shadows.
    • Use transillumination or near-infrared vein finders when palpation alone is inconclusive.

    This population is often underserved by visual-only assessment protocols, making palpation skill development essential for equitable care.

    What Are the Best Practices for IV Insertion in Pregnant Patients?

    The best practices for IV insertion in pregnant patients include selecting the non-dominant hand or forearm, avoiding the antecubital fossa when possible to preserve mobility, and using the smallest gauge that meets therapeutic requirements. Pregnancy increases blood volume by approximately 30% to 50%, which can make veins more prominent yet also more prone to shifting due to tissue edema.

    Key considerations specific to this population:

    • Position the patient in a left lateral tilt or seated upright to reduce vena cava compression and improve venous return to the extremities.
    • Avoid repeated tourniquet application, as pregnancy-related edema increases bruising risk.
    • Communicate clearly about each step, since anxiety levels are often elevated during pregnancy.
    • Secure the catheter thoroughly, as increased activity and position changes raise dislodgement risk.

    With the right adaptations, population-specific IV insertion becomes a reliable, lower-stress experience for both clinician and patient.

    What Are Common IV Insertion Mistakes and How Do You Avoid Them?

    Common IV insertion mistakes include inserting too fast, using the wrong angle, skipping the flush, poor securement, and reinserting a retracted needle. The following subsections break down each error and how to prevent it.

    Why Does Inserting Too Fast Cause Through-and-Through Punctures?

    Inserting too fast causes through-and-through punctures because the needle passes completely through both walls of the vein before the clinician can react to the flashback. When speed overrides control, the bevel enters the anterior wall, blood appears in the flash chamber, but momentum carries the tip straight through the posterior wall. This results in a blown vein, hematoma formation, and a failed attempt. Slowing the advance after skin entry gives the clinician time to recognize flashback and flatten the angle before threading the catheter. A controlled, deliberate insertion pace is one of the simplest corrections that dramatically improves first-stick outcomes.

    How Does Incorrect Angle Lead to Failed IV Attempts?

    Incorrect angle leads to failed IV attempts because too steep an entry overshoots the vein lumen, while too shallow an approach causes the needle to ride along the vessel surface without penetrating it. According to a ResearchGate analysis of IV insertion failures, the most common causes include off-shot insertion, shallow puncture, and double puncture of the vein wall. A 15 to 30 degree insertion angle works best for most superficial peripheral veins. After flashback confirms entry, reducing the angle to nearly parallel with the skin allows smooth catheter advancement without piercing the posterior wall.

    Why Is Skipping the Flush a Dangerous Shortcut?

    Skipping the flush is a dangerous shortcut because it eliminates the only reliable way to confirm catheter patency and correct intravascular placement before infusing fluids or medications. Without a saline flush, an infiltrated or partially occluded catheter may go undetected until the patient develops swelling, pain, or tissue damage from extravasated solution. Flushing also clears residual blood from the catheter hub, reducing clot formation risk. This step takes seconds yet prevents complications that can require site removal, reinsertion, and extended patient discomfort. For any clinician tempted to skip this step during high-volume shifts, the time saved never justifies the downstream consequences.

    How Does Poor Securement Lead to Catheter Dislodgement?

    Poor securement leads to catheter dislodgement because an unstabilized catheter shifts with patient movement, gradually migrating out of the vein. It is recommended that two-thirds of the IV catheter length remain inside the vein to ensure stability and reduce dislodgement risk, according to Termedia (Maciej et al., 2024). When less than this length stays intravascular, even minor arm motion can pull the tip free. The CDC recognizes catheter stabilization as an intervention that decreases risk for phlebitis, catheter migration, and dislodgement. Using a manufactured stabilization device rather than tape alone provides consistent, secure fixation.

    Why Should You Never Reinsert a Retracted Needle into the Catheter?

    You should never reinsert a retracted needle into the catheter because doing so risks shearing the catheter tip, creating a plastic fragment that can embolize through the venous system. Once the needle retracts past the catheter tip, the sharp bevel faces the thin catheter wall. Pushing forward can slice through the plastic, releasing a fragment into the bloodstream that may travel to the lungs or heart. This complication, known as catheter embolism, requires interventional retrieval and poses life-threatening risk. If a catheter fails to advance properly, the correct response is to remove the entire assembly and start fresh at a new site.

    Recognizing these common insertion errors is the first step; reducing patient pain and anxiety during the procedure further improves outcomes.

    How Do You Minimize Patient Pain and Anxiety During IV Insertion?

    You minimize patient pain and anxiety during IV insertion by combining topical anesthetics, distraction methods, clear communication, and controlled insertion speed. Each strategy targets a different dimension of the patient experience.

    Does Numbing Spray or Topical Anesthetic Reduce IV Pain?

    Numbing spray and topical anesthetics do reduce IV pain. Agents like lidocaine and benzocaine create localized nerve blockade at the puncture site, dulling sharp sensation before the needle penetrates the skin. According to a study published by the National Institutes of Health (PMC), topical anesthetics like lidocaine 10% and benzocaine 20% are effective in reducing pain associated with peripheral intravenous cannulation. These products work best when applied several minutes before insertion, giving the active ingredient time to absorb fully. For clinicians performing high-volume IV starts, building topical anesthetic use into the standard workflow is one of the simplest upgrades available for patient satisfaction.

    How Does Distraction Technique Help Patients During IV Insertion?

    Distraction technique helps patients during IV insertion by redirecting cognitive attention away from the needle and puncture sensation. Common approaches include:

    • Asking the patient to take slow, deep breaths on a counted cadence.
    • Engaging the patient in conversation about an unrelated topic.
    • Using guided imagery or asking the patient to focus on a fixed point in the room.
    • Offering a cold stimulus, such as an ice pack, on the opposite arm to shift sensory focus.

    Distraction is especially effective for patients with needle phobia, because anxiety amplifies pain perception. Even brief cognitive redirection during the 5- to 10-second insertion window can meaningfully lower reported discomfort.

    What Communication Strategies Ease Patient Anxiety Before the Stick?

    Communication strategies that ease patient anxiety before the stick include setting expectations, using calm language, and giving the patient a sense of control. Effective techniques include:

    • Explaining each step before performing it so nothing feels sudden.
    • Using neutral phrasing like “pressure” or “pinch” instead of “pain” or “sting.”
    • Asking the patient which arm they prefer, which fosters a feeling of autonomy.
    • Maintaining a confident, unhurried tone throughout the interaction.

    Patients who understand what will happen next report lower anxiety scores. In my experience, the 30 seconds spent narrating the procedure saves time on re-sticks caused by a tense, vasoconstrictive patient.

    How Does Insertion Speed Affect Patient Comfort?

    Insertion speed affects patient comfort by determining how much tissue resistance and drag the patient feels. A smooth, moderately paced insertion reduces pain compared to both extremes. Inserting too slowly prolongs skin contact with the needle bevel, increasing discomfort. Inserting too fast risks through-and-through puncture, which causes a sharp pain spike and often requires a second attempt. The ideal approach is a confident, steady advancement at a consistent angle once the bevel breaks the skin. Controlled speed also gives the clinician time to watch for flashback without overshooting the vein.

    With pain and anxiety managed effectively, maintaining sterile technique becomes the next priority for safe IV therapy.

    What Are the Key Infection Prevention Practices for IV Insertion?

    The key infection prevention practices for IV insertion include maintaining aseptic technique, changing gloves at critical steps, and assessing the site regularly. These practices reduce catheter-related infections.

    How Do You Maintain Aseptic Technique Throughout IV Insertion?

    You maintain aseptic technique throughout IV insertion by keeping all supplies sterile, disinfecting the insertion site thoroughly, and avoiding contact with the prepared area. Hand hygiene with alcohol-based rub or soap and water must occur immediately before catheter insertion.

    Key components of aseptic technique include:

    • Cleaning the site with chlorhexidine-based antiseptic in a back-and-forth friction motion and allowing it to dry completely before needle entry.
    • Using only sterile, single-use catheter equipment and transparent semipermeable dressings.
    • Avoiding touching the cleaned insertion area after antiseptic application.
    • Performing hand hygiene again if the sterile field is compromised at any point.

    According to CDC intravascular catheter infection prevention guidelines, catheter stabilization also serves as an intervention to decrease the risk for phlebitis, catheter migration, and dislodgement. Even small breaks in sterile protocol can introduce pathogens, making disciplined adherence non-negotiable for every insertion.

    When Should You Change Gloves During the IV Insertion Process?

    You should change gloves during the IV insertion process at specific transition points where contamination risk increases. Fresh gloves are required after patient assessment, after tourniquet application, and immediately before site disinfection and catheter insertion.

    According to NCBI clinical guidance, nurses should be systematic when assessing potential vessels, examining sites both visually and through palpation while progressing from distal to proximal locations. Palpation during vein assessment inevitably contaminates gloves, so replacing them before handling sterile supplies is essential. Skipping this step is one of the most common yet preventable lapses in infection control during IV procedures.

    How Often Should a Peripheral IV Site Be Assessed and Rotated?

    A peripheral IV site should be assessed at least every shift (or per facility protocol) and rotated when clinically indicated. The CDC recommends replacing peripheral catheters no more frequently than every 72 to 96 hours in adults to reduce infection and phlebitis risk.

    Assessment should include visual inspection and gentle palpation for:

    • Redness, swelling, or tenderness suggesting phlebitis.
    • Coolness, pallor, or edema indicating infiltration.
    • Drainage, odor, or skin breakdown at the dressing site.

    Routine replacement solely based on a fixed time schedule is no longer universally required; clinical judgment based on site condition and catheter function guides the decision. For clinicians prioritizing patient safety, treating every assessment as an opportunity to catch early complications remains the most reliable approach to reducing catheter-related infections.

    What Complications Can Occur After IV Insertion and How Do You Manage Them?

    Complications that can occur after IV insertion include infiltration, phlebitis, extravasation, hematoma formation, and air embolism. Each complication requires prompt recognition and a specific management approach.

    IV infiltration, phlebitis, and extravasation infographic showing common IV site complications, warning signs, and response steps

    How Do You Recognize and Treat IV Infiltration?

    You recognize and treat IV infiltration by monitoring for swelling, coolness, and pallor at the IV site, then discontinuing the infusion immediately. Infiltration occurs when IV fluid leaks from the vein into surrounding tissue, often due to catheter dislodgement or vein wall perforation.

    Key signs include:

    • Localized swelling or puffiness near the insertion site
    • Skin that feels cool to the touch compared to the opposite limb
    • Slowed or stopped infusion flow
    • Patient complaints of tightness or discomfort

    To manage infiltration, stop the infusion, remove the catheter, and elevate the affected limb. Apply a warm compress for isotonic solutions or a cold compress for certain medications. Document the event and restart IV access at a new site, preferably on the opposite extremity.

    What Are the Signs of Phlebitis at an IV Site?

    The signs of phlebitis at an IV site are redness, warmth, tenderness, and a palpable cord along the vein path. Phlebitis is inflammation of the vein wall caused by mechanical irritation, chemical irritation from infusates, or bacterial contamination. According to the AMOR-VENUS prospective cohort study, PIVC-related phlebitis occurred in 7.5% of catheters, representing 3.3 cases per 100 catheter-days in critically ill patients.

    Management steps include:

    • Removing the catheter immediately upon symptom detection
    • Applying warm compresses to the affected area
    • Elevating the extremity to reduce swelling
    • Documenting severity using a standardized phlebitis scale
    • Restarting access at a new site, moving proximal on the opposite arm when possible

    Phlebitis that goes unaddressed can progress to thrombophlebitis, making early identification essential for patient safety.

    How Do You Identify and Respond to an Extravasation Event?

    You identify and respond to an extravasation event by watching for burning pain, blistering, or tissue blanching during vesicant medication infusion, then stopping the drug immediately. Extravasation differs from infiltration because it involves the leakage of vesicant or cytotoxic agents capable of causing tissue necrosis.

    Immediate response steps are:

    • Stop the infusion without removing the catheter initially
    • Aspirate residual medication through the catheter before removal
    • Administer the appropriate antidote based on the extravasated agent
    • Apply warm or cold compresses depending on the specific drug protocol
    • Notify the physician and document the estimated volume of extravasate

    Because tissue damage can progress over hours or days, close follow-up monitoring is critical. For most clinical teams, having an extravasation kit readily accessible prevents delays during these time-sensitive events.

    What Should You Do If a Hematoma Forms During IV Insertion?

    You should apply direct pressure to the site immediately if a hematoma forms during IV insertion. A hematoma develops when blood leaks into surrounding tissue, typically caused by through-and-through vein puncture or inadequate pressure after catheter removal.

    To manage a hematoma effectively:

    • Remove the catheter and apply firm, direct pressure for at least five minutes
    • Elevate the affected extremity above heart level
    • Apply a cold compress during the first 24 hours to limit swelling
    • Avoid reusing the same vein or inserting distal to the hematoma site

    Patients on anticoagulants or those with coagulopathies are at higher risk. For these individuals, extending pressure time to 10 minutes or longer and selecting veins with good surrounding tissue support reduces recurrence.

    How Do You Manage an Air Embolism Risk During IV Therapy?

    You manage an air embolism risk during IV therapy by ensuring all IV tubing is properly primed, connections are secured with Luer-lock fittings, and air is purged before line attachment. Air embolism occurs when air enters the venous system through disconnected or improperly flushed IV lines.

    Prevention measures include:

    • Priming all tubing completely before connecting to the patient
    • Using Luer-lock connections to prevent accidental disconnection
    • Positioning the patient flat or in Trendelenburg during central line access
    • Clamping tubing before any disconnection or bag change

    If air embolism is suspected, place the patient in the left lateral decubitus position with the head lowered. This traps air in the right ventricle and prevents it from entering the pulmonary vasculature. Administer high-flow oxygen and notify the medical team immediately.

    Recognizing complications early is the foundation of safe IV practice; professional IV therapy services build these protocols into every session.

    How Do You Maintain and Improve Your IV Insertion Skills Over Time?

    You maintain and improve IV insertion skills through simulation training, performance tracking, and continuing education. Each approach targets a different aspect of skill development.

    How Does Simulation Training Build IV Insertion Confidence?

    Simulation training builds IV insertion confidence by providing repeatable, low-risk practice environments where clinicians refine technique without patient harm. Realistic manikin arms and virtual reality modules let practitioners drill vein selection, needle angle, and catheter advancement until muscle memory develops. According to a 2025 ScienceDirect meta-analysis of 15 studies, simulation-based training improved IV insertion success by 22% and reduced complications by 18%. These controlled settings also allow instructors to introduce difficult-access scenarios, helping clinicians build problem-solving skills they can transfer directly to bedside care.

    Why Is Tracking Your First-Stick Success Rate Valuable?

    Tracking your first-stick success rate is valuable because it creates a measurable baseline that reveals skill progression and identifies patterns behind missed attempts. A clinician who logs each insertion can pinpoint whether failures cluster around specific patient populations, catheter gauges, or vein locations. According to ESMED, first-attempt success rates for newly qualified nurses range from 44% to 76.9%, while experienced clinicians achieve 91% to 98%. That gap underscores why ongoing measurement matters; without data, improvement remains anecdotal rather than actionable.

    What Continuing Education Resources Sharpen IV Insertion Technique?

    Continuing education resources that sharpen IV insertion technique include peer-led simulation workshops, online procedural courses, and hands-on vascular access certification programs. According to a 2024 study published in the National Institutes of Health, simulation-based peer learning provides substantial evidence for skill improvement in procedures like IV insertion. Professional organizations also offer webinars and conference sessions covering emerging tools such as ultrasound-guided access and near-infrared vein finders. Investing in structured learning keeps clinicians current with evolving best practices and clinical standards.

    How Can Professional IV Therapy Services Enhance Your Experience?

    Professional IV therapy services enhance your experience by combining clinical expertise with the convenience of at-home care. The following sections cover how The Drip IV Infusion delivers mobile nurse-led IV treatments and the essential takeaways from this guide.

    Can The Drip IV Infusion’s Mobile Nurses Deliver Expert IV Care at Home?

    Yes, The Drip IV Infusion’s mobile nurses can deliver expert IV care at home. Founded in Fall 2022 by professionals with decades of experience in nursing, emergency medicine, and IV medical techniques, The Drip IV Infusion brings clinical-grade infusions directly to clients across Arizona. The service menu includes specialized blends for immune support, beauty enhancement, hydration, and recovery, all administered by trained nurses who apply the same evidence-based insertion techniques covered throughout this guide.

    According to a 2025 Congruence Market Insights report, the global on-demand healthcare and mobile IV therapy platforms market was valued at USD 113.0 million in 2025 and is projected to reach USD 345.7 million by 2030. This rapid growth reflects increasing demand for patient-centered care delivered outside traditional clinical settings. For anyone who wants proper technique, comfort, and convenience without visiting a clinic, The Drip IV Infusion offers a practical solution.

    What Are the Key Takeaways About IV Insertion Tips and Techniques?

    The key takeaways about IV insertion tips and techniques center on preparation, precision, and continuous skill development. This guide covered the essential practices every clinician and patient should understand:

    • Proper vein selection, catheter gauge matching, and site disinfection form the foundation of successful IV insertion.
    • Techniques such as tourniquet application, warm compresses, gravity positioning, and ultrasound guidance help locate difficult veins.
    • First-stick success depends on correct needle angle, skin stabilization, and palpation over visual assessment alone.
    • Special populations, including pediatric, elderly, obese, and dehydrated patients, require adapted approaches for safe access.
    • Avoiding common mistakes like inserting too fast, skipping the flush, or reinserting a retracted needle prevents complications.
    • Pain management through topical anesthetics, distraction, and clear communication improves the patient experience.
    • Infection prevention through aseptic technique, timely site rotation, and proper catheter securement reduces phlebitis and infiltration risk.
    • Simulation training and tracking first-stick rates accelerate long-term skill improvement.

    Mastering these fundamentals benefits both clinical professionals refining their craft and individuals seeking informed, comfortable IV therapy experiences with services like The Drip IV Infusion.

  • What Is IV Catheter?

    What Is IV Catheter?

    In the realm of modern medicine, healthcare professionals often use a medical device like an IV catheter to administer essential nutrients, medications, and fluids directly into the patient’s bloodstream. But what is IV catheter exactly? 

    This instrument plays a crucial role in delivering fluids swiftly, effectively, and with high precision. Hence, this post will explore its various types and unravel its significance in various medical procedures. By understanding the fundamentals, you can gain valuable insights into how this medical tool enhances patient care.

    Source: shutterstock.com/ Photo Contributor: Noiel

    What Is IV Catheter? – IV Catheter Definition 

    An intravenous catheter is a flexible tube typically made from materials like plastic or silicone. This is the primary component of the IV system and is inserted into the vein, typically the patient’s arm and hand.

    It is a common medical tool used for various treatments and therapies, including mobile IV therapy Arizona. The catheter stands as a lifeline in the realm of medical interventions, serving as a conduit for delivering essential nutrients and medications. When the healthcare professionals expertly insert it into the patient’s vein, it unlocks a pathway for a swift and controlled administration of fluids.

    Anatomy of an IV catheter 

    The intricate anatomy of the IV catheter encompasses components designed to ensure treatment efficiency, patient safety, and comfort. At its core is a hollow transparent tube that enables healthcare providers to monitor the flow of the fluids. At its end is a sharp yet atraumatic needle that facilitates smooth penetration into the patient’s vein, designed to minimize the patient’s discomfort. 

    Components of an IV catheter

    The IV catheter features a few elements for seamless functionality. It consists of a catheter hub situated at the end. Additionally, the catheter has wings or stabilizing fins to assist in securing the catheter in place once inserted and prevent inadvertent dislodgement.

    Sizes and gauges of an IV catheter

    The diversity in patient needs requires a range of sizes and gauges for IV catheters. The gauge is the catheter’s diameter and influences the fluids’ flow rate. Smaller gauges are suitable for delicate veins and pediatric patients.

    Larger gauges, on the other hand, accommodate rapid fluid administration, which is essential in critical situations. Choosing the appropriate size and gauge is crucial for optimal performance tailored to the specific requirements of each scenario. 

    The medical providers choose a catheter based on the patient’s age, condition, treatment requirements, as well as the viscosity of the fluids they will infuse. 

    Types of IV Catheters

    IV catheters play a pivotal role in modern healthcare. Such precision instruments are designed to navigate the complexities of vascular access. There are various types of IV catheterizations designed to cater to medical needs. 

    Peripheral catheter

    Peripheral catheters are generally used for short-term use. Healthcare professionals insert this type of catheter into the peripheral vein, typically into the arm or hand. This catheter is ideal for delivering nutrients, fluids, and medications, and it’s a convenient and less invasive option for patients requiring intravenous treatments. 

    Midline IV catheter

    Compared to the peripheral, the midline IV catheter is designed for long-term use. It is typically inserted into the upper arm and extends through larger veins but doesn’t reach the central vessels. 

    The midline catheter is commonly used for patients who need treatment for an extended period, typically longer than one or two days. Compared to the other types that require frequent changes, the midline IV catheter can stay in place longer. 

    Source: shutterstock.com/ Photo Contributor: Advertisement Graphics

    Central venous catheter

    This type of catheter is used for more complex situations. It is inserted into a large vein above the heart and facilitates the rapid flow of fluids and medications directly to the central circulatory system. 

    There are also subtypes, like peripherally inserted central catheters (PICC) and tunneled catheters, designed to meet specific requirements.

    Indications for IV Catheterization

    Administration of fluids and medications

    IV catheters are routinely employed for direct and controlled delivery of fluids and medications. Since the IV bag’s fluids, nutrients, and medications bypass the digestive system, the patient may experience their effects quickly after the treatment. 

    This makes IV catheters to be irreplaceable for emergency situations or when an immediate therapeutic intervention is needed.

    From administering necessary medications and boosting immunity to rehydrating the body and replenishing it with necessary nutrients, the IV route offers medical professionals an effective and direct avenue for treatment.

    Blood sampling

    Aside from medication and nutrient administration, IV catheters are also employed for blood sampling. Using it, healthcare providers conveniently draw blood samples directly from the venous system. This is done to facilitate diagnostic testing, monitor blood parameters, and provide a timely assessment of the patient’s condition.

    Monitoring of vital signs

    Continuous monitoring of vital signs is crucial for patient care. IV catheters enable healthcare providers to connect patients with monitoring devices. By doing so, they can ensure real-time tracking of parameters such as heart rate, blood pressure, and oxygen saturation. This minimally invasive approach may reduce patient discomfort while enabling accurate diagnoses.

    Procedure for IV Catheter Insertion

    Preparing the patient and equipment

    The first step towards IV infusion is thorough preparation. This involves obtaining informed consent from the patient, accessing their medical history, and identifying any issues. 

    To prepare for an IV treatment, the medical providers gather the necessary equipment, such as a catheter of appropriate size, sterile gloves, and disinfectants.

    Site selection

    Selecting the optimal site for catheter insertion is crucial in IV infusion as it can influence both the success of the therapy and the patient’s comfort. To make the right choice, healthcare professionals are guided by the patient’s age, medical condition, and the purpose of the IV treatment.

    Insertion technique

    IV therapy is implemented by a licensed and skilled healthcare professional. They begin with cleansing the site for insertion with an antiseptic solution to minimize the risk of infection.

    Then, they use the catheter equipped with a sharp needle and insert it at a slight angle into the vein. Once they confirm a successful entry, they retract the needle, leaving the catheter in place.

    Securing the catheter

    Securing the catheter is essential for stability and prevention of accidental dislodgement. To secure the catheter hub and the insertion site, medical providers often use adhesive or transparent film dressings. They should do this with utmost care to avoid excessive tension on the catheter and reduce the risk of complications.

    Source: shutterstock.com/ Photo Contributor: MedstockPhotos

    Conclusion

    In modern medicine’s dynamic landscape, IV infusion with the help of a catheter is a cornerstone to ensure effective and rapid treatment. If you were curious about what is IV catheter, this post gave you some valuable information about this essential medical tool.

    It has applications in various scenarios, contributing to patients’ overall well-being. Its insertion requires a combination of technical proficiency, aseptic practices, and patient-centered care. By mastering the art, healthcare providers can provide streamlined medical interventions.

  • Discover types of IV set & uses

    Discover types of IV set & uses

    An IV set is a sterile medical device that delivers fluids, medications, and nutrients directly into a patient’s vein through a closed pathway from a fluid source to the vascular system. This guide covers IV set classification systems, patient-specific selection criteria, clinical and wellness applications, delivery mechanics, and essential safety protocols.

    IV sets are classified by drip chamber size into macro drip sets (10, 15, or 20 drops per milliliter) and micro drip sets (60 drops per milliliter), with each calibration controlling infusion speed and volume precision for different patient needs.

    Beyond chamber size, IV sets vary by design and function. Primary sets establish the main fluid line, secondary sets piggyback intermittent medications, blood transfusion sets integrate inline filters sized between 170 and 260 microns, and specialized options like vented, light-resistant, and volume-controlled sets each solve a specific clinical problem.

    Choosing the right IV set depends on the patient population and prescribed therapy. Adult patients typically use macro drip sets for higher-volume delivery, while pediatric and neonatal patients require micro drip or burette sets that limit fluid availability and prevent overload. Blood products and chemotherapy agents each demand dedicated set configurations with precise filtration and light protection.

    IV sets serve four core clinical functions: fluid replacement, medication delivery, nutritional support, and blood product administration. Each application pairs with specific tubing types, container compatibility requirements, and regulatory replacement intervals that govern safe use.

    These same principles now extend beyond hospitals. Mobile IV therapy services use nurse-administered setups in homes and workplaces, applying identical safety standards (proper drip chamber fill levels, sterile technique, and correct set matching) to deliver professional-grade wellness infusions outside traditional clinical environments.

    What Is an IV Set and How Does It Work?

    An IV set is a medical device used to deliver fluids, nutrients, and medications directly into a patient’s vein. The sections below cover its main components and its fluid delivery mechanism.

    What Are the Main Components of an IV Set?

    The main components of an IV set include:

    • Spike: A rigid, pointed connector that pierces the port of an IV fluid container to establish a sterile fluid pathway.
    • Drip chamber: A transparent reservoir that allows visual monitoring of the infusion rate and prevents air from entering the tubing.
    • IV tubing: Flexible, sterile tubing that channels fluid from the drip chamber to the patient.
    • Roller clamp: An adjustable mechanism that regulates or stops fluid flow through the tubing.
    • Injection port: A self-sealing access point for administering secondary medications without disconnecting the line.
    • Connector (Luer lock): A secure fitting that attaches the tubing to the IV catheter inserted in the patient’s vein.

    Each component maintains a closed, sterile pathway from the fluid source to the patient’s vascular system. Understanding these parts helps clinicians and patients recognize how safe, controlled infusion is achieved.

    IV set components diagram including spike drip chamber tubing roller clamp injection port and luer connector

    How Does an IV Set Deliver Fluids Into the Body?

    An IV set delivers fluids into the body through either gravity or mechanical pump pressure. Gravity-driven infusions rely on the height of the fluid column above the patient to generate downward pressure, pushing fluid through the tubing and into the vein. Peristaltic infusion pumps, by contrast, use mechanical force to deliver a specific volume at a predetermined rate, according to a 2024 review published in the National Center for Biotechnology Information.

    Once the spike pierces the IV container, fluid flows into the drip chamber, where healthcare providers can visually count drops to confirm the correct rate. From there, the roller clamp fine-tunes flow before fluid reaches the catheter site. This simple yet precise system makes IV sets foundational to both hospital care and mobile wellness infusions.

    What Are the Types of IV Sets Based on Drip Chamber Size?

    The types of IV sets based on drip chamber size are macro drip sets and micro drip sets. Each delivers a different number of drops per milliliter, which directly affects infusion speed and precision.

    Macro Drip IV Set

    A macro drip IV set delivers fluid in larger drops, with a drop factor of 10, 15, or 20 drops per milliliter. According to the National Library of Medicine, this contrasts with micro drip sets, which are standardized at 60 drops per milliliter. Clinicians select macro drip sets when patients need rapid fluid delivery, typically at rates exceeding 100 mL per hour. Common applications include emergency resuscitation, surgical fluid replacement, and large-volume hydration for adult patients. Because fewer drops are needed per milliliter, macro drip tubing moves higher volumes in less time. For most adult clinical scenarios requiring aggressive hydration, macro drip sets remain the default choice.

    Micro Drip IV Set

    A micro drip IV set delivers fluid at a standardized rate of 60 drops per milliliter, producing much smaller drops than macro drip tubing. This precision makes micro drip sets ideal for infusion rates below 100 mL per hour, where even slight volume variations could affect patient safety. Pediatric and neonatal patients benefit most from this controlled delivery, since their smaller body weight demands exact fluid dosing. Micro drip sets also pair well with infusion pumps for medications requiring tight rate control, such as vasopressors or analgesics. When volume accuracy matters more than speed, micro drip tubing is the safer, more reliable option.

    Beyond drip chamber size, IV sets also vary by design features that determine their clinical function.

    Macro vs micro drip chamber comparison showing 20 drops per mL for high volume and 60 drops per mL for precise control

    What Are the Types of IV Sets Based on Design and Function?

    The types of IV sets based on design and function include primary, secondary, blood transfusion, vented, non-vented, dial-a-flow, volume-controlled, light-resistant, and pump-compatible sets. Each design serves a specific clinical purpose.

    Primary IV Set

    A primary IV set is the main infusion line that connects directly from the IV fluid container to the patient’s vascular access site. This set establishes the principal fluid pathway and typically includes a spike, drip chamber, roller clamp, and injection port. Primary IV sets deliver continuous infusions of crystalloids, medications, or nutritional solutions. Because they serve as the foundational delivery line, all other IV set types either replace or connect to a primary set. For most standard adult infusions, this is the first set selected.

    Secondary IV Set

    A secondary IV set is a shorter tubing line that connects to the primary set through an injection or Y-port. Clinicians use secondary sets to administer intermittent medications, such as antibiotics or supplemental electrolytes, without interrupting the primary infusion. The secondary bag hangs higher than the primary bag so gravity directs the secondary fluid first. Once that infusion finishes, the primary line resumes automatically. This piggyback configuration reduces the need for multiple venous access sites.

    Blood Transfusion IV Set

    A blood transfusion IV set is a specialized infusion line designed exclusively for delivering blood and blood products. According to Canadian Blood Services, blood administration sets require a standard filter with a pore size ranging from 170 to 260 microns to trap cell fragments, clots, or particulate matter that may develop during storage. The wider-bore tubing accommodates the viscosity of packed red blood cells and whole blood. Standard IV sets should never substitute for blood transfusion sets, since the integrated filter is essential for patient safety.

    Vented IV Set

    A vented IV set is an infusion line that features a small air vent in the spike to allow ambient air into the fluid container. Rigid glass bottles and some hard plastic containers require this air entry for fluid to flow out by gravity. Without the vent, a vacuum forms inside the bottle and stops the infusion. When using collapsible plastic bags, a vented set is unnecessary because the bag collapses as fluid exits. Selecting the wrong vent type for the container can halt fluid delivery entirely, making this distinction clinically important.

    Non-Vented IV Set

    A non-vented IV set is an infusion line without an air vent in the spike, designed for use with collapsible plastic IV bags. These bags compress naturally as fluid drains, eliminating the need for air replacement. Non-vented sets reduce the risk of airborne contamination entering the fluid pathway. Most modern hospital infusions use flexible plastic bags, making non-vented sets the more common choice in contemporary clinical practice. Pairing a non-vented set with a rigid glass bottle will prevent fluid flow.

    Dial-a-Flow IV Set

    A dial-a-flow IV set is an infusion line with a built-in flow regulator that allows clinicians to select a specific flow rate by turning a dial. The dial is calibrated in milliliters per hour, replacing manual roller clamp adjustments with a more precise, pre-set mechanism. These sets are particularly useful in settings where electronic infusion pumps are unavailable. While not as precise as programmable pumps, dial-a-flow sets offer a reliable middle ground between gravity-only control and full electronic regulation.

    Volume-Controlled IV Set (Burette Set)

    A volume-controlled IV set, commonly called a burette set, is an infusion line with a calibrated fluid chamber (burette) positioned between the IV bag and the drip chamber. This chamber limits the volume of fluid available for infusion at any given time. Clinicians fill the burette with a measured amount, preventing accidental delivery of excess fluid. The measured-volume approach makes the burette set one of the most practical safeguards against fluid overload in patients who require strict volume management.

    Light-Resistant IV Set

    A light-resistant IV set is an infusion line made from amber-colored or opaque tubing that shields photosensitive medications from degradation caused by ultraviolet or visible light exposure. Drugs such as nitroprusside, certain vitamins, and some chemotherapy agents lose potency when exposed to light during infusion. Standard clear tubing offers no such protection. Substituting a light-resistant set preserves medication efficacy throughout the entire delivery process.

    Pump-Compatible IV Set

    A pump-compatible IV set is an infusion line engineered to interface with electronic infusion pumps. The tubing segment that loads into the pump mechanism has specific dimensions and material properties matched to the pump’s peristaltic or cassette system. Using non-compatible tubing can cause inaccurate flow rates or pump alarms. These sets enable precise, programmable delivery measured in fractions of a milliliter per hour. Understanding each IV set’s design purpose ensures clinicians match the right equipment to each clinical scenario.

    What Are the Types of IV Sets Based on Number of Ports?

    The types of IV sets based on number of ports are single-port IV sets and multi-port (Y-type) IV sets. Each configuration determines how many fluid sources can connect to one IV line simultaneously.

    Single-Port IV Set

    A single-port IV set features one connection point between the IV container and the tubing. This design channels a single fluid source through the administration line to the patient’s vein. Single-port sets are standard for straightforward infusions where only one solution is needed, such as normal saline for hydration or a single medication drip. Because only one fluid pathway exists, the setup is simpler and reduces the risk of accidental flow interactions between incompatible solutions. For most routine infusions requiring just one fluid at a time, a single-port configuration is the most practical and cost-effective choice.

    Multi-Port (Y-Type) IV Set

    A multi-port (Y-type) IV set connects two or more fluid sources into a single IV line through a Y-shaped connector. This configuration allows clinicians to administer multiple solutions simultaneously or switch between fluids without disconnecting the tubing. Y-type sets are commonly used during blood transfusions, where normal saline must run alongside the blood product, and in surgical settings requiring rapid fluid changes. The Y-connector merges separate fluid pathways before the drip chamber, enabling controlled co-infusion. For patients needing complex multi-fluid protocols, Y-type sets reduce the need for additional venous access sites, which improves patient comfort and streamlines clinical workflow.

    Understanding port configurations helps determine the right setup for each clinical scenario, which connects directly to broader patient selection criteria.

    How Do You Choose the Right IV Set for a Patient?

    You choose the right IV set for a patient by matching the set type to the patient’s age, infusion rate, and the specific fluid or medication being administered. The sections below cover selection criteria for adults, pediatric patients, blood products, and chemotherapy.

    What Type of IV Set Is Best for Adult Patients?

    The best type of IV set for adult patients is typically a macrodrip set. Macrodrip sets deliver fluids at higher volumes, making them well suited for standard hydration, medication administration, and fluid resuscitation in adults. Most adult infusions require rates above 100 mL/hr, where macrodrip tubing provides efficient flow without excessive drop counting. For slower infusions or precise dosing, a secondary microdrip set or pump-compatible set may be paired with the primary line. Clinicians should also consider whether a vented or non-vented set is needed based on the fluid container type. Matching the IV set to the prescribed therapy prevents dosing errors and supports safe, effective delivery.

    What Type of IV Set Is Used for Pediatric Patients?

    The type of IV set used for pediatric patients is a microdrip set or a volume-controlled burette set. Microdrip sets are indicated for infusion rates less than 100 mL/hr or for pediatric and neonatal patients requiring precise volume control, according to Simple Nursing. Because children have smaller blood volumes and lower fluid tolerances, even minor miscalculations can cause harm.

    Burette sets add another layer of safety by limiting the amount of fluid available for infusion at any given time. This design prevents accidental fluid overload. In practice, pairing a microdrip set with an infusion pump offers the highest accuracy for pediatric dosing. For any provider working with young patients, prioritizing volume-controlled delivery is non-negotiable.

    What Type of IV Set Is Recommended for Blood Products?

    The type of IV set recommended for blood products is a blood administration set with an in-line filter. This specialized filter features a pore size ranging from 170 to 260 microns, which traps cell fragments, clots, and particulate matter that develop during storage. Standard IV sets lack this filtration capability, making them unsafe for transfusions.

    Blood administration sets also use larger-bore tubing to accommodate the viscosity of packed red blood cells and whole blood. Multi-port Y-type configurations allow simultaneous saline flushing during transfusion. Using the correct blood set reduces the risk of transfusion reactions and ensures the patient receives a clean, filtered product.

    What Type of IV Set Is Used for Chemotherapy?

    The type of IV set used for chemotherapy is a pump-compatible, light-resistant IV set designed specifically for cytotoxic drug delivery. Many chemotherapy agents are photosensitive, so amber-colored or opaque tubing prevents degradation from ultraviolet or visible light exposure. Pump compatibility ensures precise volumetric dosing, which is critical given the narrow therapeutic windows of most chemotherapy drugs.

    Luer-lock connections are standard on chemotherapy IV sets to prevent accidental disconnection and hazardous drug exposure. Closed-system transfer devices may also integrate with the set to protect healthcare workers. Selecting the right chemotherapy IV set safeguards both the drug’s efficacy and the safety of everyone involved in its administration.

    With the right IV set matched to each patient scenario, understanding common clinical applications adds further context to how these sets perform in practice.

    Guide to choosing the right IV set for adult pediatric blood transfusion and chemotherapy applications with proper flow rates

    What Are the Common Uses of IV Sets in Medical Settings?

    The common uses of IV sets in medical settings include fluid replacement, medication administration, nutritional support, and blood product delivery. Each application requires specific IV set configurations.

    How Are IV Sets Used for Fluid Replacement and Rehydration?

    IV sets are used for fluid replacement and rehydration by delivering crystalloid or electrolyte solutions directly into a patient’s vein, bypassing the gastrointestinal tract for immediate absorption. The choice between vented and non-vented sets depends on the fluid container. Vented IV sets feature a small air vent in the spike that allows ambient air entry for fluid flow from rigid glass or plastic bottles, while non-vented sets pair with collapsible plastic bags that compress as fluid drains. Matching the correct set type to the container prevents flow interruption. For most clinical rehydration scenarios, selecting the appropriate set ensures consistent, uninterrupted delivery at the prescribed rate.

    How Are IV Sets Used for Medication Administration?

    IV sets are used for medication administration by creating a sterile pathway that delivers drugs in fluid form directly into a patient’s vascular system. According to CIA Medical, an IV administration set is a medical device designed to deliver nutrients and medications from a fluid source to the patient’s vein, optimizing both speed and bioavailability.

    Certain medications require specialized tubing. Light-resistant IV sets, which feature amber-colored or opaque tubing, protect photosensitive drugs from degradation caused by ultraviolet or visible light exposure. This specialized design is essential for medications like nitroprusside and certain chemotherapy agents, where light exposure would reduce therapeutic efficacy. Proper set selection directly affects drug stability and patient outcomes.

    How Are IV Sets Used for Nutritional Support?

    IV sets are used for nutritional support by delivering total parenteral nutrition (TPN) or partial parenteral nutrition solutions containing amino acids, dextrose, lipids, vitamins, and electrolytes. Because TPN formulations are nutrient-dense and often lipid-based, they typically require dedicated IV tubing to prevent contamination and ensure compatibility. Filtered sets help remove particulate matter from complex nutritional solutions. Clinicians generally avoid running other medications through the same line to maintain solution integrity. This targeted approach sustains patients who cannot absorb adequate nutrition through oral or enteral routes.

    How Are IV Sets Used for Blood and Blood Product Delivery?

    IV sets are used for blood and blood product delivery by incorporating specialized inline filters that trap cellular debris. According to Canadian Blood Services, blood administration sets require a standard filter with a pore size ranging from 170 to 260 microns to capture fragments of cells, clots, or particulate matter that develop during storage.

    Tubing replacement intervals also follow strict protocols. CDC guidelines recommend replacing administration sets for continuous infusions (other than blood, blood products, or fat emulsions) no more frequently than every 96 hours, but at least every 7 days. Blood-specific tubing, however, is typically changed after every unit or every four hours. These precise filter specifications and replacement schedules make blood delivery one of the most regulation-driven applications of IV sets, requiring careful attention from clinical staff.

    With clinical applications established, understanding the differences between gravity and pump IV sets further refines proper set selection.

    What Is the Difference Between Gravity IV Sets and Pump IV Sets?

    The difference between gravity IV sets and pump IV sets lies in how each system controls fluid delivery. Gravity sets use hydrostatic pressure, while pump sets use mechanical force for precise volume control.

    Gravity IV sets rely on the height of the fluid container above the patient to generate downward pressure that moves fluid through the tubing. Clinicians adjust the roller clamp manually to regulate flow, calculating drip rates using the standard formula: (Total Volume in mL × Drop Factor) ÷ Time in minutes. This approach works well for routine hydration and stable adult patients, though flow rates can shift with patient movement or changes in container height.

    Pump IV sets connect to electronic infusion pumps that use peristaltic mechanisms to deliver a specific volume at a predetermined rate. According to CIA Medical, pump-compatible IV sets pair with infusion devices that eliminate the variability inherent in gravity-dependent delivery. These systems excel when dosing precision is critical, particularly in pediatric settings where medications like IV fluids and analgesics are more frequently involved in errors.

    Key differences include:

    • Flow control: Gravity sets use manual roller clamp adjustment; pump sets use programmable electronic regulation.
    • Accuracy: Pump sets deliver exact volumes per hour, while gravity sets require frequent manual monitoring.
    • Cost: Gravity sets are simpler and less expensive; pump sets require dedicated infusion pump hardware.
    • Clinical indication: Gravity sets suit straightforward fluid replacement; pump sets are preferred for high-risk medications, pediatric patients, and critical care.

    For most wellness IV sessions, gravity-based delivery provides reliable, consistent hydration without the complexity of pump systems. Understanding which system fits the clinical scenario ensures both safety and efficiency in any IV administration setting.

    How Do IV Drip Rates Vary Between IV Set Types?

    IV drip rates vary between IV set types based on the drop factor assigned to each set’s drip chamber. Macro drip sets and micro drip sets produce different drop volumes, which directly determines how quickly fluid reaches the patient.

    The drop factor is the number of drops required to deliver one milliliter of fluid. Macro drip IV sets deliver 10, 15, or 20 drops per milliliter, making them suitable for rapid, high-volume infusions. Micro drip IV sets are standardized at 60 drops per milliliter, producing much smaller drops for precise, slow-rate delivery.

    According to the British Columbia Institute of Technology, the drip rate formula for gravity infusions is calculated as: (Total Volume in mL × Drop Factor in gtts/mL) ÷ Time in minutes = Drops per minute (gtts/min).

    This formula shows why set type matters so much. A 1,000 mL bag infused over 8 hours through a 15 gtts/mL macro drip set yields approximately 31 drops per minute, while the same bag through a 60 gtts/mL micro drip set requires roughly 125 drops per minute. The set selection changes the clinical workflow entirely.

    Key drip rate differences by IV set type include:

    • Macro drip sets (10, 15, or 20 gtts/mL) produce larger drops and are generally used when the infusion rate exceeds 100 mL/hr.
    • Micro drip sets (60 gtts/mL) produce smaller drops and are indicated for rates below 100 mL/hr, particularly for pediatric and neonatal patients requiring precise volume control.
    • Pump-compatible IV sets bypass manual drop counting entirely, using mechanical force to deliver a specific volume at a predetermined rate regardless of drop factor.

    For most adult fluid resuscitation scenarios, a macro drip set paired with gravity delivery provides adequate rate control. Pediatric cases and medication infusions demanding tight volume accuracy, however, benefit significantly from micro drip sets or pump-driven systems. Choosing the correct drip rate setup is one of the most practical decisions clinicians make before starting any infusion, and understanding safety protocols ensures that choice remains effective throughout treatment.

    What Safety Precautions Should Be Followed When Using IV Sets?

    The safety precautions that should be followed when using IV sets include proper tubing replacement intervals, correct drip chamber filling, sterile technique, and careful line inspection. These measures reduce infection risk, prevent complications, and ensure accurate fluid delivery.

    Key safety precautions for IV set use include:

    • Replace administration sets at appropriate intervals. According to CDC guidelines, administration sets used for continuous infusions (excluding blood, blood products, or fat emulsions) should be replaced no more frequently than every 96 hours, but at least every 7 days.
    • Fill the drip chamber correctly. The drip chamber should be filled to at least one-third or one-half of its capacity before starting an infusion, ensuring no air enters the tubing during the process.
    • Maintain strict aseptic technique. All connections between IV tubing, fluid containers, and access sites must remain sterile throughout the infusion.
    • Inspect tubing and connections before each use. Check for cracks, leaks, or particulate matter in the fluid line before initiating flow.
    • Verify compatibility between the IV set type and the prescribed therapy. Blood products require filtered sets, photosensitive medications need light-resistant tubing, and pediatric patients need volume-controlled or micro-drip sets.
    • Monitor the patient continuously during infusion. Watch for signs of infiltration, phlebitis, or flow rate changes that may indicate a problem with the IV set or access site.

    Once a medication enters the vein, the action cannot be reversed. This reality makes proper preparation, accurate dosage calculation, and safe administration practices essential for every infusion. For clinicians and wellness providers alike, treating every IV set connection as a critical safety checkpoint is the most effective way to protect patients.

    IV therapy safety essentials including tubing replacement sterile technique proper drip chamber use and continuous patient monitoring

    How Are IV Sets Used Beyond Hospital Settings for Wellness?

    IV sets are increasingly used beyond hospital settings for wellness through mobile and home-based infusion services. The sections below cover nurse-administered home infusions and key takeaways about IV set types.

    Can Mobile IV Therapy From The Drip IV Infusion Provide Nurse-Administered Infusions at Home?

    Yes, mobile IV therapy from The Drip IV Infusion can provide nurse-administered infusions at home. Founded in Fall 2022 by professionals with decades of experience in nursing and emergency medicine, The Drip IV Infusion delivers personalized IV cocktails directly to clients in their homes or workplaces across Arizona.

    This growing model reflects a broader industry shift. According to a 2025 Towards Healthcare report, the U.S. home infusion therapy market is expected to expand from USD 19.56 billion in 2025 to USD 39.57 billion by 2035, reflecting a CAGR of 7.3%. The same safety principles that govern clinical infusions apply in the home setting; nurses monitor drip chambers visually to confirm proper flow and fill chambers to at least one-third capacity to maintain safe fluid delivery.

    For anyone exploring the types of IV sets discussed throughout this article, The Drip IV Infusion puts that knowledge into practice with convenient, professional care.

    What Are the Key Takeaways About Types of IV Sets and Their Uses?

    The key takeaways about types of IV sets and their uses center on matching the right set to the patient, fluid, and clinical scenario. The most important points include:

    • IV sets are classified by drip chamber size (macro drip and micro drip), design and function (vented, non-vented, blood transfusion, light-resistant, volume-controlled), and number of ports (single-port and multi-port).
    • Macro drip sets suit high-volume adult infusions, while micro drip sets provide the precision required for pediatric and neonatal patients.
    • Specialty sets, such as blood transfusion sets with 170 to 260 micron filters and light-resistant sets for photosensitive medications, address specific clinical safety requirements.
    • Gravity-driven and pump-compatible IV sets each serve distinct purposes depending on whether manual monitoring or programmable delivery is needed.
    • Proper safety practices, including correct drip chamber fill levels and adherence to tubing replacement guidelines, apply equally in hospitals and home settings.

    Understanding these distinctions helps patients and caregivers make informed decisions, whether in a clinical environment or through services like The Drip IV Infusion.

  • What Is IV Tubing?

    What Is IV Tubing?

    IV therapy provides patients with plenty of health and wellness benefits. If you have received IV treatments previously, you may have noticed that there are several pieces of equipment involved, including IV tubing. But what is IV tubing, exactly?

    IV tubing is how the healthcare providers administer the treatment to the patients. So, let’s dive in and explore the topic better!

    Source: shutterstock.com / Photo Contributor: Numstocker

    IV Tubing Definition: What is IV Tubing? 

    IV tubing (intravenous line) refers to the soft plastic line that runs from the IV bag to the IV catheter. IV tubing is a crucial part of IV treatments as it is through this line that the patients get their medications or IV therapy.

    The IV tubing comes separately and is not connected to the IV bag. This ensures they are sterile, and the health providers can choose the appropriate set for their patients.

    IV tubing sets are essential for controlled medication and IV fluids administration. The IV tubing connects the medication to the needle the nurse injects into the patient’s arm.

    Based on your needs and the treatment you receive, our nurse will use the appropriate IV tubing for your Arizona IV therapy. IV tubing comes in several types. 

    Components of IV Tubing

    IV tubing sets consist of several components that ensure safe and controlled IV therapy administration. IV tubing components are the following:


    • Sterile spike and spike cap– the spike must be kept sterile as the nurse spikes the IV bag to ensure the patient’s safety

    • Drip chamber– with the drip chamber, the air rises from the IV fluid, ensuring it is not passed onto the patient

    • Roller flow control clamp– this component provides control over the administration flow speed. The roller control clamp can also be used to stop the infusion.

    • Access ports– the access ports on the IV set allow IV push medications to be administered. Access ports are also referred to as Y ports. 

    Types of IV Tubing

    Let’s have a look at all the different types of IV tubing:

    Macro drip tubing

    Macro drip tubing uses a wider tube to administer IV fluids by producing larger drops. These tubing sets are suitable for delivering higher doses of liquids. 

    Healthcare providers use macro drip tubing when administering routine IV fluids containing no sensitive medication. Macro drip tubing sets are available in three sizes, including 10 gtt/mL, 15 gtt/mL, and 20 gtt/mL.

    They are most suitable when medical teams need to infuse significant fluid volumes, like a saline solution. Macro drips are appropriate in the following cases:


    • Fluid deficit replenishment

    • Replacing loss of fluid during operation

    • To infuse intravenous medication and anesthetics

    Micro drip tubing

    Unlike macro drips, micro drip tubing sets are narrower than macro drips and provide smaller drops. Micro drip tubing is suitable for infusing sensitive medication where the flow rate is crucial. 

    Micro drip tubings are available in only one size, 60 gtt/mL, translating to 60 drips per minute. This makes micro drip tubing ideal for drip rates that need to be exact. Healthcare providers use micro drips when an IV administration requires precision. 

    Extension tubing

    Inserting a cannula in a patient’s peripheral vein necessitates extension tubing. Connected to the hub on the cannula, the extension tube is flushed with normal saline to maintain the cannula’s patency. 

    Extension tubing is present on most peripheral IV cannulas. The tube is about 20 cm long with a positive displacement pressure cap attached to the hub of the cannula. This is for easy access and to reduce catheter hub manipulation. 

    Healthcare providers must change the extension tubing each time they change the peripheral catheter.

    How IV Tubing Works

    IV tubing is how essential IV fluids for patient treatment are administered directly into the bloodstream. Only certified medical professionals should handle and place IV tubing drips.

    During IV tubing placement, the nurse should do the following: 


    1. Start by finding a vein for the IV

    2. Once your nurse find a vein, tie a wide elastic band above it

    3. Next, clean and disinfect the site where the IV will go in

    4. Insert a thin plastic tube into the vein using a needle

    5. After inserting the plastic tube, remove the needle, leaving the tube in place

    6. As the last step, tape the tube to the patient’s arm to hold it securely in place

    Source: shutterstock.com/ Photo Contributor: Numstocker

    Maintenance and Care of IV Tubing

    Healthcare providers must maintain proper hygiene before administering IV therapy. Safety also includes sterilizing and disinfection of the medical instruments, including the IV tubing.

    It is also vital that the nurse check the fluid type and its expiration date to verify its safety. Another crucial step before administering an IV is to check the IV bag is intact and not leaking.

    It is crucial to keep in mind that IV tubing requires routine replacement to prevent potential infections. Depending on the type of IV tubing, the replacement times should be: 


    • Every 6 to 12 hours, tubing is used to infuse propofol. 

    • Every 72 hours, tubing is used to infuse dextrose and amino acids-containing solutions without lipids. 

    • Every 96 hours for every other type of tubing. 

    • One-time use per patient in the mobile IV therapy setting.

    During the administration of the IV, the nurse should closely monitor the patient. They should inspect the infusion site for redness, swelling, or tenderness. These symptoms may be signs of inflammation, irritation, or infection. 

    Conclusion

    What is IV tubing? As we mentioned, IV tubing is an essential part of the IV infusion equipment through which the health providers administer the fluids to the patients. 

    The macro, micro, and extension drip tubings are among the most popular for the administration of IV therapy. Safety and hygiene standards are of utmost importance when administering IV tubings.