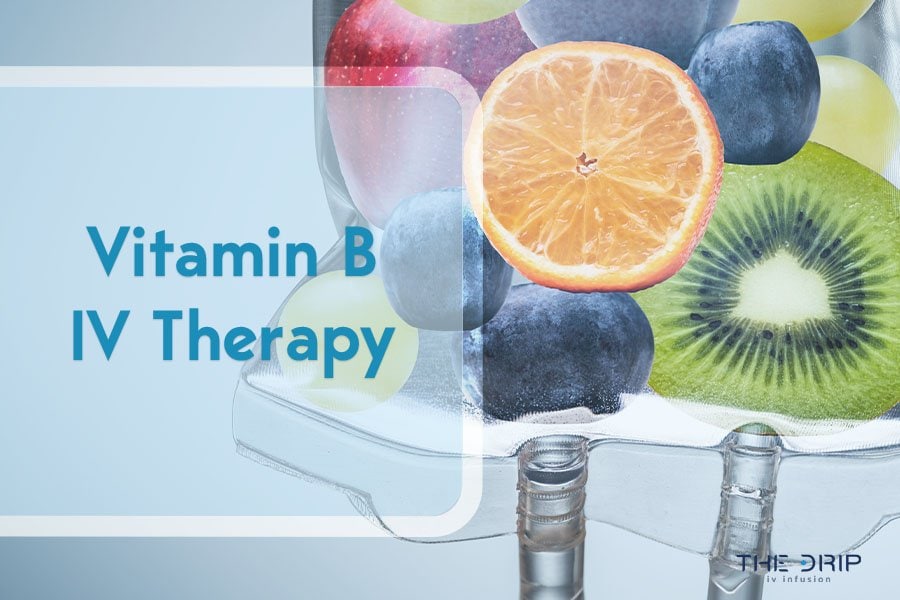
Vitamin B12 plays a vital role in many metabolic processes in the body. Although the human body cannot produce this vitamin, it is consumed through food such as meat and dairy products. So, what are B12 IV benefits?
Continue reading to learn in detail about the benefits of intravenous therapy and vitamin B12.
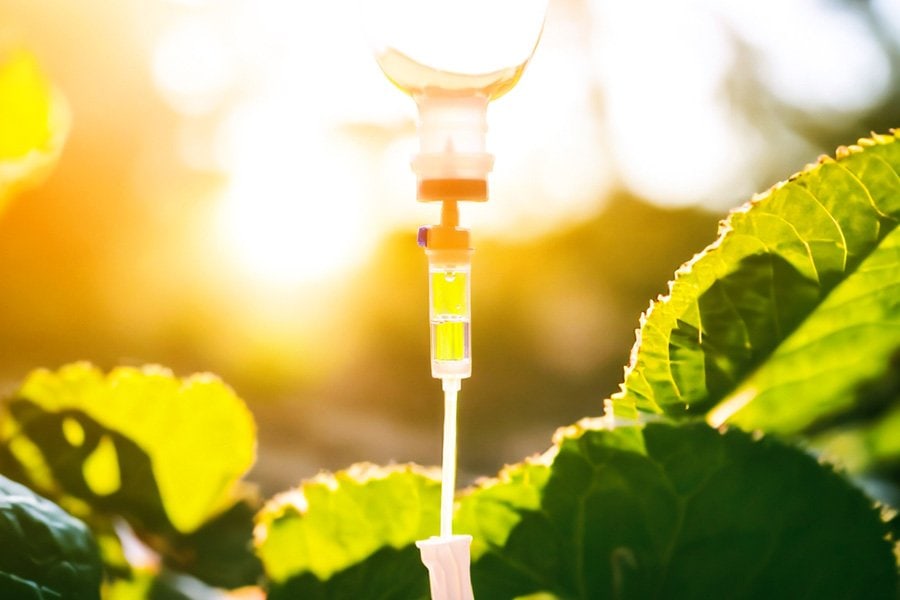
The main benefit of B12 IV is how it is administered. Specifically, intravenous administration bypasses the digestive system, delivering nutrients directly into the bloodstream. This way, you may quickly get all the advantages of the administered IV fluid.
You can receive this type of therapy at a health facility, or you can get it at home IV therapy service in Queen Creek. In addition to the method of administration, B12 IV therapy may help with several health conditions. We explained them in the following.
Energy boost and metabolism
One of the important B12 IV drip benefits might be improved concentration and energy levels. In other words, B12 is necessary to produce red blood cells that transport oxygen and nutrients throughout the body. Thus, by increasing oxygen in the bloodstream, vitamin B12 may help improve cognitive function and increase energy levels in the body.
Cardiovascular health
An amino acid called homocysteine is produced by breaking down proteins in the body. This amino acid, when produced in large amounts, may be the cause of many heart diseases.
Also, an increased level of homocysteine may be the result of an unregulated diet and bad habits such as alcohol or coffee. By taking in B12, the homocysteine level may be reduced, potentially lowering the chances of cardiovascular diseases.
Skin, hair, and nail improvement
B12 plays a role in hair, nails, and skin health due to its role in cell production. However, lacking this vitamin may lead to dry and brittle hair, discolored nails, cracked mouth corners, etc.
Mood improvement and mental health
Besides the above-mentioned B12 IV infusion benefits, it may help with enhancing mood. Additionally, the B complex vitamins—B12 in particular—may be quite important for maintaining brain function.
This vitamin is important for serotonin metabolism, a chemical key to your mood. Reduced blood B12 levels lead to decreased serotonin production and, consequently, reduced mood.
If the condition persists, it may lead to more severe forms of depression. Therefore, by supplementing B12 levels within normal limits, mood may be elevated, and certain negative health conditions may be avoided.
Exercise performance and recovery
Vitamin B12 may help improve athletic performance and aid recovery after strenuous exercise. Some studies suggest that B12 may accomplish this function by ensuring the proper functioning of the central nervous system and the production of red blood cells that deliver oxygen to muscle tissue.
In addition, this vitamin may help produce fatty acids, proteins, and amino acids essential for muscle recovery after a hard workout. Hence, this therapy may help people who are actively involved in sports or need energy.
Hematological benefits
Intravenous B12 therapy may have hematological benefits as well. Such benefits relate to the prevention of anemia by the production of red blood cells. Anemia is when you don’t have healthy red blood cells capable of carrying oxygen to the tissues.
Such red blood cells in B12-deficient patients have a large oval shape and cannot move easily through the bloodstream. However, this condition of red blood cells may be improved with B12 IV therapy, and the cells can function optimally.
Source: thedripivinfusion.com
Things to Consider Before B12 IV Therapy
If your doctor has recommended IV therapy, there are a few things to consider. First, your healthcare provider should be thoroughly familiar with your medical condition.
For this purpose, you should emphasize if you are allergic to any ingredient found in the IV fluid. That way, the healthcare provider will prepare a combination of ingredients that match your health condition. In addition, you should list all past and present illnesses, including hereditary diseases.
If you are taking a prescribed therapy, list the name and how often you take it. Doing so reduces the risk of IV therapy ingredients reacting with regular therapy ingredients.
How Much Does IV Therapy Cost?
If you want to take B12 IV therapy, please note that this treatment has no specific price. First, the factors that affect the price are the composition of the IV fluids and the place where you receive this therapy. You can check the prices of our IV cocktails here.
Many insurance companies do not cover this type of IV therapy, so the cost will be out of pocket. This treatment is relatively safe and typically has an immediate impact on your overall wellness.
So, if your condition requires IV therapy, it is good to consult with your doctor or healthcare provider about the type of IV therapy, benefits, possible risks, and cost.
Conclusion
We hope it has become clearer to you about the B12 IV benefits. So, if you decide on this therapy, keep in mind that mobile IV therapy does not replace regular therapy prescribed by a doctor. You should always consult a healthcare professional to determine if you are an ideal candidate.
Were you considering a boost in your nutrient intake? Vitamin B IV therapy might be the solution you’re seeking. This therapy is designed to enhance the absorption of vital B vitamins, potentially addressing deficiencies, elevating energy levels, and supporting overall well-being.
In this guide, we will navigate the intricacies of administering B vitamins intravenously, explore their potential benefits, address uncertainties, and offer insights to empower you in your quest for knowledge about this wellness trend.
What Is Vitamin B IV Therapy?
This method is believed to enhance absorption and quickly boost essential nutrients, potentially addressing deficiencies, improving energy levels, and supporting overall well-being. However, individuals should consult with healthcare professionals before considering such treatments. If you’re interested in exploring this therapy, you might consider a mobile IV therapy service in Queen Creek for added convenience.
Vitamin B IV therapy involves administering various B vitamins directly into the bloodstream. This method allows faster absorption than oral supplements, bypassing the digestive system. Once in the bloodstream, B vitamins are readily available for cells to use in various metabolic processes.
When taken orally, vitamin B is absorbed through the digestive tract. However, factors like stomach acid and individual variations in absorption efficiently can affect the amount absorbed.
IV therapy delivers a higher concentration of B vitamins directly to the bloodstream, potentially leading to quicker and more effective results than oral supplements’ slower and variable absorption.
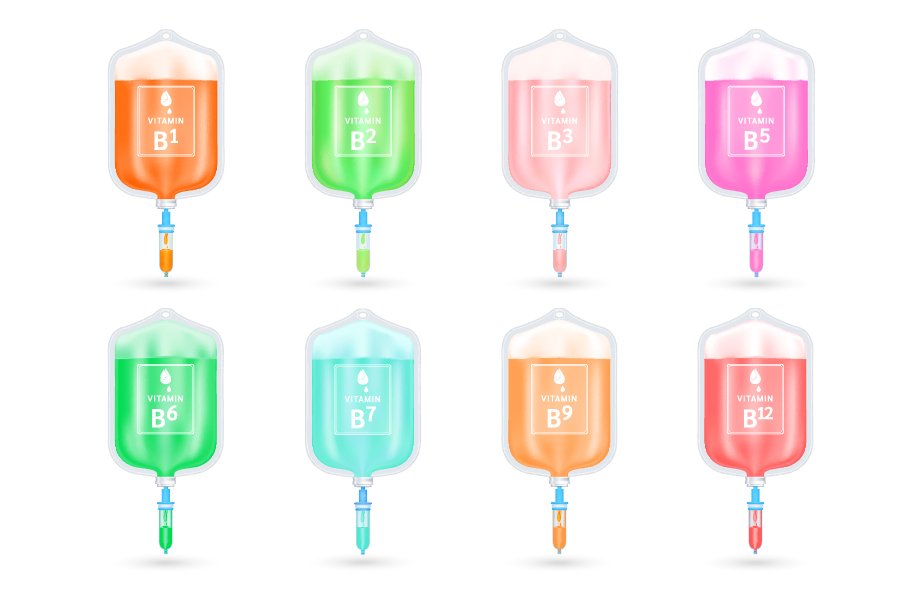
B Vitamins Included in IV Therapy
Vitamin B1 (Thiamin)
Vitamin B1 is crucial in preventing nervous, cardiovascular, and gastrointestinal complications. It also facilitates electrolyte flow between extracellular fluid and muscle or nerve cells, with deficiency leading to beriberi affecting the heart, nerves, and digestive system.
Vitamin B2 (Riboflavin)
Riboflavin is essential for maintaining the body’s energy supply by converting carbohydrates to Adenosine Triphosphate(ATP). It has additional benefits, including the maintenance of healthy skin, eyes, and muscles. Riboflavin is also beneficial for producing hormones by the adrenal gland, preventing cataract formation, and keeping the liver healthy. It also helps to convert tryptophan into niacin and aids in fetal development.
Vitamin B3 (Niacin)
Niacin, a vital vitamin produced and utilized by your body, plays a crucial role in converting food into energy. Additionally, it contributes to maintaining the health of your nervous system, digestion, and skin. It is commonly included in daily multivitamins.
Vitamin B5 (Dexpanthenol)
Dexpanthenol, also known as Vitamin B5, is crucial in supporting various aspects of your health. It contributes to the well-being of your skin, hair, and eyes and may actively participate in synthesizing hormones, producing red blood cells, and maintaining a healthy gastrointestinal tract. Its versatile functions make it essential for overall health, emphasizing the significance of incorporating Vitamin B5 into your daily nutritional intake.
Vitamin B6 (Pyridoxine)
Pyridoxine is crucial for mood control, neurotransmitter production, prevention of eye diseases, and possibly cancer prevention. It may also reduce the risk of heart disease, prevent Alzheimer’s, manage premenstrual syndrome symptoms, and help with nausea and vomiting during pregnancy.
Vitamin B7 (Biotin)
Biotin supports many of your body’s systems, including the nervous system, eyes, liver, skin, and hair. Biotin supplements may help manage symptoms of diabetes. It may help reduce blood sugar levels, total cholesterol, and blood fats in some people with diabetes.
Vitamin B9 (Folic acid)
Folic acid is vital for preventing congenital disabilities, and pregnant women are advised to take it to prevent spina bifida and anencephaly. It may also contribute to blood sugar control and reduce homocysteine levels associated with impaired kidney function.
Vitamin B12 (Cyanocobalamin)
Cyanocobalamin is recommended for megaloblastic anemia, preventing age-related macular degeneration, and metabolizing serotonin for mood regulation. Regular intake positively affects memory and cognitive function, preventing memory loss associated with deficiency.
Vitamin B Complex IV Therapy Benefits
Vitamin B complex IV therapy may enhance appetite by supporting the metabolism of nutrients crucial for proper digestion and absorption. It could aid in building muscle tone by promoting protein synthesis and optimizing energy utilization in muscle cells. Improved athletic performance may result from enhanced energy production and oxygen utilization facilitated by B vitamins.
Vitamin B complex IV therapy may also help with hyperpigmentation. Skin tone may benefit from the vitamin B complex vitamins, which promote collagen formation and skin cell regeneration. Increased energy levels are associated with the involvement of B complex vitamins in converting food into energy. Mood improvement may be linked to the role of B complex vitamins in neurotransmitter synthesis, positively affecting brain function.
The stress-reducing effects may arise from B vitamins’ role in adrenal gland function and stress hormone regulation. Cognitive function improvement is attributed to the vitamins’ involvement in neurotransmitter production and overall brain health.
As you conclude your exploration of vitamin B IV therapy, you’ve journeyed through the intricacies of administering essential B vitamins intravenously. Now armed with insights into potential benefits and the importance of consulting healthcare professionals, you stand at the culmination of this informative guide.
Whether considering this therapy or satisfying your curiosity, the knowledge gained here empowers you to make informed decisions. Remember, the wellness world is vast, and your understanding of vitamin B IV therapy is now a valuable part of it. Step forward confidently, equipped with newfound knowledge about the intriguing realm of vitamin B IV therapy.
IV therapy, administered with an IV bag, is a process of administering medications, nutrients, or fluids directly into a person’s vein. But, the IV therapy of today’s world and age is quite different from the IV therapy that was known many centuries ago. With the advancement of technology, the modern IV bag as we know it today was not the first type of IV bag invented. The history goes far back. So, when were IV bags invented, and how did the design change over time?
IV bags are sterile containers used to deliver the necessary fluids and medications into the patient’s veins. They are significant in modern medicine as they provide a safe and efficient way to administer fluids and medications when oral intake is impossible.
The first IV plastic bag dates back to the 1970s, but that doesn’t mean there were no other IV bags before. Although there were no plastic bags in the early 1900s, IV infusions were kept in an open container covered with gauze. With time and advancement in medical equipment, in the 1930s, glass bottle solutions were invented.
However, in the 1950s, when IV therapy became common, the glass bottle system became expensive. So, this is how the idea of plastic bags was born. They were a functional, cheaper alternative. So, IV bags were first invented in the 1950s, revolutionizing the field of modern medicine.
In the 1940s a nurse was allowed for the first time to administer IV therapy. Until then, doctors were the only ones who did that. Today, nurses are the providers of IV therapy. Now, it is easy to find the best mobile IV therapy AZ.
The background, inspiration, and description of the first IV bags
In the first years of 1830, when the cholera epidemic spread through Europe, there was a need for intravenous infusion for severely dehydrated people. Before this, doctors had only speculated about the benefits of IV therapy. Thomas Latta was the first doctor who successfully performed a saline solution drip in 1832. He based his experiments on the theory of Dr William O’Shaughnessy.
During the next cholera epidemic in China in 1950, IV therapy became widespread. However, glass bottle solutions were heavy and fragile, making them difficult to transport. Moreover, not only was the glass breakable, but it involved a risk of contamination.
The first IV bags were designed as a more practical and efficient alternative to glass bottles. They were made of flexible plastic material that was lightweight, durable, and sterile. Plastic bags were easy to transport, store, and dispose of. The bags were also transparent, and medical professionals could monitor the flow and content of the administered fluids.
Evolution of IV Bags
Since their invention, IV bags have undergone improvements in design, manufacturing, and materials used. These advancements have contributed to improved patient care and expanded the use of IV bags in medicine.
One of the most significant improvements of IV bags is the development of a more user-friendly system for administering fluids. The early IV bags required extra equipment for precise dosage and flow control. The modern ones have integrated flow regulators and injection ports, making them easier to use and reducing the risk of medication errors.
The advancement in manufacturing has also improved the quality and consistency of IV bag production. The automated processes and quality control measures have improved the sterility of IV bags. This reduced the risk of contamination and increased patient safety.
Nowadays, materials used for making IV bags are eco-friendly and have a lower risk of leaching harmful substances into the administered fluids.
IV therapy has made a revolution in the medical field. The equipment and administering method were changed and improved from the beginning until today. Yet, it is interesting to learn when were IV bags invented. IV bags impact modern medicine by allowing for safe and efficient delivery of fluids, nutrients, and medications to patients.
IV bags are now essential tools. They are carefully created and make IV therapy easier and controlled. Since their invention, IV bags have improved in design, manufacturing, and materials.
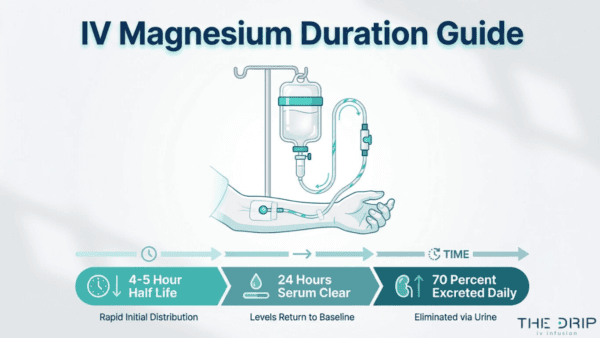
IV magnesium is an intravenously delivered mineral that achieves 100% bioavailability instantly, with a serum half-life of approximately 4 to 5 hours and roughly 70% of the dose excreted through urine within 24 hours in individuals with healthy kidney function.
This guide covers IV magnesium pharmacokinetics, the factors that alter retention time, how the body eliminates magnesium, clinical effect durations, and who benefits most from IV magnesium therapy.
After infusion, magnesium follows a two-compartment model: a rapid distribution phase moves the mineral from blood into tissues, followed by a slower elimination phase controlled by renal filtration. Serum levels return to baseline within about 24 hours, but red blood cells retain magnesium for weeks, and bone stores hold it for months to years.
Several variables determine how long IV magnesium lasts in any individual. Kidney function controls excretion speed through glomerular filtration rate, while dosage size, baseline deficiency level, infusion rate, and concurrent medications each shift retention in measurable ways. Severely deficient individuals retain a greater percentage of each dose because depleted tissues absorb magnesium aggressively before renal excretion increases.
The kidneys handle elimination through a layered reabsorption system, with the thick ascending limb of the Loop of Henle reclaiming approximately 60% of filtered magnesium. Under normal conditions, renal tubules reabsorb 97% of filtered magnesium, but surplus from an IV infusion triggers reduced reabsorption and increased urinary output.
Clinical effects follow distinct timelines: muscle relaxation persists for 4 to 6 hours, cardiovascular benefits last 6 to 12 hours, and neurological calming effects extend up to 24 hours post-infusion. Athletes losing magnesium through intense training, people with chronic deficiency, and those seeking migraine or stress relief gain the most from IV delivery’s direct-to-bloodstream advantage over oral supplementation.
What Happens When Magnesium Is Administered Intravenously?
When magnesium is administered intravenously, it enters the bloodstream directly, achieves full bioavailability instantly, and begins correcting deficiencies within minutes. The following sections cover how IV magnesium reaches circulation, its onset speed, and how its absorption compares to oral supplements.
How Does IV Magnesium Enter the Bloodstream?
IV magnesium enters the bloodstream through a catheter inserted into a peripheral vein, typically in the arm. Magnesium sulfate, the most common IV formulation, dissolves in saline solution and flows directly into venous circulation. Because it bypasses the gastrointestinal tract entirely, none of the dose is lost to incomplete absorption or first-pass metabolism in the liver.
Once in the bloodstream, magnesium distributes rapidly throughout the body. Intravenous magnesium sulfate is not associated with cardiovascular, liver, or kidney toxicity in adults when administered according to clinical protocols, according to a study published in the Journal of Clinical Pharmacology. This direct-to-blood delivery method is what makes IV administration particularly effective for acute deficiencies where rapid correction matters.
How Quickly Does IV Magnesium Start Working?
IV magnesium starts working within minutes of infusion. Because the mineral enters systemic circulation immediately, cells begin receiving magnesium almost as soon as the infusion begins. Physiological effects, including muscle relaxation and neurological calming, can often be felt during the session itself.
The speed of onset depends partly on infusion rate and dosage. Slower, controlled infusion rates allow the body to distribute magnesium steadily without overwhelming renal filtration. For most wellness applications, noticeable effects typically emerge within 15 to 30 minutes. This rapid action is one reason clinicians prefer the intravenous route when timely correction of magnesium levels is a priority.
What Is the Bioavailability of IV Magnesium Compared to Oral?
The bioavailability of IV magnesium compared to oral is dramatically higher. According to a 2019 review published in the National Center for Biotechnology Information, intravenous magnesium sulfate achieves 100% bioavailability immediately upon administration, whereas oral magnesium supplements typically exhibit bioavailability ranging from 30% to 50%.
This difference matters in practical terms:
IV magnesium delivers the entire dose to circulation without gastrointestinal losses.
Oral magnesium must survive stomach acid, compete with other nutrients for absorption, and pass through intestinal walls before reaching the blood.
Intravenous administration of electrolytes like magnesium can correct imbalances more rapidly and effectively than oral routes in both clinical and home-based settings.
For anyone with a significant deficiency or acute symptoms, that gap between 100% and 30% to 50% absorption can be the difference between rapid relief and prolonged supplementation. Understanding this bioavailability advantage helps explain why IV magnesium produces effects that oral forms often cannot match in the same timeframe.
How Long Does IV Magnesium Stay In Your Blood?
IV magnesium stays in your blood for varying durations depending on the compartment measured. Serum levels shift within hours, while red blood cells and deeper tissues retain magnesium over days to weeks.
How Long Does IV Magnesium Stay In Serum?
IV magnesium stays in serum for a relatively short window, typically returning to baseline within 24 hours in patients with normal kidney function. Renal reabsorption controls serum concentrations tightly; according to KoreaMed Synapse, only about 20% of filtered magnesium is reabsorbed in the proximal tubule, with the remaining reabsorption occurring deeper in the nephron. Clinical protocols often infuse magnesium at a sustained rate of 0.5 g/h to maintain therapeutic serum levels in hospitalized patients. For acute hypomagnesemia, guidelines recommend an initial IV dose of 1 to 5 grams depending on severity. Because the kidneys rapidly clear circulating magnesium, serum retention without ongoing infusion is brief.
How Long Does IV Magnesium Stay In Red Blood Cells?
IV magnesium stays in red blood cells significantly longer than in serum. Red blood cells accumulate magnesium gradually during their roughly 120-day lifespan, making intracellular levels a more stable indicator of total body status. After an IV infusion, magnesium shifts from blood plasma into red blood cells over hours to days. This intracellular pool does not fluctuate as rapidly as serum, so red blood cell magnesium can remain elevated for weeks following treatment. For this reason, clinicians sometimes measure red blood cell magnesium to assess longer-term magnesium status rather than relying solely on serum tests, which reflect only a small fraction of the body’s total stores.
How Long Does IV Magnesium Stay In Bones and Tissues?
IV magnesium stays in bones and tissues for months to years, depending on metabolic demand. Bone serves as the body’s largest magnesium reservoir, and this deep storage compartment exchanges magnesium slowly with circulating blood. Soft tissues, including skeletal muscle and organs, hold a substantial intracellular pool that turns over more quickly than bone but far slower than serum. When magnesium stores are depleted, IV infusions help replenish these deeper compartments over repeated sessions rather than a single treatment. This slow tissue exchange is why individuals with chronic deficiency often require multiple infusions to achieve meaningful, lasting improvement in total body magnesium levels.
With blood-level dynamics established, the factors influencing how long IV magnesium lasts become clearer.
What Factors Affect How Long IV Magnesium Lasts?
Several factors affect how long IV magnesium lasts, including kidney function, dosage, baseline deficiency level, infusion rate, and concurrent medications. Each variable influences how the body retains or eliminates magnesium after an infusion.
How Does Kidney Function Affect IV Magnesium Duration?
Kidney function affects IV magnesium duration by controlling how quickly the body excretes magnesium through urine. The glomerular filtration rate (GFR) is the primary determinant; as GFR declines in chronic kidney disease, the kidney’s ability to excrete magnesium decreases, leading to prolonged retention. According to a review published in Seminars in Nephrology, renal magnesium excretion depends directly on GFR. Healthy kidneys efficiently clear excess magnesium within hours, while impaired kidneys may retain it significantly longer. Specialized proteins like claudin-16 form magnesium pores in the renal tubules, though their precise physiologic function remains under investigation. For anyone with reduced kidney function, this extended retention makes professional monitoring during IV magnesium therapy especially important.
How Does the Dosage Infused Change Retention Time?
The dosage infused changes retention time because larger doses saturate renal clearance pathways, keeping magnesium elevated in the bloodstream longer. A small supplemental dose may clear within hours, while higher clinical doses take considerably more time for the kidneys to fully process. The body distributes magnesium across multiple compartments, so a larger infusion fills not only serum but also intracellular and bone stores. Once these deeper compartments absorb magnesium, release back into circulation happens gradually. This layered distribution is why a higher dose extends both serum elevation and total-body retention compared to a lower one.
How Does Magnesium Deficiency Level Affect Retention?
Magnesium deficiency level affects retention because depleted tissues absorb and hold infused magnesium more aggressively. When stores in bone, muscle, and intracellular compartments are low, the body prioritizes replenishment over excretion. According to a study published in the International Journal of Vitamin and Nutrition Research, an estimated 2.4 billion people globally, approximately 31% of the population, do not meet recommended dietary magnesium intake levels. Severely deficient individuals often retain a greater percentage of each infused dose, as their kidneys reduce urinary excretion to conserve supply. Mildly deficient patients typically excrete more of the dose. This makes pre-infusion deficiency status one of the strongest predictors of how long IV magnesium benefits persist.
How Does Infusion Rate Influence How Long It Stays?
Infusion rate influences how long IV magnesium stays in the system by affecting how much the kidneys excrete during administration. A rapid bolus floods serum concentrations quickly, triggering the kidneys to excrete a large portion before tissues can absorb it. Slower infusion rates allow more gradual tissue uptake, reducing immediate renal losses and improving overall retention. Clinical protocols for hypomagnesemia commonly use prolonged infusion rates for this reason. The result is a meaningful difference: a slow, controlled drip delivers more magnesium into intracellular and bone stores, extending how long the mineral remains available in the body.
How Do Other Medications Affect Magnesium Clearance?
Other medications affect magnesium clearance by altering renal excretion rates, tubular reabsorption, or competing for elimination pathways. Diuretics such as loop and thiazide types increase urinary magnesium loss, accelerating clearance. Proton pump inhibitors reduce intestinal absorption, compounding depletion over time. According to the FDA, the average half-life and systemic clearance of magnesium sulfate in preeclamptic women is approximately 4 to 5 hours and 4 to 5 liters per hour, respectively, with plasma clearance remaining relatively consistent at 4.28 to 5.00 liters per hour across populations. Despite this consistency in baseline clearance, concurrent medications can shift excretion substantially. Reviewing current prescriptions before an IV magnesium session helps anticipate how long the mineral will remain effective.
Understanding these retention factors helps determine the right approach for your next infusion session.
How Does the Body Eliminate IV Magnesium?
The body eliminates IV magnesium primarily through the kidneys. Renal filtration and tubular reabsorption control how much magnesium is retained versus excreted in urine.
How Do the Kidneys Filter Out Excess Magnesium?
The kidneys filter out excess magnesium through a multi-step process along the renal tubules. Blood passes through the glomerulus, where magnesium enters the filtrate. Most of this filtered magnesium is then selectively reabsorbed at specific points along the nephron before it reaches the collecting duct.
According to a study published in Advances in Chronic Kidney Disease, the thick ascending limb of the Loop of Henle is the primary site of renal magnesium reabsorption, responsible for reabsorbing approximately 60% of the filtered magnesium load. The proximal tubule handles a smaller portion, while the distal convoluted tubule fine-tunes final reabsorption. This layered system allows healthy kidneys to precisely regulate circulating magnesium levels, retaining what the body needs and allowing the rest to pass into urine.
How Much IV Magnesium Is Excreted Through Urine?
Approximately 70% of an intravenous magnesium dose is excreted through urine within 24 hours in patients with normal renal function. This rapid urinary clearance explains why IV magnesium elevates serum levels temporarily rather than indefinitely.
Under normal physiological conditions, the renal tubules reabsorb about 97% of filtered magnesium, leaving only roughly 3% for excretion. However, when an IV infusion suddenly raises serum magnesium above baseline, the kidneys recognize the surplus and reduce reabsorption rates accordingly. The result is a significant increase in urinary magnesium output during the first day after infusion. For individuals with compromised kidney function, this excretion rate drops considerably, which is why renal health is one of the most important variables in magnesium retention.
Understanding renal elimination helps clarify what determines the half-life of IV magnesium.
What Is the Half-Life of IV Magnesium?
The half-life of IV magnesium is approximately 4 to 5 hours in most clinical settings. According to U.S. Food and Drug Administration labeling data, the average half-life and systemic clearance of magnesium sulfate in preeclamptic women is approximately 4 to 5 hours and 4 to 5 liters per hour, respectively. This means serum magnesium concentration drops by roughly half every 4 to 5 hours after infusion stops.
Following intravenous administration, magnesium follows a 2-compartment pharmacokinetic model: a rapid distribution phase moves the mineral from blood into tissues, followed by a slower elimination phase as the kidneys filter and excrete the excess. Plasma clearance remains relatively consistent across populations at approximately 4.28 to 5.00 liters per hour, though individual kidney function can shift this timeline. For anyone considering magnesium as part of a wellness infusion, this pharmacokinetic window is worth understanding because it shapes how long elevated levels persist in circulation before the body rebalances.
How Long Do the Effects of IV Magnesium Last?
The effects of IV magnesium last anywhere from several hours to over 24 hours, depending on the body system involved. Muscle relaxation, cardiovascular support, and neurological calming each follow distinct timelines.
How Long Do Muscle Relaxation Effects Last?
Muscle relaxation effects from IV magnesium typically last 4 to 6 hours after infusion. Magnesium acts as a natural calcium channel blocker at the neuromuscular junction, reducing excessive muscle contraction. Once serum levels begin declining, which aligns with the 4 to 5 hour half-life reported by the FDA for magnesium sulfate, smooth and skeletal muscle tone gradually returns to baseline. Individuals with deeper tissue stores from prior infusions may notice lingering relaxation beyond this window, as intracellular and bone-stored magnesium slowly replenishes circulating levels. For those prone to chronic cramping or spasms, this makes consistent replenishment more valuable than relying on a single session.
How Long Do Cardiovascular Benefits Last?
Cardiovascular benefits from IV magnesium last approximately 6 to 12 hours in most individuals. Magnesium supports healthy heart rhythm by stabilizing cardiac cell membranes and regulating calcium influx into myocardial tissue. These vasodilatory and antiarrhythmic effects persist as long as serum concentrations remain within therapeutic range. Because plasma clearance holds relatively steady at approximately 4.28 to 5.00 liters per hour, according to a pharmacokinetic analysis published in BJOG, circulating magnesium levels decline predictably after infusion ends. Patients with existing deficiency often retain cardiovascular benefits longer, since depleted tissues absorb and hold magnesium more aggressively before renal excretion ramps up. Sustained heart health support typically requires ongoing magnesium optimization rather than isolated treatments.
How Long Do Neurological Calming Effects Last?
Neurological calming effects from IV magnesium last up to 24 hours post-infusion. Magnesium regulates NMDA receptor activity in the central nervous system, reducing neuronal excitability that contributes to anxiety, stress responses, and migraine episodes. According to a study published in the Journal of Clinical Medicine, IV magnesium reduces acute migraine symptoms within 15 to 45 minutes of infusion, with measurable effects persisting at 120 minutes and up to 24 hours post-treatment. This extended duration reflects magnesium’s ability to cross the blood-brain barrier and modulate neurotransmitter release beyond the point where serum levels normalize. For individuals managing stress or migraine frequency, this prolonged neurological window makes IV magnesium a particularly effective option compared to oral supplementation.
With effect durations established, infusion frequency becomes the next practical consideration.
How Often Should You Get IV Magnesium Infusions?
How often you should get IV magnesium infusions depends on your deficiency level, health goals, and how your body retains magnesium. Since the kidneys excrete roughly 70% of an IV magnesium dose within 24 hours in individuals with normal renal function, the benefits of a single session are temporary. Maintenance frequency varies: people with chronic deficiency or high physical demands may benefit from weekly or biweekly sessions, while those seeking general wellness support often find monthly infusions sufficient. A qualified infusion specialist can assess your serum magnesium levels and symptoms to recommend a personalized schedule. Consulting with a healthcare provider before establishing any recurring protocol ensures safe, effective replenishment tailored to your individual needs.
What Are Signs That IV Magnesium Has Left Your System?
Signs that IV magnesium has left your system include the gradual return of symptoms that improved during and after the infusion. Because magnesium is compartmentalized across different body stores, recognizing depletion requires attention to multiple physical and neurological cues.
According to the American Academy of Family Physicians, magnesium distribution is compartmentalized such that approximately 1% resides in extracellular fluid, 31% in intracellular space, and 60-65% in bone and teeth. This means serum levels drop first, while deeper tissue stores deplete more slowly. As circulating magnesium falls, symptoms tend to emerge in a predictable pattern:
Muscle cramps and spasms return, particularly in the calves and feet, often during rest or at night.
Fatigue and low energy resurface, since magnesium supports cellular energy production.
Headaches or migraines reappear, especially in individuals who received IV magnesium for neurological relief.
Sleep quality declines, with difficulty falling or staying asleep becoming noticeable again.
Increased anxiety or irritability develops, reflecting magnesium’s role in nervous system regulation.
Heart palpitations or irregular rhythms occur in some individuals as extracellular magnesium drops.
Because only 1% of total body magnesium circulates in blood, standard serum tests can appear normal even when intracellular and bone stores are depleted. Tracking symptom recurrence often provides a more practical signal than lab work alone. Paying close attention to how your body responds in the days following an infusion helps determine optimal timing for follow-up sessions.
Who Benefits Most From IV Magnesium Therapy?
The people who benefit most from IV magnesium therapy include athletes losing magnesium through intense training, individuals with chronic deficiency, and those seeking fast relief from migraines or stress-related symptoms.
Why Do Athletes Need IV Magnesium Replenishment?
Athletes need IV magnesium replenishment because intense physical training depletes magnesium stores through sweat, muscle contractions, and elevated metabolic demand. Oral supplements often cannot restore levels quickly enough between training sessions or competitions.
The consequences of depletion extend beyond physical performance. According to a study published through the University of Queensland, approximately 41.4% of athletes meet the criteria for one or more common mental disorders, with 31.7% reporting symptoms that may be exacerbated by magnesium depletion. Muscle cramps, prolonged recovery times, and disrupted sleep patterns are also common when levels drop.
IV administration bypasses the digestive system, delivering magnesium directly into the bloodstream for faster cellular uptake. For athletes operating under tight recovery windows, this route offers a practical advantage over oral supplementation alone.
Why Do People With Chronic Deficiency Need IV Magnesium?
People with chronic deficiency need IV magnesium because persistent low levels resist correction through diet and oral supplements alone. Conditions such as malabsorption disorders, kidney dysfunction, and long-term medication use can impair the body’s ability to maintain adequate magnesium stores.
The clinical impact of sustained deficiency is significant. A case-control study of 40 patients published in Anesthesiology and Pain Medicine found complete elimination of headache pain in 80% of patients within 15 minutes of an IV magnesium infusion. For migraine sufferers with aura, IV magnesium provides statistically significant improvement in both pain and associated symptoms such as photophobia and phonophobia.
Beyond neurological benefits, adequate magnesium intake supports kidney health in older adults. Chronic deficiency, when left unaddressed through standard oral routes, often requires the direct correction that IV delivery provides.
Why Is IV Magnesium Used for Migraine and Stress Relief?
IV magnesium is used for migraine and stress relief because magnesium plays a direct role in regulating neurotransmitter activity and vascular tone, both of which influence migraine onset and stress response. When circulating levels fall, the nervous system becomes more susceptible to excitatory signals that trigger headaches and heightened anxiety.
According to a study published in the Journal of the American College of Nutrition, magnesium depletion induced by stress from pain and anxiety is a significant factor in the high incidence of migraines and is frequently observed in young healthy athletes. This creates a cycle where stress depletes magnesium, and low magnesium intensifies the stress response.
IV delivery corrects this imbalance rapidly, often producing relief within minutes rather than the hours or days required by oral forms. For individuals caught in this depletion cycle, IV magnesium represents one of the most efficient interventions available.
With a clear picture of who benefits most, understanding how mobile IV services deliver these treatments adds practical context.
How Can Mobile IV Therapy Optimize Your Magnesium Levels?
Mobile IV therapy can optimize your magnesium levels by delivering infusions directly to your location with registered nurse oversight. The following sections cover how The Drip IV Infusion supports magnesium maintenance and key retention facts to remember.
Can Nurse-Administered IV Infusions From The Drip IV Infusion Help Maintain Magnesium Levels?
Yes, nurse-administered IV infusions from The Drip IV Infusion can help maintain magnesium levels. Registered nurses play a critical role in patient assessment and the safe administration of intravenous electrolytes like magnesium, according to industry reporting on mobile IV therapy practices. The Drip IV Infusion offers magnesium as a customizable add-on to its IV cocktail menu, allowing each session to be tailored to individual wellness needs. Because intravenous delivery bypasses the GI tract entirely, the body absorbs magnesium at full capacity without the limitations of oral supplements. Founded by professionals with decades of nursing and emergency medicine experience, The Drip IV Infusion brings this clinical-grade support directly to homes and workplaces across Arizona.
What Should You Remember About How Long IV Magnesium Stays In Your System?
What you should remember about how long IV magnesium stays in your system comes down to a few essential points:
IV magnesium achieves full bioavailability instantly, unlike oral forms that absorb only 30% to 50%.
The serum half-life of magnesium sulfate is approximately 4 to 5 hours after infusion.
Roughly 70% of an IV magnesium dose is excreted through urine within 24 hours in individuals with healthy kidney function.
The body stores 60% to 65% of its magnesium in bones and tissues, creating longer-term reserves beyond what serum levels reflect.
Individual factors like kidney health, deficiency severity, and infusion rate all influence how long benefits persist. Consistent sessions, guided by a qualified nurse, offer the most reliable path to sustained magnesium optimization.
The main benefits of magnesium IV therapy are rapid symptom relief, improved absorption, and immediate correction of magnesium deficiency. If you’re looking up magnesium IV therapy, chances are you’re dealing with stubborn headaches, muscle cramps, or fatigue. We get it—IV therapy can feel confusing when you’re trying to get relief fast, and this section helps you understand why these benefits matter..
Magnesium IV therapy is when doctors put magnesium sulfate straight into your bloodstream through a little tube in your arm, skipping your stomach completely so it gets right to work. Think of it like this: when you take pills, only about 30% actually gets absorbed – it’s like trying to water your garden with a leaky hose. But with IV magnesium, you get 100% of what you need, and it starts working right away.
TL;DR Summary
Here’s what we found when we dug into all the research: magnesium IV therapy really works, and the proof is solid. Kids with bad asthma attacks are 85% less likely to end up in the hospital when they get this treatment. People with splitting headaches? Every single person got better with IV magnesium, compared to basically nobody who got fake treatment. Since three out of four Americans don’t get enough magnesium anyway, IV therapy is like hitting the fast-forward button on getting your levels back to normal. Doctors give it their highest rating for serious pregnancy complications and heart rhythm problems, and most people only get mild side effects that go away on their own. If you’re tired of muscle cramps, can’t shake that exhaustion, or your heart feels like it’s skipping beats, magnesium IV through places like The Drip IV Infusion could give you relief in minutes instead of making you wait weeks.
Quick Tip: If your muscles cramp up a lot, you’re always tired, or your heart beats funny, get your magnesium levels checked – these are red flags that you might be running low and could really benefit from the quick fix that IV therapy offers.
How Does Magnesium IV Therapy Work in the Body?
Understanding how magnesium moves through your body gives clarity about why IV delivery is so effective. Magnesium supports countless biological systems, and IV administration helps replenish these stores quickly. Its major roles include:
Supporting over 300 enzymatic processes
Maintaining steady heart rhythm
Regulating muscle contraction and relaxation
Enabling nerve signal transmission
Storing 27% in muscles and 63% in bones
This stuff is like the oil in your car’s engine – it helps over 300 different processes run smoothly, from making energy to building your DNA.
What Biological Processes Does Magnesium Support?
Magnesium acts like a master key inside the body, helping several major systems function properly every day. When levels drop, these systems struggle, leading to widespread symptoms. The processes most dependent on magnesium include:
Nerve signaling and neurotransmission
Muscle contraction and relaxation
Blood pressure regulation
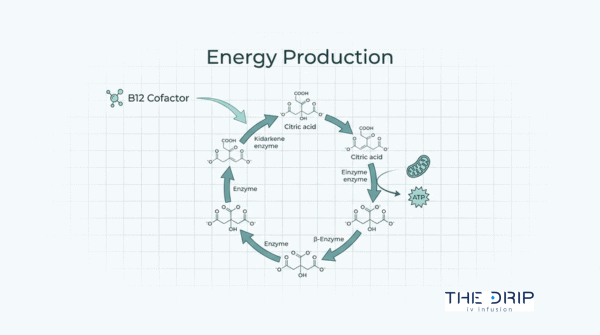
Energy production through glucose metabolism
Bone strength and mineral storage
How Is IV Magnesium Absorbed Compared to Oral Supplements?
IV magnesium works differently from pills because absorption occurs directly in the bloodstream instead of through the gut. Several major absorption differences explain why IV therapy works faster and more reliably:
Oral magnesium absorption = ~30%
IV magnesium absorption = 100% immediate uptake
Organic salt forms have higher absorption than basic forms
Kidneys reabsorb ~95% of circulating magnesium
Oral supplements raise blood levels only slightly compared to IV
Therapy / Route
Parameter
Measurement
IV magnesium
Onset of action
Immediate
IV magnesium
Duration (anticonvulsant)
30 minutes
IM magnesium
Onset of action
1 hour
IM magnesium
Duration
3–4 hours
Oral magnesium
Intestinal absorption
30%
Kidney
Magnesium reabsorption
95%
Some types of magnesium pills work better than others – the ones made from organic salts get absorbed better than the basic stuff. Your kidneys are really good at hanging onto magnesium, keeping tight control over how much you have floating around.
What Symptoms or Conditions Can Magnesium IV Help Address?
Magnesium IV therapy is used across both emergency and chronic care settings. Its FDA-approved uses and widely accepted clinical applications include the following conditions:
Clinically low magnesium levels
Seizure prevention in pregnancy (eclampsia/preeclampsia)
Kidney-related metabolic issues
Correcting arrhythmias caused by low magnesium
Severe asthma attacks
Certain acute cardiac emergencies
The research shows some pretty impressive results:
Kids with severe asthma are 85% less likely to need the hospital (that’s a huge difference)
Doctors give it their top rating for treating dangerous pregnancy complications
It gets their highest recommendation for fixing certain deadly heart rhythms
Good evidence shows it helps with kidney stone pain and pelvic pain from endometriosis
These uses show how versatile magnesium IV can be – it handles both emergency situations and ongoing problems, which brings us to the everyday benefits most people care about.
What are the Most Common Health Benefits of Magnesium IV Therapy?
The biggest benefits people notice from magnesium IV therapy are better muscle and nerve function, headache relief, heart support, and less stress. Since IV magnesium gets to work immediately instead of making you wait around like pills do, you can feel better within minutes whether you’re dealing with a pounding headache or your heart acting up.
How Can Magnesium IV Therapy Improve Muscle and Nerve Function?
Magnesium influences the communication between nerves and muscles more directly than most nutrients. Several mechanisms explain why IV therapy improves function so quickly:
Regulates nerve-to-muscle communication
Controls calcium flow to prevent spasms
Reduces muscle hyperexcitability
Decreases need for muscle relaxants during surgery
Rapidly stops cramps and spasms
A study from 2021 found that people getting spinal surgery needed way less muscle relaxers when they got IV magnesium. It’s like having a built-in chill pill that keeps your nervous system from getting too wound up. That’s why IV magnesium can stop muscle cramps and those scary muscle spasms so quickly.
Can Magnesium IV Infusions Help Alleviate Migraines or Headaches?
Yes. Research consistently shows that magnesium IV infusions are powerful for migraine relief, especially when oral magnesium hasn’t helped. Clinical studies report several standout results:
100% patient improvement with IV magnesium vs. 7% with placebo
86.6% complete pain disappearance
All associated symptoms improved, including nausea and light sensitivity
Particularly effective for cluster headaches and menstrual-cycle migraine
All the other nasty stuff that comes with migraines – nausea, sensitivity to light, you name it – went away in everyone who got IV magnesium versus only 20% of people who got the placebo. Research shows that people who get cluster headaches and migraines, especially the ones tied to your monthly cycle, tend to be low on magnesium. Even taking magnesium pills every day can cut down on how often you get migraines, but the IV stuff works way faster.
Does Magnesium IV Therapy Support Heart Health?
Yes. Magnesium IV therapy supports heart health by helping regulate electrical rhythm and correcting deficiencies that trigger arrhythmias. Magnesium’s effects on electrical conduction make IV therapy especially useful for heart rhythm issues. The key heart-related benefits include:
Keeping blood magnesium in the safe 1.5–2.5 mEq/L range
Correcting rapid atrial fibrillation
Preventing torsade de pointes, a dangerous arrhythmia
Reducing post-surgical arrhythmias from 20–50% down to 13.9% with IV
Stabilizing electrical activity in heart muscle cells
Can Magnesium IV Reduce Stress, Anxiety, or Improve Sleep?
Yes. Magnesium affects the nervous system in ways that calm the brain and reduce stress responses. Its effects on relaxation and sleep come from several mechanisms:
Activating NMDA and GABA receptors involved in stress regulation
Reducing post-surgical pain
Lowering the need for pain medications for up to 24 hours
Promoting calmer, more stable nerve signaling
Supporting restful sleep through muscle relaxation
Studies show that surgical patients needed way less pain medication when they got magnesium. Patients could respond better and seemed more alert compared to other treatments. A good-sized dose of IV magnesium (30-50 mg per kilogram of body weight) kept people needing less pain meds for a whole day, which shows it has lasting effects on anxiety and stress.
Understanding all these benefits helps you figure out if magnesium IV therapy makes sense for your health goals and medical situation.
Source: thedripivinfusion.com
Who Should Consider Magnesium IV Therapy?
People who should think about magnesium IV therapy include those with sudden medical problems that need quick magnesium replacement and patients whose magnesium levels are low despite taking pills. This treatment makes sense when you need magnesium to work right now, not in a few hours or days.
Are There Specific Medical Conditions That May Benefit Most from Magnesium IV?
Yes. Several specific medical conditions benefit most from magnesium IV, including severe magnesium deficiency, pregnancy complications, and acute asthma attacks.When your magnesium drops so low that your muscles start spasming like you’re having a calcium problem, you need IV treatment right away. Pregnant women with dangerous blood pressure need IV magnesium to prevent and control seizures.
People getting fed through their veins need IV magnesium to keep their levels normal. A 2018 study on kids with bad asthma found that their breathing improved by almost 27% after getting IV magnesium. Heart problems like dangerous rhythms and super-fast heartbeats respond really well to IV magnesium too. People with kidney stone pain or pelvic pain from endometriosis also get relief from this treatment.
Is Magnesium IV Safe for Everyone?
No. Magnesium IV therapy is not safe for everyone, particularly people with heart block, magnesium allergies, or impaired kidney function. If you’re allergic to magnesium sulfate, this treatment is obviously off the table.
Pregnancy has some special rules for IV magnesium safety. If pregnant women get it for more than 5-7 days straight, it can cause low calcium and bone problems in the baby. Premature babies are especially at risk for aluminum poisoning from IV products.
How well your kidneys work really matters with magnesium IV safety. If your kidneys don’t work well, magnesium can build up to dangerous levels. According to the FDA, patients with kidney problems who get more than 4-5 micrograms of aluminum per kilogram of body weight per day might accumulate toxic levels, so doctors need to watch closely and adjust doses.
What Are Signs of Magnesium Deficiency That May Warrant IV Therapy?
Signs you might need IV magnesium include blood levels below 0.7 mmol/L (1.4 meq/L) and muscle spasms that look like calcium deficiency. Lab tests showing magnesium below 0.7 mmol/L mean you’re clinically deficient and need help. Dietary magnesium intake across the U.S. population consistently falls below recommended levels. The table highlights the gap between required and actual magnesium intake in different demographic groups.
Group
Actual Intake
RDA / Requirement
Notes
General U.S. population
75% below RDA
—
Widespread deficiency
Half of Americans
Less than recommended intake
—
Major shortfall
Women
228 mg/day
300 mg/day
Strong deficit
Men
266–323 mg/day
420 mg/day
Consistent deficit
General population
50% borderline deficiency
—
Cellular function impacted
These dietary gaps, combined with symptoms like muscle spasms similar to calcium deficiency, point to people who could really benefit from IV magnesium therapy to quickly get their levels back to normal and prevent complications.
How Does Magnesium IV Therapy Compare to Other Magnesium Supplementation Methods?
Magnesium IV therapy is different from other ways of getting magnesium because of how fast it works, how much actually gets into your system, and what medical situations it’s used for. IV gives you immediate results, shots take an hour to work, and pills only get about 30% absorbed through your stomach. Understanding these differences helps you know when each method works best.
How Effective Is IV Therapy Versus Oral or Topical Magnesium?
IV therapy beats oral and topical magnesium when it comes to how well and how fast it works. IV magnesium starts working immediately compared to an hour for shots in your muscle. A study looking at absorption found that even the best oral supplement only increased blood magnesium by 6.2% at most, while IV gives you much higher and faster increases.
Research comparing different methods shows some surprising results in certain situations. One study found that taking 1600mg of magnesium oxide pills worked just as well as 2000mg of IV magnesium sulfate for preventing low magnesium after heart surgery. When you give IV magnesium and your body’s magnesium stores get full, you start peeing out the extra immediately, which shows it’s getting distributed throughout your system fast. You can see different absorption patterns in your blood for up to 4 hours after taking oral supplements.
Are There Situations Where IV Magnesium Is Preferred?
Yes. There are several situations where IV magnesium is preferred, especially medical emergencies requiring immediate magnesium correction. Emergency treatment of a dangerous heart rhythm called torsade de pointes needs IV administration to stabilize your heart rhythm right away. In eclampsia, IV should only be used for immediate control of life-threatening seizures.
Sudden, severe conditions respond better to magnesium you inject rather than pills. Severe asthma attacks benefit from injected magnesium, improving breathing and reducing hospital stays. Acute migraine attacks respond to 1g of IV magnesium sulfate with a 100% success rate. Quick correction of low magnesium becomes necessary when patients show signs of muscle spasms. During surgery, when you need immediate effects, IV is the way to go since it works right away versus an hour with a shot.
Are There Risks Associated with Different Forms of Magnesium Supplementation?
The risks with different types of magnesium supplementation depend on how much ends up in your blood and how well your kidneys work..This table outlines the recognized clinical effects at various blood concentrations.
Plasma Level
Clinical Effect
Risk Category
4 mEq/L
Decreased reflexes
Mild
10 mEq/L
Absent reflexes, respiratory paralysis
Severe
10 mEq/L or below
Heart block
Critical
>12 mEq/L
Potentially fatal
Life-threatening
Aluminum poisoning is a risk with long-term IV use if your kidneys don’t work well. Magnesium toxicity usually doesn’t happen unless you have kidney disease, which is why doctors need to check your kidney function before starting IV therapy. These level-dependent risks show why proper monitoring is so important during magnesium supplementation, especially with IV where changes happen quickly.
What Should You Expect During a Magnesium IV Infusion Session?
A magnesium IV infusion session is pretty straightforward – they put magnesium sulfate directly into your bloodstream through a small tube in your arm. Most people find it comfortable and easy to handle. Knowing what the timing looks like, what you might feel, and what results to expect helps you get ready for your treatment at The Drip IV Infusion.
How Long Does a Magnesium IV Session Usually Last?
A magnesium IV session usually takes anywhere from 15 minutes to an hour, depending on how much you need and why you’re getting it. According to a 2021 review of treatment protocols, 1g of magnesium sulfate typically takes about 15 minutes to give for migraine treatment. The seizure-preventing effects last about 30 minutes after IV administration.
Loading doses of 30-50 mg per kilogram of body weight are standard in surgical protocols. Maintenance doses of 6-20 mg per kilogram may follow the first dose. For eclampsia and preeclampsia management, healthcare providers give 1-2 grams of magnesium sulfate per hour.
Your total session time includes: • Getting checked and having the IV placed (10-15 minutes) • The actual magnesium drip (15-60 minutes) • Watching you after it’s done (5-10 minutes) • Taking out the IV and giving you instructions (5 minutes)
Most wellness infusions for general health take about 30-45 minutes total.
Does the Infusion Process Cause Any Discomfort or Side Effects?
Yes. Most people tolerate magnesium IV infusions well, but mild side effects can happen, especially with faster drip rates. The most commonly reported sensations include:
Warm, flushed feeling in the face
Temporary nausea or vomiting
Mild muscle weakness
Slight blood pressure drop
Pleasant warming sensation due to vessel relaxation
Normal therapeutic doses don’t cause much in the way of side effects. The warm feeling happens because magnesium relaxes your blood vessels, improving circulation. Most people describe this as nice rather than uncomfortable.
How Soon Can Results Be Felt from Magnesium IV Therapy?
You can feel results from magnesium IV therapy immediately to within a few hours, depending on what you’re treating. A 2018 brain study showed that the seizure-preventing action starts immediately with IV administration. In that migraine study, pain completely disappeared in 86.6% of patients right after the 15-minute infusion was done.
The effects from a single IV dose last about 30 minutes for seizure prevention. However, one dose can reduce your need for pain medication after surgery for up to 24 hours according to a 2020 surgical pain review. Your blood magnesium level peaks around 4 mg/dL during surgery The effects of magnesium IV therapy unfold over several hours, with some benefits happening instantly and others lasting days. Here’s the typical response timeline:
Immediately: Seizure prevention, migraine relief
30 minutes: Blood magnesium peaks
24 hours: Reduced post-surgical pain and medication needs
48–72 hours: Improved metabolism and enzyme activity
Your specific results depend on how low your magnesium was to start with, how much you get, and how your individual body processes it. The immediate availability of IV magnesium allows quick symptom relief compared to oral supplements’ slower absorption timeline.
Are There Any Risks or Side Effects Associated with Magnesium IV Therapy?
Magnesium IV therapy does have some risks and side effects you should know about. The most common ones are mild and don’t last long, while serious problems are rare when it’s done right. Understanding these risks helps make sure your treatment is safe.
What Are the Most Common Side Effects of Magnesium IV?
The most common side effects of magnesium IV are your face getting flushed and feeling warm, which usually go away on their own without needing any treatment. Some people feel sick to their stomach or throw up while getting IV magnesium. You might feel a little weak in your muscles during treatment. Your blood pressure might drop a bit if the magnesium goes in too fast or you get a high dose, because it makes your blood vessels relax.
More serious side effects happen less often but need to be watched for. About 1.6% of patients lose their knee-jerk reflex, though different studies report anywhere from 0-57% depending on how much magnesium they give and how they monitor patients. Breathing problems occur in 1.3% of cases overall, with reports ranging from 0-8.2% across different medical settings. These differences reflect variations in patient groups, dosing schedules, and monitoring methods.
Who Should Avoid Magnesium IV Infusions?
People with heart block should avoid magnesium IV infusions because magnesium makes already slow heart conduction even worse. Having damaged heart muscle is another absolute reason not to get IV magnesium therapy. If you’ve had allergic reactions to magnesium sulfate before, you definitely can’t get this treatment.
Severe kidney problems rule out magnesium IV therapy because of the risk of magnesium poisoning. Your kidneys are the only way magnesium gets out of your body, so if they don’t work well, magnesium can build up dangerously. Pregnant women who need magnesium treatment for more than 5-7 days face risks to their baby including low calcium and bone problems. Premature babies are especially vulnerable to aluminum toxicity from IV magnesium products, requiring special consideration before treatment.
How Are Side Effects Monitored or Managed During Treatment?
During magnesium IV therapy, clinicians monitor several markers to ensure safe blood levels and early detection of toxicity. Standard monitoring includes:
Serum magnesium checks every 6–8 hours
Knee-jerk reflex assessment
Urine output monitoring
Vital signs, especially breathing rate
Use of calcium gluconate only if levels become excessive
Calcium gluconate works as the antidote for magnesium toxicity, though it’s rarely needed – less than 0.2% of cases, specifically 17 times among 9,556 women in pregnancy studies. Safe magnesium levels for treating pregnancy complications stay between 2.0-3.5 mmol/L (equivalent to 4-7 meq/L). Your knee reflexes disappear at 4.0-5.0 mmol/L, signaling they need to adjust your dose immediately. Breathing problems emerge at 5.0-7.5 mmol/L, requiring immediate help including possibly giving calcium gluconate and helping you breathe.
Understanding these risks and using proper monitoring makes magnesium IV therapy safe and effective for the right people.
How Can You Approach Magnesium IV Therapy with The Drip IV Infusion?
Magnesium IV therapy with The Drip IV Infusion gives you customized treatments that target your individual magnesium needs through professional IV administration. The Drip IV Infusion offers specialized magnesium infusions as part of complete wellness programs, delivering immediate benefits that beat oral supplements’ limited 30% absorption rate. These treatments target specific health problems like migraines, muscle cramps, and heart concerns while keeping strict safety standards.
Can The Drip IV Infusion Customize Magnesium IV Treatments to Individual Needs?
Yes. The Drip IV Infusion can customize magnesium IV treatments to individual needs through tailored dosing and personalized formulations. Patients often compare the costs of different IV formulations before choosing magnesium therapy. The table organizes current pricing for magnesium-related infusions and shows projected industry growth.
Treatment / Market Metric
Attribute
Value
General IV sessions
Cost range
$100–$500 per session
Basic hydration
Cost range
$80–$150
Specialized magnesium treatments
Cost range
$200–$500+
Myers’ Cocktail with magnesium
Cost range
$150–$250
The Drip Bar Vitality infusion
Price
$189
U.S. mobile IV therapy market (2024)
Market value
$568.25 million
Projected market value (2034)
Forecast
$1,556.29 million
Treatment personalization ensures each patient receives the optimal amount of magnesium without unnecessary risk. The Drip IV Infusion offers several customization options, including:
Adjusting magnesium concentration based on deficiency level
Combining magnesium with vitamins or minerals that complement its effects
Tailoring treatment frequency to individual response patterns
Providing mobile IV services at home or office
What Are the Key Takeaways About the Benefits of Magnesium IV Therapy?
The key things to remember about magnesium IV therapy benefits are that it gets absorbed better, works clinically, and has a good safety record. IV magnesium starts working immediately compared to oral supplements’ 30% absorption rate. The table below organizes the highest-quality evidence and population data supporting its use.
Category
Attribute
Value
Clinical evidence grade
Conditions with Grade A support
Eclampsia, preeclampsia, torsade de pointes, rapid atrial fibrillation
Migraine RCT (2019)
Response rate
100% with 1g IV magnesium vs. 7% placebo
Pediatric asthma (2020)
Hospitalization reduction
85% with IV magnesium
Population deficiency (2022 NIH)
% not meeting RDA
75%
Safety profile
Mild side effects
86.6% without discontinuation
Reasons you can’t get it are limited to heart block, heart muscle damage, and severe kidney problems. The Drip IV Infusion screens all patients for these conditions before starting treatment, ensuring safe and effective magnesium replacement tailored to your individual therapeutic needs.
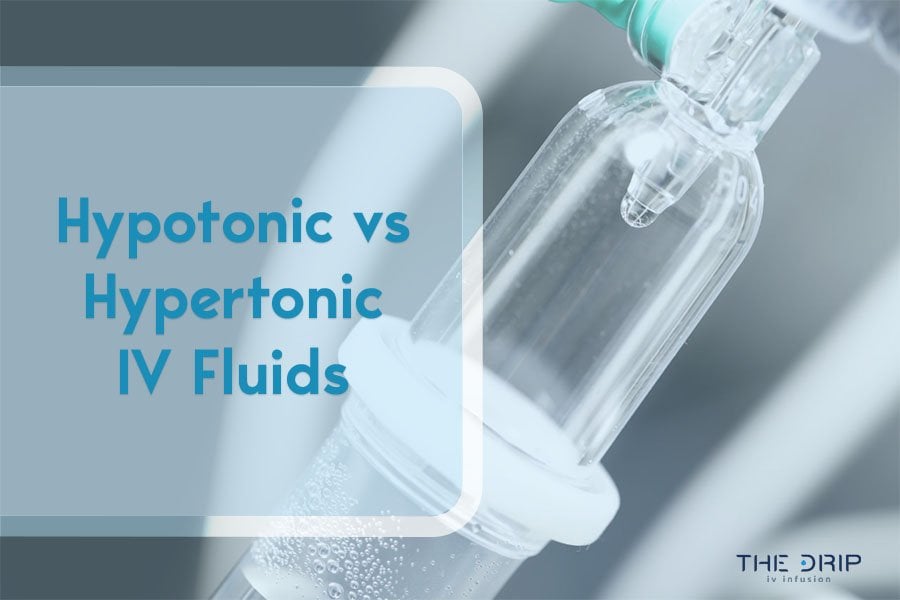
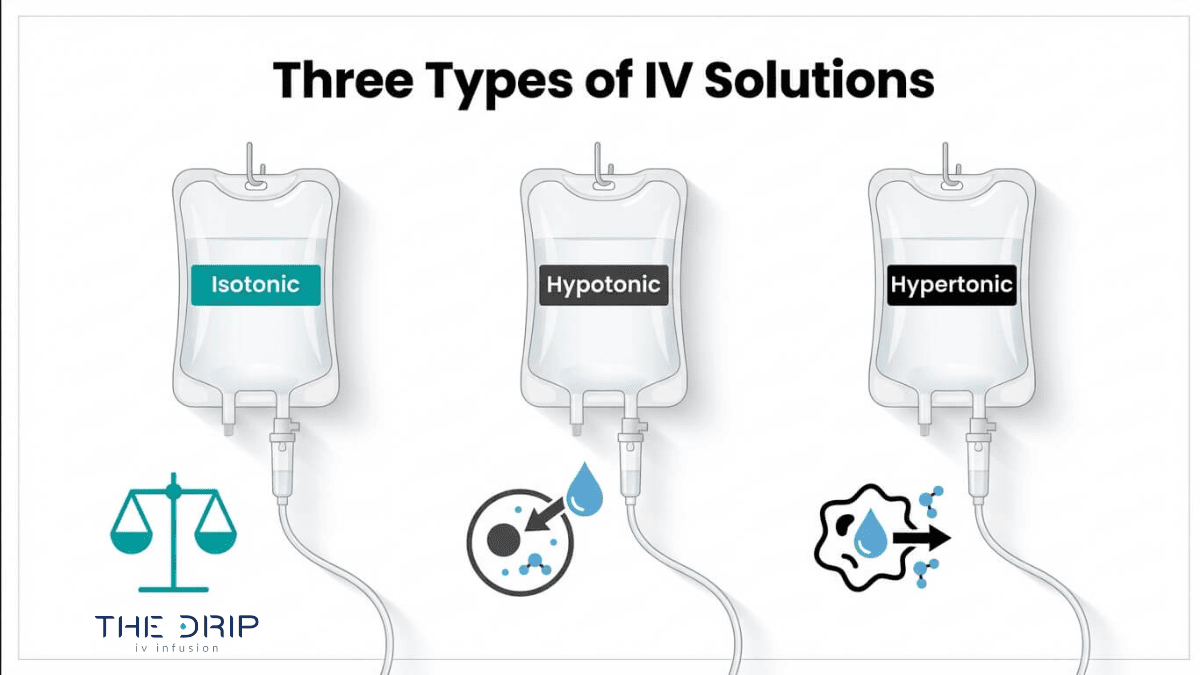
Administered intravenous (IV) fluids are crucial in managing various medical conditions. Understanding the differences between hypotonic vs hypertonic IV fluids is paramount in delivering effective care.
This article sets the stage for comprehensively exploring hypotonic and hypertonic IV fluids’ distinct compositions, indications, and effects. It aims to provide healthcare professionals with valuable insights, enabling them to navigate the nuanced application of these fluids within clinical settings more effectively.
Source: shutterstock.com / Photo Contributor: Siberian Art
Hypotonic vs Hypertonic IV Fluids
Understanding hypotonic IV fluids
Hypotonic intravenous IV solutions are fluid administered to patients to address specific medical conditions or dehydration. These solutions have a lower concentration of solutes, such as electrolytes and other dissolved substances, compared to the body’s extracellular fluid.
In simpler terms, the fluid outside the cells has fewer dissolved particles than inside the cells. This disparity creates an osmotic gradient, encouraging water movement from the hypotonic solution into the more concentrated intracellular space. This influx of water helps hydrate cells and replenish intracellular fluid.
Hypotonic IV fluids address cellular dehydration or shift fluids from the interstitial space into the cells. Hypotonic IV fluids are commonly used to address cellular dehydration or to shift fluids from the interstitial space into the cells.
However, caution is necessary when administering hypotonic solutions, as an excessive influx of water into cells may lead to cellular swelling and potential complications, especially in individuals with certain medical conditions. Therefore, healthcare professionals in the best mobile IV therapy in Arizona carefully assess patient needs and monitor fluid balance when using hypotonic IV solutions.
Understanding hypertonic IV fluids
Hypertonic intravenous IV solutions are a category of fluids that contain a higher concentration of solute compared to plasma and interstitial fluid. This establishes an osmotic gradient, causing fluid to move from the interstitial into the intravascular space.
The osmotic effect of hypertonic fluids is primarily employed to draw water out of cells and tissues, making them useful in scenarios where there is a need to reduce cellular swelling or address hyponatremia conditions, a state characterized by low sodium levels in the blood. Hypertonic IV solutions are often utilized to manage specific clinical conditions, such as cerebral edema, or to raise serum sodium levels.
However, their administration requires careful monitoring to avoid complications like fluid volume overload or electrolyte imbalance. Healthcare professionals must tailor the choice and dosage of hypertonic fluids to individual patient needs and closely observe their response to treatment.
Differences Between Hypotonic and Hypertonic IV Fluids
Hypotonic and hypertonic IV fluids differ significantly in their composition, osmolarity, indications, and effects on cellular hydration and fluid shifts in the body.
Hypotonic IV fluids have a lower concentration of solutes than the body’s extracellular fluid, creating an osmotic gradient that allows water to move into cells, promoting cellular hydration. These solutions often address cellular dehydration or shift fluids from the interstitial space into cells.
On the other hand, hypertonic IV fluids have a higher solute concentration than the body’s extracellular fluid, resulting in an osmotic gradient that draws water out of cells and tissues into the bloodstream.
Hypertonic solutions may reduce cellular swelling, manage conditions like cerebral edema, or raise serum sodium levels in hyponatremia.
So, the key distinction between these two fluids lies in their osmotic effects, with hypotonic solutions promoting cellular hydration and hypertonic solutions extracting water from cells.
Healthcare professionals carefully choose between these IV fluids based on specific patient needs and clinical indications to achieve the desired physiological effects.
Medical applications and uses
Based on their distinct properties and osmotic effects, hypotonic and hypertonic intravenous IV fluids are applied in various medical scenarios.
Hypotonic IV fluids
Hypotonic IV fluids are commonly used in cases of cellular dehydration, where there is an imbalance with increased intracellular solute concentration. These fluids are preferred when there’s a need to shift fluids from the extracellular space into cells, promoting cellular hydration.
The hypotonic IV solutions are often chosen cautiously, as excessive use in patients with compromised kidney function may lead to fluid overload.
Hypertonic IV fluids find applications when there is a need to draw water out of cells and tissues. Conditions such as cerebral edema, hyponatremia, or traumatic brain injuries may benefit from hypertonic solutions to reduce cellular swelling and restore electrolyte balance. Hypertonic fluids are preferred in carefully monitored circumstances to avoid complications like fluid volume overload or electrolyte imbalances.
Healthcare professionals consider various factors in choosing the appropriate IV fluid, including the patient’s clinical condition, electrolyte balance, and renal function. Regular monitoring is crucial to adjust fluid therapy as needed and prevent adverse effects.
Individualized treatment plans ensure that hypotonic or hypertonic fluids are administered judiciously to address specific medical needs while minimizing potential risks.
Conclusion
The comparison of hypotonic vs hypertonic IV fluids reveals the nuanced yet pivotal role these intravenous solutions play in medical care. With their lower solute concentration, hypotonic fluids prove invaluable in addressing cellular dehydration and promoting intracellular hydration.
On the other hand, hypertonic fluids, characterized by a higher solute concentration, are strategically employed to draw water out of cells, mitigating conditions like cerebral edema and hyponatremia. Understanding these differences is paramount for healthcare professionals in tailoring fluid therapy to individual patient needs.
IV therapy is a common medical procedure that involves delivering fluids, nutrients, or medication directly into a patient’s bloodstream. This technique ensures rapid and effective results, often prescribed to patients experiencing deficient fluid volume. However, there’s a wide variety of IV solutions and fluids, so patients may not fully understand what they are receiving through their IV. That’s why knowing the types of IV fluids and understanding the fundamentals of hypertonic IV fluids is critical for anyone planning to receive IV therapy.
Acknowledging and understanding the differences between IV fluid types is vital for patients as they directly impact their body’s fluid balance, electrolyte levels, and overall well-being. Three main types of IV fluids are distinguished by their tonicity, which refers to the volume behavior of cells in a solution. These are isotonic, hypotonic, and hypertonic.
In this article, you’ll learn more about hypertonic fluids and gain insights into the hypertonic IV solution used in medical settings. The content will also cover the definition and characteristics of hypertonic fluids, administration methods, and potential complications and adverse reactions associated with these fluids.
Generally, IV fluids are grouped into two categories – crystalloid and colloid. Both of these groups are sterile solutions, and IV drip Arizona can customize them with various ingredients to address a number of conditions. However, they exhibit distinctive compositions, which have different reactions in the body.
Crystalloid solutions
Crystalloid solutions contain small electrolytes and molecules that easily pass through cell membranes, hence their common use in medical care. They’re also affordable and accessible, as well as shelf-stable and free of allergens, adding to their popularity. They can be divided into three subgroups including:
Isotonic solutions maintain a balanced osmotic pressure with equal amounts of fluids, both on the inside and outside of cells. This is due to the volume of the isotonic solution resembling that of your blood plasma.
Hypotonic solutions increase fluid levels in cells. They’re particularly useful for conditions like diabetes, which may reduce levels of cellular fluid, disrupting their proper function.
Hypertonic fluids are the opposite of hypotonic, meaning they have a higher sodium content, which draws water out of the cells rather than brings it in. This makes hypertonic IV fluids ideal for replacing electrolytes but not as good for dealing with dehydration.
Colloids
Colloids are solutions containing larger molecules that cannot cross semipermeable membranes as crystalloid solutions do. They stay in your bloodstream instead of entering your cells.
Overview of Hypertonic IV fluids
Hypertonic intravenous solutions contain a higher concentration of sodium and chloride or dissolved particles, compared to plasma and interstitial fluid than the cells in your body. These are crystalloid intravenous fluids composed of NaCl dissolved in water with a higher sodium than in a normal blood serum.
Hypertonic IV solutions are available in the following forms and strengths:
3% sodium chloride (3% NaCl) – contains 513 mEq/L of sodium and chloride with an osmolality of 1030 mOsm/L.
5% sodium chloride (5% NaCl) – contains 855 mEq/L of sodium and chloride with an osmolality of 1710 mOsm/L.
10% dextrose water (D10W) – used to treat ketosis of starvation, providing calories (380 kcal/L), free water (distilled water that is free of any solutes), and no electrolytes.
20% dextrose water (D20W) – a hypertonic IV solution or an osmotic diuretic that causes fluid shifts between various compartments that may potentially promote diuresis.
50% dextrose water (D50W) – a strong hypertonic IV solution used to treat severe hypoglycemia and is administered rapidly via IV bolus.
Essentially, hypertonic fluids are used to increase intravascular fluid volume.
When administered, hypertonic fluids create an osmotic gradient, resulting in an increased concentration of dissolved solutes within the intravascular space in comparison to the cells. Consequently, this causes the osmotic movement of water from the cells or interstitial space into the intravascular space, leading to the diluting of solutes within the blood. However, hypertonic fluid saline stimulates vasopressin release from the pituitary gland, decreasing water loss through the kidneys.
Furthermore, the increase in intravascular volume simultaneously increases the mean arterial pressure (MAP), cardiac output (CO), and stroke volume (SV) when compared with equal volumes of standard saline or other isotonic fluids. Additionally, while a significant increase can be found in end-diastolic pressure, there’s a subsequent decrease in pulmonary vascular resistance. This suggests hypertonic fluid saline requires less overall volume administration to achieve similar plasma volumes as larger amounts of standard saline fluids.
Uses of Hypertonic IV Fluids
Hypertonic intravenous fluids exhibit a wide range of uses with diverse applications in medical settings. These fluids can be utilized to address specific medical conditions and health issues due to their elevated solute concentrations. So, hypertonic IV solution uses include:
Treatment of hyponatremia and other electrolyte imbalances – in patients with hyponatremia, hypertonic fluids with 3% saline are employed to potentially manage symptoms and correct the imbalance by raising serum sodium levels. This may also be useful in severe hyponatremia cases associated with neurological symptoms.
Management of cerebral edema – hypertonic solutions may help reduce cerebral edema by drawing water out of cells and potentially reducing brain tissue volume. This is considered a valuable treatment for cerebral edema in patients with traumatic brain injury.
Administration of medications, such as chemotherapy drugs – in certain medical cases, hypertonic solutions are utilized to act as a carrier solution and administer medications, such as chemotherapy drugs. The increased tonicity may have an impact on better drug distribution and absorption.
Administration of Hypertonic IV Fluids
Hypertonic fluids are administered parenterally by intravenous infusion. Generally, it’s done through central venous access, but administration via a peripheral intravenous catheter is also acceptable if no other option is available. While infusion volumes and rates are based on specific clinical indications, the initial rate of hypertonic administration is not to exceed 50 ml per hour.
Furthermore, precise administration techniques, controlled infusion rates, and accurate dosing are essential for ensuring the safety and efficiency of the procedure. Patients receiving hypertonic fluids demand careful attention and monitoring due to their potential effects on the cells. So, vigilant supervision is critical for avoiding and preventing any potential complications and adverse reactions associated with hypertonic intravenous fluids, such as:
Infection at the IV site
Thrombophlebitis
Extravasation
Hypervolemia
Source: shutterstock.com / Photo Contributor: Studio Romantic
Conclusion
In conclusion, a comprehensive understanding of what hypertonic IV fluids are and how they function is fundamental for anyone undergoing IV therapy. Their versatility and broad use are evident in their role in correcting various health issues, including treating hyponatremia, managing cerebral edema, and administering medications, among many more.
Proper administration and careful monitoring, as well as accurate dosing and controlled infusion rates, are critical for a safe and care-free procedure. With professional treatment, caution, and careful consideration, patients can confidently go through effective and individually tailored procedures.
A vitamin B12 IV infusion is an intravenous treatment that delivers this essential micronutrient directly into the bloodstream, bypassing the digestive system to achieve immediate, full bioavailability. It is used primarily to correct deficiency in individuals whose bodies cannot absorb B12 effectively through food or oral supplements.
This guide covers B12’s biological functions, how IV infusions work compared to other delivery methods, their specific health benefits, who benefits most from treatment, and how to choose a qualified provider.
Vitamin B12 serves as a cofactor for critical biochemical reactions in the Krebs cycle, myelin sheath maintenance, red blood cell production, and DNA synthesis. When levels drop, these processes slow simultaneously, which is why deficiency produces such wide-ranging symptoms.
IV delivery raises serum B12 levels significantly faster than daily oral supplementation, making it the preferred route for individuals with pernicious anemia, post-bariatric malabsorption, or chronic gastrointestinal conditions that impair nutrient uptake. For those with normal absorption, oral supplements often remain sufficient.
The benefits of correcting B12 deficiency through IV infusions span energy restoration, improved mental clarity, mood stabilization, immune support, and cardiovascular protection through homocysteine regulation. Athletes and frequent travelers also use infusions to support recovery and maintain nutrient reserves during periods of high physical demand.
Certain populations face elevated deficiency risk: vegans show prevalence rates as high as 44.1%, B12 concentrations decline roughly 6.8 ng/L per decade of age, and bariatric surgery patients carry approximately a 20% chance of deficiency within five years. Recognizing symptoms early and selecting a provider with licensed clinical staff are essential steps for safe, effective treatment.
What Is Vitamin B12 and Why Does Your Body Need It?
Vitamin B12 is an essential micronutrient that serves as a cofactor for biochemical reactions critical to energy production, nervous system function, red blood cell formation, and DNA synthesis.
What Role Does Vitamin B12 Play in Energy Production?
Vitamin B12 plays a direct role in energy production by acting as a cofactor for the synthesis of succinyl-CoA from methylmalonyl-CoA, an intermediate in the Krebs cycle. According to a study published in the International Journal of Molecular Sciences (2025), this biochemical conversion is fundamental to how cells generate usable energy. Without adequate B12, the Krebs cycle cannot process certain fatty acids and amino acids efficiently, which often manifests as persistent fatigue. NAD+ therapy is frequently co-administered with Vitamin B12 in IV clinic settings to further support cellular energy production and mitochondrial function. For individuals with compromised oral absorption, intravenous delivery ensures B12 reaches the cells that need it most.
How Does Vitamin B12 Support Nervous System Function?
Vitamin B12 supports nervous system function by serving as a cofactor for two critical enzymes: methionine synthase and L-methylmalonyl-CoA mutase. According to the NIH Office of Dietary Supplements, these enzymes are required for the formation of S-adenosylmethionine, a universal methyl donor for DNA, RNA, proteins, and lipids. This methylation process is essential for maintaining the myelin sheath that protects peripheral nerves and the brain.
When B12 levels drop, nerve damage can develop silently. Conventional testing identified deficiency in only 5% of Crohn’s Disease patients, but sensitive functional markers like holoTC and MMA revealed a 32% prevalence. Notably, B12 supplementation appears ineffective for improving cognitive function or depressive symptoms in patients without advanced neurological disorders, underscoring the importance of accurate diagnosis before treatment.
Why Is Vitamin B12 Essential for Red Blood Cell Formation?
Vitamin B12 is essential for red blood cell formation because it supports the biochemical reactions needed to produce reticulocytes, the immature cells that eventually develop into mature red blood cells. According to a 2025 comprehensive review published in PubMed Central, disruption of these reactions due to B12 deficiency can lead to megaloblastic anemia, a condition characterized by abnormally large, dysfunctional red blood cells. When the body cannot produce properly formed red blood cells, oxygen delivery to tissues becomes impaired. This is one reason unexplained fatigue and weakness are among the earliest clinical signs of B12 deficiency.
How Does Vitamin B12 Contribute to DNA Synthesis?
Vitamin B12 contributes to DNA synthesis through its role in the methionine synthase pathway. This enzyme converts homocysteine to methionine, which then produces S-adenosylmethionine, the primary methyl donor required for methylating DNA, RNA, and proteins. Without sufficient B12, cells cannot replicate their genetic material correctly, which disrupts the production of rapidly dividing cells throughout the body. Tissues with high turnover rates, such as bone marrow and the intestinal lining, are particularly vulnerable to this disruption. This connection between B12 and DNA replication is precisely why deficiency affects so many different body systems simultaneously.
Understanding these foundational roles clarifies why delivering B12 intravenously can offer distinct clinical advantages.
What Is a Vitamin B12 IV Infusion?
A vitamin B12 IV infusion is an intravenous treatment that delivers B12 directly into the bloodstream, bypassing the digestive system entirely. The sections below explain how it differs from oral supplements, what a session involves, and how quickly absorption occurs.
How Does a Vitamin B12 IV Infusion Differ From Oral Supplements?
A vitamin B12 IV infusion differs from oral supplements by delivering the nutrient directly into the bloodstream, eliminating dependence on gastrointestinal absorption. Oral B12 must pass through the stomach and intestines, where absorption relies on intrinsic factor and healthy gut function.
According to a clinical comparison study published in PubMed Central, weekly intravenous supplementation of vitamin B12 showed a statistically significant increase in B12 levels compared to daily oral supplementation. This distinction matters most for individuals with absorption disorders, pernicious anemia, or post-surgical digestive changes. For anyone with a confirmed deficiency, IV delivery offers a reliability that oral tablets simply cannot guarantee. However, Dr. Bauer from Mayo Clinic notes that limited evidence supports IV vitamin benefit for people with normal nutritional intake.
What Happens During a Vitamin B12 IV Infusion Session?
A vitamin B12 IV infusion session begins with a brief health assessment by a licensed nurse or medical professional. A small catheter is inserted into a vein, typically in the arm, and the B12 solution drips steadily into the bloodstream over 20 to 45 minutes.
During the infusion, patients can relax, read, or use their phone. Vital signs may be monitored throughout. Once the drip finishes, the catheter is removed and a small bandage applied. Most people resume normal activities immediately. Session costs vary widely by provider and formulation; according to Future Care Medical, vitamin drips in London range from £50 to £495 depending on infusion type and active ingredients.
How Quickly Does Your Body Absorb B12 Through IV Delivery?
Your body absorbs B12 through IV delivery almost immediately because the nutrient enters the bloodstream directly. Unlike oral supplements, which require digestion and intestinal transport, intravenous B12 achieves 100% bioavailability the moment it is infused.
This rapid absorption is why users commonly describe faster recovery from conditions such as dehydration, jet lag, hangovers, and physical exhaustion following IV vitamin therapy. Most patients notice effects within hours of their session, though the full physiological impact on cellular processes, including red blood cell production and nerve function, unfolds over subsequent days. For individuals with severe deficiencies, this speed of delivery can be clinically significant compared to waiting weeks for oral supplementation to raise serum levels.
With a clear picture of what B12 IV infusions involve, the next step is understanding their specific health benefits.
What Are the Benefits of Vitamin B12 IV Infusions?
The benefits of vitamin B12 IV infusions span energy production, cognitive function, mood regulation, immune defense, and physical recovery. The following subsections cover each benefit in detail.
How Do B12 IV Infusions Help With Chronic Fatigue?
B12 IV infusions help with chronic fatigue by restoring a nutrient essential for cellular energy production. Vitamin B12 acts as a cofactor in the synthesis of succinyl-CoA from methylmalonyl-CoA, an intermediate in the Krebs cycle that drives ATP generation. When B12 levels drop, this energy pathway slows, and persistent tiredness often follows.
Intravenous delivery bypasses digestive absorption barriers, raising serum B12 levels more rapidly than oral routes. For individuals whose fatigue stems from confirmed deficiency, this correction can produce noticeable improvements in stamina within days. Fatigue without underlying deficiency, however, is unlikely to respond to supplementation alone.
Can B12 IV Infusions Improve Mental Clarity and Focus?
Yes, B12 IV infusions can improve mental clarity and focus, particularly in individuals with low B12 status. Vitamin B12 supports the formation of S-adenosylmethionine (SAMe), a universal methyl donor required for neurotransmitter synthesis and healthy myelin sheath maintenance. Compromised methylation impairs nerve signal transmission, often manifesting as brain fog and poor concentration.
According to a 2021 review published in Nutrients (PMC), B12 supplementation is likely ineffective for improving cognitive function in patients without advanced neurological disorders. This distinction matters: the cognitive benefits are most pronounced when a genuine deficiency exists, not when B12 levels are already adequate.
How Do B12 IV Infusions Support Mood and Emotional Health?
B12 IV infusions support mood and emotional health by facilitating neurotransmitter pathways that regulate serotonin and dopamine production. Because vitamin B12 is required for SAMe synthesis, insufficient levels can disrupt methylation reactions involved in producing these mood-regulating chemicals.
Deficiency-related mood disturbances can range from mild irritability to clinical depression. Correcting low B12 through IV delivery addresses the biochemical root rather than masking symptoms. That said, B12 infusions are not a standalone treatment for mood disorders; they work best as part of a broader approach that includes professional mental health support when needed.
Can B12 IV Infusions Boost Immune System Function?
Yes, B12 IV infusions can boost immune system function by supporting the rapid cell division that immune responses require. Vitamin B12 plays a direct role in DNA synthesis and red blood cell formation, both of which underpin a healthy immune defense. Without adequate B12, disrupted reticulocyte production can lead to megaloblastic anemia, weakening the body’s ability to mount effective immune responses.
IV delivery ensures full bioavailability, which is especially valuable for individuals with absorption issues who cannot maintain adequate levels through diet alone. Consistent B12 status helps maintain white blood cell production and overall immune readiness.
How Do B12 IV Infusions Benefit Hair, Skin, and Nail Health?
B12 IV infusions benefit hair, skin, and nail health by supporting the cell division and oxygenation these tissues depend on. Vitamin B12 contributes to red blood cell formation, which delivers oxygen to hair follicles, skin cells, and nail beds. Deficiency often presents as hair thinning, pale or yellowish skin, and brittle nails.
As Dr. Bauer from Mayo Clinic notes, there is limited evidence that IV vitamins provide benefit to people with normal nutritional intake and levels. The cosmetic improvements tend to be most visible when correcting a genuine deficiency rather than supplementing already sufficient stores. Prioritizing baseline testing before treatment is a practical first step.
Can B12 IV Infusions Aid in Athletic Performance and Recovery?
Yes, B12 IV infusions can aid in athletic performance and recovery by optimizing oxygen transport and energy metabolism. B12’s role in red blood cell production directly affects how efficiently muscles receive oxygen during exercise. Its involvement in the Krebs cycle also supports the sustained ATP output that endurance and high-intensity training demand.
Athletes commonly describe faster recovery from physical exhaustion when treated with IV vitamin therapy, according to a 2025 review in Cureus (PMC). For athletes with demanding training schedules, maintaining optimal B12 levels through IV delivery can reduce recovery windows and support consistent performance output.
How Do B12 IV Infusions Support Cardiovascular Health?
B12 IV infusions support cardiovascular health by helping regulate homocysteine levels in the blood. Vitamin B12, through its role in methionine synthase activity, converts homocysteine back into methionine. Elevated homocysteine is an independent risk factor for cardiovascular disease, including atherosclerosis and stroke.
When B12 is deficient, homocysteine accumulates, potentially damaging blood vessel walls over time. IV infusions correct this deficiency rapidly, restoring the methylation pathway that keeps homocysteine in check. For individuals already at cardiovascular risk, maintaining adequate B12 is one of the more straightforward nutritional strategies available.
With these wide-ranging benefits established, the next step is determining who stands to gain the most from B12 IV therapy.
Who Should Consider Getting Vitamin B12 IV Infusions?
Vitamin B12 IV infusions are worth considering for anyone whose body cannot adequately absorb or maintain sufficient B12 levels. The following sections cover specific groups, from those with confirmed deficiency to athletes and frequent travelers.
Why Might People With B12 Deficiency Need IV Infusions?
People with B12 deficiency need IV infusions because oral supplementation may not overcome absorption barriers. Passive diffusion accounts for only 1.2% of total vitamin B12 absorption, a pathway unaffected by conditions like pernicious anemia or gastric surgery, according to a study published in PubMed Central. For individuals with compromised gut function, this limited passive route cannot compensate for lost active absorption.
Vitamin B12 preserves the myelin sheath that covers and protects peripheral nerves and the brain. Without adequate levels, patients may experience pins and needles in the hands, arms, legs, or feet. IV delivery bypasses the digestive system entirely, making it the most reliable correction method when oral routes fail.
Should Vegans and Vegetarians Consider B12 IV Infusions?
Yes, vegans and vegetarians should consider B12 IV infusions if oral supplements are not maintaining adequate levels. Vitamin B12 occurs naturally only in animal-derived foods, placing plant-based eaters at inherent risk. Research published in PubMed Central found B12 deficiency prevalence among long-term vegetarians reached 38.5%, with vegans showing significantly higher rates at 44.1% compared to 15.0% in lacto-ovo vegetarians.
Daily oral supplements work well for many plant-based eaters, yet some still test low despite consistent supplementation. For those individuals, periodic IV infusions offer a direct path to restoring serum levels without relying on gastrointestinal absorption.
Can Older Adults Benefit From B12 IV Infusions?
Yes, older adults can benefit from B12 IV infusions. Age-related decline in gastric acid and intrinsic factor production reduces the body’s ability to extract B12 from food and oral supplements. A study published on ResearchGate found that total B12 concentrations decrease by approximately 6.8 ng/L per decade of age increase, making adults over 50 a high-risk group for deficiency.
Because this decline is progressive and often asymptomatic in early stages, many older adults remain undiagnosed until neurological symptoms appear. IV infusions provide a reliable alternative when oral absorption becomes insufficient.
Why Might People With Digestive Disorders Choose B12 IV Therapy?
People with digestive disorders choose B12 IV therapy because their conditions impair nutrient absorption in the gut. Conditions such as Crohn’s disease, celiac disease, and chronic gastritis damage or inflame the ileum, where active B12 absorption occurs. Bariatric surgery patients face similar challenges due to altered gastrointestinal anatomy.
For these individuals, even high-dose oral B12 may never reach the bloodstream in adequate quantities. IV therapy eliminates the digestive system from the equation entirely, delivering B12 directly into circulation. This makes it particularly practical for anyone managing chronic malabsorption conditions long term.
Should Athletes and Active Individuals Get B12 IV Infusions?
Athletes and active individuals should consider B12 IV infusions when intense training increases metabolic demand beyond what diet and oral supplements provide. Vitamin B12 supports energy production through its role in the Krebs cycle and red blood cell formation, both critical for athletic performance and oxygen delivery to working muscles.
While most athletes with balanced diets maintain adequate levels, those training at high volumes or following restrictive eating patterns may benefit from periodic IV supplementation. The rapid systemic delivery can support faster recovery between demanding sessions.
Can Frequent Travelers Benefit From B12 IV Infusions?
Yes, frequent travelers can benefit from B12 IV infusions. Irregular eating schedules, jet lag, and exposure to new environments place additional stress on the body’s nutrient reserves. B12 supports immune function and energy metabolism, both of which travel disrupts.
For those who cross multiple time zones regularly, an IV infusion before or after travel helps restore baseline nutrient levels quickly. This is especially valuable when dietary consistency proves difficult to maintain on the road. With the growing accessibility of mobile IV services, maintaining optimal B12 status between trips has become a practical wellness strategy.
What Are the Signs and Symptoms of Vitamin B12 Deficiency?
The signs and symptoms of vitamin B12 deficiency span neurological, psychological, and physical domains. Recognizing these warning signs early can prevent irreversible nerve damage and guide timely intervention through supplementation or IV therapy.
Vitamin B12 deficiency can cause neurological symptoms including numbness, muscle weakness, pins and needles, and psychological problems ranging from mild depression to dementia, according to the NHS. These symptoms often develop gradually, making them easy to dismiss as normal fatigue or aging.
Neurological warning signs deserve particular attention. Lower limb sensory symptoms, such as tingling or reduced sensation in the feet and legs, may be the only manifestation of vitamin B12 deficiency in some patients, as documented by NHS Lothian clinical guidelines. This subtle presentation frequently delays diagnosis, allowing nerve damage to progress before treatment begins.
Physical symptoms commonly include:
Persistent fatigue and weakness unrelated to sleep quality
Pale or slightly yellow skin
A sore, red tongue (glossitis)
Mouth ulcers
Disturbed vision
Breathlessness and dizziness
Psychological symptoms can range from irritability and mood changes to cognitive decline. In severe cases, untreated deficiency may progress to memory problems or dementia-like symptoms.
Certain populations face elevated risk. There is approximately a 20% chance of developing vitamin B12 deficiency between two to five years following bariatric surgery due to altered absorption mechanisms. Older adults, strict vegans, and individuals with gastrointestinal conditions also require vigilance.
When deficiency is confirmed, a typical vitamin B12 injection dosage for mild cases is 1,000 micrograms once a week for several weeks, followed by maintenance doses. For patients with absorption disorders, bypassing the digestive system entirely through IV delivery often proves more reliable than oral supplementation alone.
Early detection remains the most critical factor in preventing permanent neurological complications, making routine screening essential for anyone in a high-risk group.
How Do B12 IV Infusions Compare to B12 Injections?
B12 IV infusions compare to B12 injections in delivery method, absorption speed, dosing flexibility, and clinical use. Both bypass the digestive tract, but they differ in how nutrients enter the bloodstream and which scenarios each method suits best.
B12 IV infusions deliver vitamin B12 directly into the bloodstream through a vein, typically as part of a larger fluid and nutrient blend. The infusion process takes 30 to 60 minutes, allowing for gradual absorption alongside other vitamins, minerals, and hydration fluids. This makes IV infusions well suited for individuals who need comprehensive nutrient replenishment beyond B12 alone.
B12 injections, by contrast, deposit a concentrated dose of vitamin B12 into the muscle (intramuscular) or under the skin (subcutaneous). The nutrient absorbs from the injection site into the bloodstream over several hours. A typical dosage for mild deficiency is 1,000 micrograms once a week for several weeks, followed by maintenance doses. Injections are faster to administer, often completed in under five minutes.
Key differences between B12 IV infusions and B12 injections include:
Delivery route: IV infusions enter the vein directly; injections deposit B12 into muscle or subcutaneous tissue.
Session duration: IV infusions typically last 30 to 60 minutes; injections take under five minutes.
Nutrient scope: IV infusions can combine B12 with fluids, magnesium, vitamin C, and other nutrients; injections deliver B12 only.
Absorption pathway: IV delivery provides immediate 100% bioavailability; intramuscular injections absorb gradually from the tissue depot.
Cost range: IV infusion sessions generally cost $85 to $400 depending on treatment type; standalone B12 injections are typically less expensive per session.
Clinical context: IV infusions suit broader wellness and multi-nutrient protocols; injections are the standard medical treatment for confirmed B12 deficiency.
According to a clinical comparison study published in PubMed Central, weekly intravenous supplementation of vitamin B12 showed a statistically significant increase in B12 levels compared to daily oral supplementation. Both parenteral routes, whether IV or injection, outperform oral delivery for individuals with absorption impairments such as pernicious anemia or post-surgical malabsorption.
For most people seeking targeted B12 correction alone, intramuscular injections remain the more practical and cost-effective choice. IV infusions become the stronger option when the goal extends beyond B12 to include hydration, multi-nutrient support, or recovery from physical exhaustion. Understanding which delivery method aligns with your health needs helps you avoid paying for more than necessary, or settling for less than what your situation requires.
How Often Should You Get Vitamin B12 IV Infusions?
You should get vitamin B12 IV infusions on a schedule tailored to your deficiency severity, health goals, and provider recommendations. Frequency typically ranges from weekly loading doses to monthly or quarterly maintenance sessions.
The frequency of vitamin B12 IV infusions depends on whether you are correcting an active deficiency or maintaining optimal levels. A typical protocol starts with more frequent sessions and tapers as levels normalize. According to IVBoost UK, a typical vitamin B12 injection dosage for mild deficiency is 1,000 micrograms once a week for several weeks, followed by maintenance doses.
Several factors influence how often sessions are needed:
Deficiency severity: Individuals with serum B12 below 200 pg/mL often require weekly infusions during the initial correction phase.
Absorption capacity: Those with pernicious anemia or post-bariatric conditions may need ongoing infusions since oral routes remain ineffective for them.
Health objectives: Wellness-focused clients without clinical deficiency typically schedule sessions monthly or quarterly.
Dietary intake: Vegans and strict vegetarians, who face higher deficiency risk, often benefit from more regular infusions than omnivores.
Most providers follow a two-phase approach. The loading phase involves weekly sessions for four to six weeks to rapidly restore depleted stores. Once blood levels stabilize, maintenance shifts to once every one to three months. Your provider should monitor serum B12 and methylmalonic acid levels to adjust timing appropriately.
For anyone without a diagnosed deficiency, periodic infusions every few months can serve as a preventive measure, though the clinical necessity remains debatable for well-nourished individuals. The most reliable approach is to let lab results, not a fixed calendar, guide your schedule. Understanding potential side effects helps you weigh the full picture before committing to a recurring protocol.
What Are the Potential Side Effects of B12 IV Infusions?
The potential side effects of B12 IV infusions are generally mild and temporary, though some reactions warrant medical attention. The following covers common reactions, serious risks, and contraindications to be aware of before treatment.
What Are the Common Side Effects After a B12 IV Infusion?
The common side effects after a B12 IV infusion include mild, transient reactions that typically resolve within hours. According to Health Canada’s drug product labeling, documented adverse effects of vitamin B12 injections include mild transient diarrhea, itching, and transitory exanthema (skin rash).
Additional common reactions include:
Slight soreness, redness, or bruising at the IV insertion site.
Temporary warmth or flushing during the infusion.
Mild headache or lightheadedness shortly after treatment.
A metallic taste in the mouth during delivery.
Most of these effects are related to the intravenous delivery method itself rather than vitamin B12 specifically. For the vast majority of recipients, these reactions are brief and manageable without intervention.
Are There Serious Risks Associated With B12 IV Therapy?
Serious risks associated with B12 IV therapy are rare but possible, particularly when infusions are administered in unregulated settings. The most significant concerns include:
Infection at the injection site if sterile technique is not followed properly.
Phlebitis, an inflammation of the vein, which can cause pain, swelling, and redness along the IV line.
Anaphylaxis, a severe allergic reaction requiring emergency treatment, though this is extremely uncommon with B12.
Polycythemia vera exacerbation, where B12 supplementation stimulates excessive red blood cell production in predisposed individuals.
The FDA notes that contraindications for cyanocobalamin injection include known sensitivity to cobalt or vitamin B12 itself. This is why a thorough health screening before any IV infusion is essential for identifying individuals at elevated risk.
Who Should Avoid B12 IV Infusions?
Certain individuals should avoid B12 IV infusions or proceed only under direct medical supervision. Those with a known allergy to cobalt or any form of cobalamin should not receive B12 intravenously. Patients diagnosed with polycythemia vera, Leber’s hereditary optic neuropathy, or certain kidney conditions also face heightened risk.
The UK’s MHRA classifies vitamin B12 injections as prescription-only medicines, reinforcing that these treatments require professional oversight. Pregnant or breastfeeding individuals should consult their physician before any IV vitamin therapy, as dosing considerations differ during these periods. In my experience, the single most overlooked safety step is a proper pre-infusion screening; skipping it turns a low-risk procedure into an unnecessary gamble.
Choosing a qualified provider with clinical protocols in place helps minimize these risks significantly.
How Should You Choose a Vitamin B12 IV Infusion Provider?
You should choose a vitamin B12 IV infusion provider based on clinical credentials, treatment transparency, and personalized care. The following sections cover how The Drip IV Infusion delivers B12 therapy and the key takeaways from this guide.
Can The Drip IV Infusion Deliver B12 IV Therapy to You?
Yes, The Drip IV Infusion can deliver B12 IV therapy directly to your home or workplace through its mobile service in Arizona. Founded in Fall 2022, The Drip IV Infusion brings decades of combined experience in nursing, emergency medicine, and IV medical techniques to every session. Vitamin B12 is available as a standalone add-on or as part of customized IV cocktails tailored to individual health goals.
The Drip IV Infusion offers additional options to complement B12 therapy:
NAD+ for cellular energy and mitochondrial support
Glutathione for antioxidant protection
B-Complex vitamins for broader metabolic coverage
Amino Blend for recovery and performance
Each infusion is administered by trained professionals who assess client needs before treatment. To schedule a session or explore the full IV menu, contact The Drip IV Infusion at hello@thedripivinfusion.com or call +1.602.341.3511.
What Are the Key Takeaways About Vitamin B12 IV Infusions?
The key takeaways about vitamin B12 IV infusions center on their speed, bioavailability, and suitability for individuals who cannot absorb B12 effectively through oral routes. IV delivery bypasses the gastrointestinal tract entirely, making it particularly valuable for those with pernicious anemia, digestive disorders, or post-surgical malabsorption.
The most actionable points to remember include:
B12 deficiency affects a wide range of populations, from vegans and older adults to bariatric surgery patients.
Symptoms like chronic fatigue, numbness, and cognitive difficulty often signal low B12 levels worth investigating.
IV infusions raise serum B12 levels faster than oral supplements, though not everyone requires this route.
Choosing a provider with licensed medical staff and transparent protocols ensures both safety and effectiveness.
For most people exploring B12 IV therapy, the decision comes down to absorption capacity and lifestyle needs; those with confirmed deficiency or absorption challenges stand to benefit most.
Isotonic, hypotonic, and hypertonic solutions are three categories of IV fluids classified by their solute concentration relative to blood plasma. Each type triggers a different osmotic response at the cellular level, making fluid selection one of the most consequential decisions in clinical care.
This guide covers tonicity fundamentals and osmosis, isotonic fluid indications, hypotonic fluid indications, hypertonic fluid indications, key differences between all three solution types, nursing safety considerations, and how IV fluid principles apply to everyday hydration and recovery.
Tonicity defines whether cells maintain equilibrium, swell with incoming water, or shrink as water exits. Osmosis is the mechanism driving these shifts, and clinicians match a solution’s osmolarity to the patient’s specific deficit to determine which fluid to administer.
Isotonic solutions like 0.9% sodium chloride and Lactated Ringer’s match plasma osmotic pressure, producing no net fluid shift. They serve as first-line choices for volume expansion during hemorrhage, shock, severe vomiting, and diarrhea. Lactated Ringer’s offers a balanced electrolyte profile that may reduce adverse kidney events compared to standard saline.
Hypotonic solutions such as 0.45% and 0.225% sodium chloride lower vascular osmolality, driving water into dehydrated cells. They treat hypernatremia and cellular dehydration but are strictly contraindicated in patients with increased intracranial pressure due to the risk of cerebral edema.
Hypertonic solutions including 3% saline, D10W, D5NS, and D5LR pull water out of cells into the extracellular space. They address severe hyponatremia, cerebral edema, and hypoglycemia, though administration demands ICU-level monitoring to prevent osmotic demyelination syndrome.
Safe administration requires continuous tracking of vital signs, urine output, serum electrolytes, lung sounds, and neurological status. Selecting the wrong tonicity can cause fluid overload, pulmonary edema, or irreversible neurological damage.
What Are Isotonic, Hypotonic, and Hypertonic Solutions?
Isotonic, hypotonic, and hypertonic solutions are three categories of IV fluids classified by their solute concentration relative to blood plasma. The following sections explain tonicity and the role osmosis plays in fluid selection.
What Does Tonicity Mean in IV Fluid Therapy?
Tonicity in IV fluid therapy means the ability of an intravenous solution to influence water movement across cell membranes based on its solute concentration compared to plasma. This property determines whether cells maintain their shape, swell with excess water, or shrink as water is drawn out.
Clinicians rely on tonicity to guide every fluid order because selecting the wrong concentration carries serious consequences. According to the Society of Critical Care Medicine, complications of incorrect tonicity administration include fluid overload, pulmonary edema, cerebral edema, osmotic demyelination syndrome, and hyperchloremic metabolic acidosis.
To catch problems early, nurses monitor several parameters during infusion:
Vital signs and hemodynamic trends
Urine output volume and concentration
Serum electrolyte levels
Lung sounds, specifically crackles that signal fluid overload
Neurological status changes
Understanding tonicity before choosing a solution is foundational; without it, even a routine fluid order can become dangerous.
How Does Osmosis Relate to IV Solution Selection?
Osmosis relates to IV solution selection because it is the mechanism through which IV fluids alter cellular hydration. When a solution enters the bloodstream, water moves across cell membranes from areas of lower solute concentration toward areas of higher solute concentration until equilibrium is reached.
According to Khan Academy, tonicity refers to the ability of an extracellular solution to make water move into or out of a cell by osmosis, which is directly related to the solution’s osmolarity. An isotonic fluid keeps water balanced across the membrane. A hypotonic fluid drives water into cells, while a hypertonic fluid pulls water out.
Clinicians match a solution’s osmolarity to the patient’s specific fluid deficit, making osmosis the governing principle behind every IV fluid decision. With these foundational concepts established, the next sections examine how each solution type behaves at the cellular level.
What Is an Isotonic Solution and How Does It Work?
An isotonic solution matches the osmotic pressure of blood plasma, preventing net fluid movement into or out of cells. The sections below explain cellular behavior in isotonic environments and the most common isotonic IV fluids used clinically.
What Happens to Cells in an Isotonic Solution?
Cells in an isotonic solution remain in a state of equilibrium, with no net water movement across cell membranes. Because the solute concentration outside the cell equals the concentration inside, osmotic pressure is balanced in both directions.
According to Osmosis by Elsevier, isotonic solutions such as 0.9% Sodium Chloride (Normal Saline) and Lactated Ringer’s have the same osmotic pressure as plasma, causing no net fluid shift and keeping cells stable.
This equilibrium is precisely why isotonic fluids are preferred when the clinical goal is volume replacement without altering cell size. Neither swelling nor shrinkage occurs, which protects red blood cells and tissue integrity during rapid infusion.
What Are Common Examples of Isotonic IV Fluids?
Common examples of isotonic IV fluids include:
0.9% Sodium Chloride (Normal Saline): The most widely used crystalloid for general fluid resuscitation.
Lactated Ringer’s Solution: A balanced electrolyte solution that closely mirrors plasma composition.
5% Dextrose in Water (D5W): Initially isotonic in the bag, though it becomes hypotonic once dextrose is metabolized.
According to the National Center for Biotechnology Information, isotonic fluids are the primary choice for volume expansion in clinical scenarios including hemorrhage, severe vomiting, diarrhea, shock, and metabolic acidosis. For clinicians and patients alike, understanding which isotonic fluid fits a given situation is foundational before considering hypotonic or hypertonic alternatives.
When Should You Give an Isotonic Solution?
You should give an isotonic solution when a patient needs intravascular volume expansion without shifting fluid into or out of cells. The specific isotonic fluid depends on the clinical scenario, electrolyte needs, and patient history.
When Should You Give Normal Saline (0.9% NaCl)?
You should give normal saline (0.9% NaCl) when a patient requires rapid volume resuscitation or has significant sodium and chloride losses. Common indications include:
Hemorrhage and hypovolemic shock requiring immediate fluid replacement
Severe dehydration from vomiting or diarrhea
Blood transfusion compatibility, since normal saline is the only IV fluid safe to administer alongside blood products
Diabetic ketoacidosis as the initial resuscitation fluid
Metabolic alkalosis, where the chloride content helps correct the acid-base imbalance
Normal saline remains the most widely used crystalloid in emergency settings. However, prolonged high-volume infusion can contribute to hyperchloremic metabolic acidosis, making balanced alternatives worth considering for extended resuscitation.
When Should You Give a Lactated Ringer’s Solution?
You should give Lactated Ringer’s solution when replacing water and electrolyte loss in patients with low blood volume or low blood pressure. According to Mayo Clinic, Lactated Ringer’s is specifically indicated for these conditions but is contraindicated in patients with severe renal insufficiency due to the risk of fluid or solute overload.
Because Lactated Ringer’s contains potassium, calcium, and lactate in concentrations that closely mirror plasma, it causes less acid-base disruption than normal saline during large-volume resuscitation. Clinical research reported by the New England Journal of Medicine indicates that replacing standard saline with balanced crystalloids like Lactated Ringer’s in intensive care units can significantly reduce major adverse kidney events and death. For surgical patients and trauma cases, this balanced composition makes Lactated Ringer’s a preferred first-line isotonic fluid.
When Should You Give D5W as an Isotonic Infusion?
You should give D5W as an isotonic infusion when a patient needs a vehicle for intravenous medication delivery or requires modest caloric supplementation without additional sodium. D5W is isotonic in the bag, which means it does not cause vein irritation during administration.
Once infused, however, the body rapidly metabolizes the dextrose, leaving behind free water that distributes across all fluid compartments. This makes D5W unsuitable for true volume expansion. Clinicians typically select D5W for patients who need a keep-vein-open solution, those on sodium-restricted diets, or individuals requiring short-term hydration where electrolyte supplementation is unnecessary. Understanding this dual behavior is essential when selecting between isotonic fluids that restore volume and those that primarily deliver free water.
What Is a Hypotonic Solution and How Does It Work?
A hypotonic solution is an IV fluid with lower osmolality than blood plasma, causing water to move into cells through osmosis. The sections below explain how cells respond to hypotonic environments and which IV fluids fall into this category.
What Happens to Cells in a Hypotonic Solution?
Cells in a hypotonic solution absorb water through osmosis because the surrounding fluid contains fewer dissolved particles than the intracellular environment. This inward fluid shift causes cells to swell, and in extreme cases, the membrane can rupture in a process called lysis.
According to CIA Medical, hypotonic solutions such as 0.45% Sodium Chloride (Half-Normal Saline) lower the osmolality within the vascular space, causing fluid to shift into the cells and potentially leading to cellular swelling or lysis. This mechanism makes hypotonic fluids useful for treating cellular dehydration and hypernatremia, where cells have lost water and need rehydration at the intracellular level.
However, this same fluid-shifting property creates serious risks in certain patients. Hypotonic solutions are strictly contraindicated in patients with increased intracranial pressure because the resulting cellular swelling can exacerbate cerebral edema. For clinicians, understanding this balance between therapeutic benefit and potential harm is what separates safe hypotonic fluid use from dangerous administration.
What Are Common Examples of Hypotonic IV Fluids?
The common examples of hypotonic IV fluids include solutions with osmolality at or below 250 mOsm/L. The most frequently used options are:
0.45% Sodium Chloride (Half-Normal Saline): The most widely administered hypotonic IV fluid, used for cellular rehydration and gradual sodium correction.
0.225% Sodium Chloride (Quarter-Normal Saline): An extremely hypotonic solution reserved for critical care settings when significant free water delivery is needed.
D5W (post-metabolism): Initially isotonic in the bag, 5% Dextrose in Water becomes functionally hypotonic once the body metabolizes the glucose, leaving free water that distributes across fluid compartments.
Each fluid serves a distinct clinical purpose based on how aggressively intracellular rehydration needs to occur. With these foundational hypotonic fluids defined, the next step is understanding when each one should be administered.
When Should You Give a Hypotonic Solution?
You should give a hypotonic solution when a patient presents with cellular dehydration or elevated sodium levels. The specific clinical scenario determines whether 0.45% saline, 0.225% saline, or D5W is most appropriate.
When Should You Use 0.45% Normal Saline?
You should use 0.45% normal saline when treating hypernatremia and intracellular dehydration. This half-normal saline solution lowers vascular osmolality, driving water into dehydrated cells to restore fluid balance. Common indications include:
Diabetic ketoacidosis maintenance fluids after initial isotonic resuscitation
Hypernatremia requiring gradual sodium correction
Daily maintenance fluid therapy for patients who cannot take fluids orally
According to Drugs.com, hypotonic solutions like 0.45% sodium chloride are strictly contraindicated in patients with increased intracranial pressure because they can exacerbate cerebral edema. Careful serum sodium monitoring during infusion prevents overly rapid correction, which risks neurological complications. For most clinical teams, this remains the default hypotonic choice when moderate free water delivery is needed.
When Should You Use 0.225% Normal Saline?
You should use 0.225% normal saline in specific critical care settings where aggressive free water replacement is necessary. This quarter-normal saline is an extremely hypotonic solution, making it far more potent at shifting fluid into cells than half-normal saline.
Its primary indication is severe hypernatremia requiring controlled free water administration. According to a study published in PubMed (National Library of Medicine), 0.225% sodium chloride is used in critical care to treat severe hypernatremia when free water delivery is required. Because of its very low osmolality, this solution carries a higher risk of rapid cellular swelling. Administration typically requires ICU-level monitoring with frequent electrolyte checks.
When Should You Use D5W as a Hypotonic Infusion?
You should use D5W as a hypotonic infusion when a patient needs free water without additional sodium. D5W is initially isotonic in the bag, but once the body metabolizes the dextrose, the remaining solution becomes hypotonic. This provides free water to both extracellular and intracellular compartments.
Key clinical uses include:
Providing free water for patients with hypernatremia who need sodium-free hydration
Serving as a drug diluent for IV medication delivery
Supporting mild caloric supplementation in patients unable to eat
Clinicians often underestimate how quickly D5W’s tonicity shifts after infusion, which makes ongoing monitoring essential. Understanding these hypotonic options helps clinicians select the right concentration for each clinical scenario, a principle that applies equally when choosing hypertonic solutions.
What Is a Hypertonic Solution and How Does It Work?
A hypertonic solution is an IV fluid with higher solute concentration than blood plasma, which pulls water out of cells through osmosis. The sections below explain cellular response and common hypertonic fluid examples.
What Happens to Cells in a Hypertonic Solution?
Cells in a hypertonic solution lose water and shrink through a process called crenation. Because the surrounding fluid contains more dissolved particles than the cell’s interior, osmosis drives water outward across the cell membrane to equalize concentration. This deliberate fluid shift is precisely why clinicians select hypertonic solutions: to reduce dangerous swelling in tissues, particularly the brain.
According to RxList, hypertonic solutions such as 3% Sodium Chloride create an osmotic pressure gradient that draws water out of the intracellular space into the extracellular space, causing cells to shrink. Given this potent effect, administration requires careful oversight. State nursing boards regulate who can manage these infusions; Mississippi, for example, specifically prohibits LPNs from independently regulating dosages of hypertonic solutions. For most clinical scenarios, hypertonic fluids demand central venous access and continuous monitoring because rapid osmotic shifts can cause serious complications if poorly controlled.
What Are Common Examples of Hypertonic IV Fluids?
Common examples of hypertonic IV fluids include 3% Sodium Chloride, 5% Sodium Chloride, D10W, D5NS, and D5LR. Each serves a distinct clinical purpose:
3% Sodium Chloride (3% NaCl) is used for severe hyponatremia and cerebral edema, requiring slow, monitored infusion.
5% Sodium Chloride (5% NaCl) treats critically low sodium levels under intensive care supervision.
D10W (10% Dextrose in Water) provides 340 calories per liter and addresses hypoglycemia or nutritional support needs.
D5NS (5% Dextrose in 0.9% NaCl) combines electrolyte replacement with caloric supplementation while maintaining high osmolarity.
D5LR (5% Dextrose in Lactated Ringer’s) delivers electrolytes and calories, preventing fluid from shifting into cells.
The variety within this category highlights an important point: not all hypertonic fluids work the same way. Selecting the right one depends on whether the clinical goal is sodium correction, glucose support, or combined electrolyte and caloric delivery. Understanding when each is appropriate is essential for safe IV fluid management.
When Should You Give a Hypertonic Solution?
You should give a hypertonic solution when a patient needs rapid fluid shift from cells into the vascular space. Common clinical scenarios include severe hyponatremia, cerebral edema, and hypoglycemia requiring concentrated glucose.
When Should You Use 3% Saline?
You should use 3% saline when a patient presents with severe, symptomatic hyponatremia or acute cerebral edema. This concentrated sodium chloride solution creates a strong osmotic gradient that pulls excess water out of swollen brain cells, reducing dangerous intracranial pressure.
According to the U.S. Food and Drug Administration, 3% and 5% sodium chloride injections are indicated for treating severe hyponatremia and cerebral edema, though they must be administered with extreme caution to avoid osmotic demyelination syndrome. Because of this risk, 3% saline typically requires ICU-level monitoring with frequent serum sodium checks. For clinicians, the critical principle is controlled correction; raising sodium too quickly can cause irreversible neurological damage, making this one of the highest-risk IV fluids in practice.
When Should You Use D10W?
You should use D10W when a patient requires treatment for hypoglycemia or needs concentrated caloric supplementation through an IV line. D10W, or 10% dextrose in water, is a hypertonic solution that delivers a higher glucose load than standard dextrose fluids.
According to DailyMed, D10W provides 340 calories per liter and is used for nutritional support or to treat hypoglycemia when higher glucose concentrations are required. This makes it particularly valuable for neonates, patients who cannot eat, or those with persistently low blood sugar unresponsive to D5W. Blood glucose levels should be monitored closely during infusion, since overcorrection can lead to hyperglycemia and osmotic complications.
When Should You Use D5 in 0.9% Normal Saline?
You should use D5 in 0.9% normal saline (D5NS) when a patient needs both fluid volume expansion and supplemental calories. D5NS combines the isotonic electrolyte profile of normal saline with 5% dextrose, creating a hypertonic solution that maintains high osmolarity while delivering energy.
Common indications include postoperative fluid maintenance, patients with combined caloric and electrolyte deficits, and situations where prolonged NPO (nothing by mouth) status demands nutritional support alongside hydration. Because D5NS provides sodium, chloride, and glucose simultaneously, it is well suited for patients who need more than simple rehydration. Serum glucose and electrolytes should be monitored throughout the infusion.
When Should You Use D5 in Lactated Ringers?
You should use D5 in Lactated Ringer’s (D5LR) when a patient requires balanced electrolyte replacement combined with caloric intake. D5LR pairs the multi-electrolyte composition of Lactated Ringer’s, including sodium, potassium, calcium, and lactate, with 5% dextrose for energy.
This solution is frequently selected for surgical patients, burn recovery, and prolonged fluid therapy where both electrolyte balance and caloric support matter. Compared to D5NS, D5LR offers a more physiologically balanced electrolyte profile that reduces the risk of hyperchloremic metabolic acidosis. However, it remains contraindicated in patients with severe hepatic impairment, since the liver must metabolize lactate to bicarbonate. Selecting between D5NS and D5LR ultimately depends on the patient’s acid-base status and electrolyte needs.
What Are the Key Differences Between Isotonic, Hypotonic, and Hypertonic Solutions?
The key differences between isotonic, hypotonic, and hypertonic solutions center on osmolality, the direction of water movement across cell membranes, and their clinical applications. Normal serum osmolality falls between 275 and 295 mOsm/kg, according to StatPearls, and each solution type is defined by its concentration relative to this baseline.
Feature
Isotonic
Hypotonic
Hypertonic
Osmolality Range
250–375 mOsm/L
≤ 250 mOsm/L
≥ 375 mOsm/L
Water Movement
No net fluid shift
Water moves into cells
Water moves out of cells
Cell Response
Equilibrium
Swelling (possible lysis)
Shrinkage (crenation)
Primary Use
Volume expansion, shock, hemorrhage
Cellular dehydration, hypernatremia
Severe hyponatremia, cerebral edema
Common Examples
0.9% NaCl, Lactated Ringer’s
0.45% NaCl, 0.225% NaCl
3% NaCl, D10W, D5NS
Understanding these distinctions matters because selecting the wrong tonicity can worsen a patient’s condition rather than correct it. For clinicians and nursing students frequently searching for clarification on isotonic versus hypotonic solutions for dehydration, this comparison serves as a practical reference point. With these differences established, proper monitoring during administration becomes the next critical step.
What Nursing Considerations Apply When Administering IV Solutions?
Nursing considerations when administering IV solutions include continuous patient monitoring, accurate tonicity selection, and awareness of complications from incorrect fluid choices. The subsections below cover monitoring protocols and risks of tonicity errors.
How Do You Monitor a Patient Receiving IV Fluids?
You monitor a patient receiving IV fluids by tracking a specific set of clinical parameters throughout the infusion. According to BC Campus Open Publishing, essential nursing monitoring parameters for IV therapy include vital signs, urine output, serum electrolytes, lung sounds for crackles indicating fluid overload, and neurological status.
Effective monitoring follows a consistent assessment cycle:
Measure vital signs at baseline and at regular intervals during infusion.
Track urine output to evaluate kidney function and fluid balance.
Auscultate lung sounds for crackles, which signal early pulmonary edema.
Review serum electrolyte levels to detect imbalances caused by the infusion.
Assess neurological status, especially when administering hypotonic or hypertonic solutions.
Skipping any single parameter can mask early warning signs, making a structured checklist one of the most practical tools a nurse can use during IV administration.
What Are the Risks of Giving the Wrong IV Tonicity?
The risks of giving the wrong IV tonicity include fluid overload, pulmonary edema, cerebral edema, osmotic demyelination syndrome, and hyperchloremic metabolic acidosis. Each complication stems from unintended fluid shifts between the intravascular and intracellular compartments.
Administering a hypotonic solution to a patient with elevated intracranial pressure, for example, can worsen cerebral edema by driving water into brain cells. Conversely, correcting hyponatremia too rapidly with hypertonic saline risks osmotic demyelination syndrome, which causes irreversible neurological damage. Even isotonic solutions carry risk when infused in excessive volumes, potentially triggering pulmonary edema in patients with compromised cardiac function.
These consequences reinforce why tonicity selection requires careful assessment before and throughout every infusion. Understanding the relationship between solution type and complication risk forms the foundation for safe IV fluid delivery in any clinical or wellness setting.
How Does IV Fluid Tonicity Apply to Everyday Hydration Needs?
IV fluid tonicity applies to everyday hydration needs by informing how professionals select solutions that restore fluid balance outside hospital settings. The sections below cover mobile IV therapy for wellness recovery and key takeaways on isotonic, hypotonic, and hypertonic solution selection.
Can Mobile IV Therapy From The Drip IV Infusion Help With Rehydration and Recovery?
Yes, mobile IV therapy from The Drip IV Infusion can help with rehydration and recovery by delivering fluids, electrolytes, and vitamins directly into the bloodstream. This approach bypasses the GI tract, allowing maximum absorption for individuals experiencing dehydration from illness, athletic exertion, or general fatigue. The Drip IV Infusion provides customizable IV cocktails administered by experienced nurses in the comfort of a client’s home or workplace. Although a 2024 review published in the JAMA Network noted limited high-quality evidence supporting vitamin drips in healthy individuals, medically supervised IV rehydration remains a well-established method for replenishing fluids when oral intake is insufficient. For anyone seeking professional hydration support, The Drip IV Infusion offers convenient, nurse-administered sessions tailored to individual wellness goals.
What Are the Key Takeaways About When to Give Isotonic, Hypotonic, and Hypertonic Solutions?
The key takeaways about when to give isotonic, hypotonic, and hypertonic solutions center on matching a fluid’s osmolality to the patient’s clinical need:
Isotonic solutions (250 to 375 mOsm/L) maintain plasma equilibrium and serve as first-line choices for volume replacement during hemorrhage, shock, or severe dehydration.
Hypotonic solutions (≤250 mOsm/L) push water into cells, making them appropriate for cellular dehydration and hypernatremia while being contraindicated with elevated intracranial pressure.
Hypertonic solutions (≥375 mOsm/L) pull water out of cells, treating conditions such as severe hyponatremia and cerebral edema under close monitoring.
One notable exception is D5W, which is initially isotonic in the bag but becomes hypotonic once dextrose is metabolized, providing free water to both extracellular and intracellular compartments. Understanding these classifications ensures each fluid choice aligns with the body’s immediate physiological demand.
Cost considerations are usually among the main priorities when deciding on a service. Primarily, clients are interested in the effects of IV therapy and the range of options, after which IV nutrient therapy cost comes into play.
This article provides a comprehensive overview of IV therapy pricing. It looks into the average cost of IV therapy and explains the factors involved in determining the overall price. The sections below also discuss insurance coverage and alternative paying methods that may help lessen the financial burden of IV therapy.
The cost of IV therapy may vary widely based on the provider. Still, customers can expect the minimal cost of a single dose to be around $195. While this is considered an average starting price, the cost can go upward from $350 to $495 depending on what is added. Setting an average cost of IV therapy becomes difficult as the price tag depends on the ingredients included in the solution. However, other factors also influence the IV cost.
Doing a bit of market research reveals that pricing structures vary across clinics. For instance, in a Miami clinic customers can expect to pay between $175 to $400 for a single session. In comparison, the IV therapy range in Los Angeles is a bit higher and usually varies between $195 to $500.
It’s worth noting that these are mainly ballpark numbers, and the actual cost of IV is determined by individual needs and circumstances. Patients looking for specific solution blends or needing frequent IV sessions will likely spend more than the mentioned average. Those interested in mobile IV infusion Queen Creek can look through our services.
Insurance Coverage for IV Nutrient Therapy
Those interested in IV therapy should keep in mind that insurance policies don’t cover this treatment for mobile IV therapy. While the number of insurance companies that cover IV treatment expenses is not high, they are out there and the coverage is related to very specific situations. Usually, these companies approve coverage only in cases where IV therapy is deemed a medical necessity per a doctor’s orders. For an IV treatment to be determined as such, patients need to obtain an order from their physician and the treatment would be done in the doctor’s office rather than the comfort of your home.
Potential Cost Savings
While insurance might not cover the IV therapy spending, several cost-effective practices may help lessen the financial burden of IV therapy. Patients interested in IV treatment should explore the following:
Package deals
While investing in a single IV drip session might not be a heavy financial burden, paying for multiple sessions will likely affect your budget. Having this in mind, many IV providers offer package deals. For example, some providers may offer limited edition package deals where customers can receive six treatments and pay for only five.
Regularly looking through the pricing sections of IV providers often proves a good practice, as IV clinics often offer discounts. Some clinics may also offer a referral discount to their existing clients.
Tax deductions
Patients may also cut down on spendings by opening a Health Savings Account (HSA). These personal savings accounts are designed to help individuals lessen their medical bills. Put simply, an HSA account allows individuals who reside in the US to put away money in their accounts and then withdraw their savings tax-free. The only condition is for the contributions made to this account to cover medical expenses.
Factors Affecting IV Nutrient Therapy Cost
Several factors play a role in determining the overall price of your IV therapy.
Type of therapy
There are several types of IV cocktails available, and each comes with a specific cost. The price of each infusion solution is mainly determined by its ingredients. Accordingly, each type of IV cocktail has a unique purpose, meaning the cost of IV therapy will be determined by your goal.
Customers can expect a lower price of a classic Myers cocktail as this drip infusion offershydration and replenishment. Infusions such as The GOAT that contain a specifically tailored blend of vitamins, nutrients, and fluids usually come with a higher cost.
Clinic location
The location of the clinic also determines the overall cost of IV therapy. While this might not be the first thing that comes to mind, there is an added cost in driving to the clinic.
For instance, individuals who have a longer distance to drive should always consider the distance of the clinic in determining if it’s worth the cost and if they are able to drive in the first place.
One way to get around this is to opt for a mobile IV therapy service. Mobile IV services make a suitable choice for those whose condition might be preventing them from driving.
Frequency of treatment
While receiving just a single dose of IV infusion might not be a heavy financial burden, long-term therapy can be costly.
For some patients, just one IV treatment can be enough. This is usually the case for those looking for hydration or hangover relief. However, others might have more specific goals that can only be obtained through frequent IV therapy. This group can expect their expenses to be heavier.
Add-ons may also increase the cost of IV therapy. While IV cocktails are tailored for different purposes, sometimes customers are seeking other benefits to their treatment, which can only be achieved through add-ons. This can be anything from an extra dose of B-complex vitamins to medications such as Toradol or Zofran.
Provider experience and expertise
While this might seem a little controversial, experience and expertise often contribute to the price of IV infusion. IV clinics that aim to offer their patients the best service possible will likely hire experienced professionals. This itself means that they will need to pay their employees more substantially. Thus, such expenses might be reflected in the price.
Conclusion
Those who are new to IV therapy might find it difficult to determine the price range of IV solutions as browsing the plethora of different offers can be overwhelming. However, what remains important in this expedition is finding an IV nutrient therapy cost that fits individual needs and budgets.
As explained above, determining an average IV therapy cost becomes difficult with different factors influencing the price. Clients can expect the price range of IV to differ based on the type of IV, location, provider experience, and more.
However, the biggest influence on the overall cost of IV therapy can be the frequency of treatment. This is why many IV providers sometimes offer package deals, referral programs, and membership discounts. Individuals interested in IV infusion often turn to insurance coverage, but most insurance policies don’t cover this treatment.